If you love light, creamy desserts with a refreshing tropical flavor, this Creamy Pineapple Mousse is a recipe you will want to make again and again. Made with sweet pineapple, whipped cream, and a few simple ingredients, this delightful dessert combines a smooth, airy texture with the bright, fruity taste of pineapple.
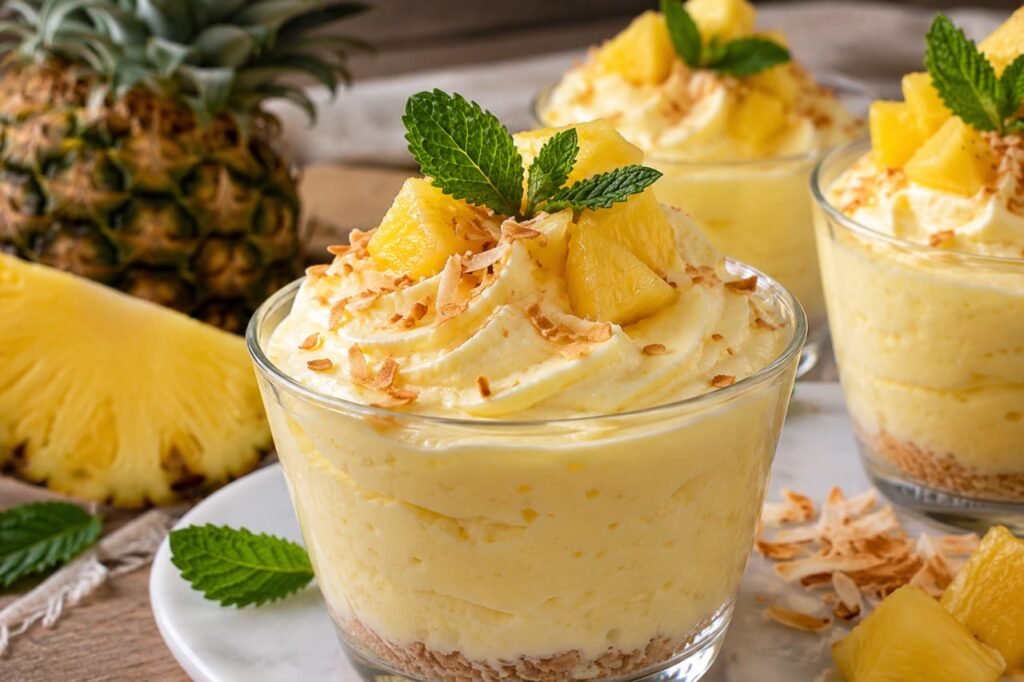
Unlike heavy cakes and rich baked desserts, pineapple mousse feels light and refreshing after a family dinner, summer barbecue, or special celebration. Its beautiful pale-yellow color also makes it an attractive addition to a dessert table, especially when served in individual glasses and garnished with fresh pineapple pieces or mint leaves.
The best part is that this creamy pineapple mousse does not require an oven. With a little preparation and enough chilling time, you can create an elegant homemade dessert without complicated techniques. Follow the steps below to achieve a smooth pineapple mixture, fluffy cream, and a mousse that holds its shape beautifully.
Why You’ll Love This Creamy Pineapple Mousse
- Refreshing tropical flavor: Pineapple gives this dessert a naturally fruity taste with a pleasant balance of sweetness and acidity.
- Light and creamy texture: Whipped cream creates a soft, airy consistency that feels luxurious without being overly heavy.
- No-bake preparation: You can prepare the mousse without turning on the oven.
- Simple ingredients: The recipe uses familiar ingredients that are easy to find at most grocery stores.
- Perfect for entertaining: Individual serving glasses make the dessert look elegant and simplify serving.
- Make-ahead convenience: Prepare the mousse in advance and refrigerate it until you are ready to serve.
Ingredients for Creamy Pineapple Mousse
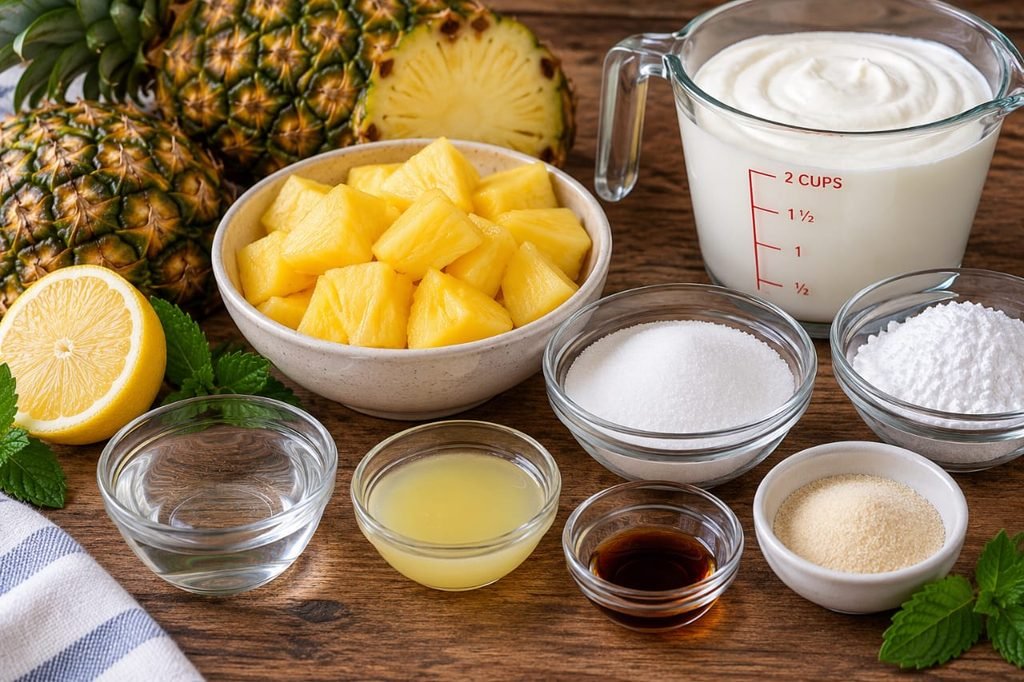
Each ingredient contributes to the flavor or texture of this dessert. For the smoothest result, prepare the pineapple mixture first and allow it to cool completely before folding it into the whipped cream.
- 2 cups pineapple chunks: Use canned pineapple chunks drained of their juice, or fresh pineapple that has been cooked until tender.
- 1/3 cup granulated sugar: Adjust the amount according to the sweetness of your pineapple.
- 1 tablespoon fresh lemon juice: Adds a little brightness and balances the sweetness.
- 1 teaspoon vanilla extract: Enhances the flavor and complements the cream.
- 1 tablespoon unflavored powdered gelatin: Helps the mousse set and maintain its shape.
- 1/4 cup cold water: Used to bloom the gelatin before dissolving it.
- 1 1/2 cups cold heavy whipping cream: Provides the mousse with its rich, fluffy texture.
- 2 tablespoons powdered sugar: Sweetens the whipped cream lightly.
- Fresh pineapple pieces or mint leaves: Optional garnishes for serving.
Choosing the Best Pineapple
Canned pineapple is a convenient choice because it is already heat-treated, making it suitable for a gelatin-based dessert. Drain the pineapple thoroughly before blending it so the mousse does not become unnecessarily watery.
If you prefer fresh pineapple, peel and cut it into small chunks, then simmer the pieces with a small splash of water until tender. Blend the cooked pineapple and allow the puree to cool completely before continuing. Cooking fresh pineapple is important because the natural enzyme bromelain can interfere with gelatin setting.
Which Cream Works Best?
Use cold heavy whipping cream with a fat content of approximately 30% to 36%. Cream with sufficient fat whips more easily and helps create a stable, fluffy texture. Keep the cream refrigerated until you are ready to use it.
How to Make Creamy Pineapple Mousse
Step 1: Prepare the Pineapple Puree
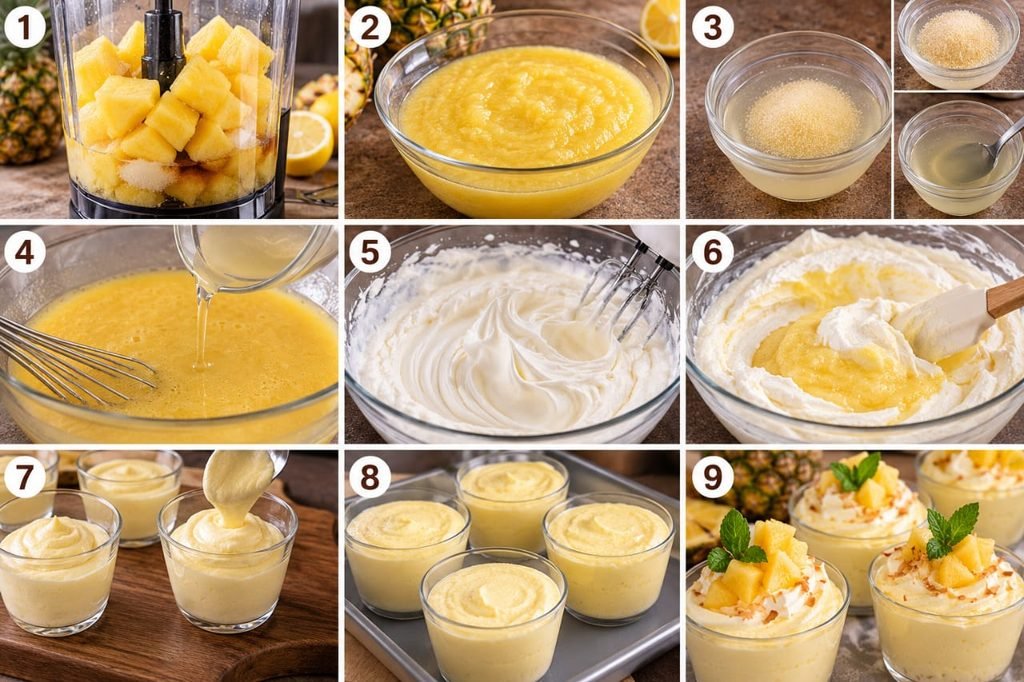
Place the drained pineapple chunks in a blender or food processor. Add the granulated sugar, lemon juice, and vanilla extract. Blend until the mixture becomes as smooth as possible.
If you prefer an especially silky mousse, pass the puree through a fine-mesh sieve to remove any remaining fibrous pieces. Taste the mixture and adjust the sweetness if needed.
If you are using fresh pineapple, make sure it has been cooked until tender before blending. Set the puree aside and let it cool completely. Never mix warm pineapple puree directly into whipped cream because the heat can cause the cream to lose its airy texture.
Step 2: Bloom the Gelatin
Pour the cold water into a small heatproof bowl. Sprinkle the powdered gelatin evenly over the surface and let it stand for approximately 5 to 10 minutes. During this time, the gelatin absorbs the water and becomes swollen.
Once the gelatin has bloomed, gently warm it using a short microwave interval or a warm-water bath until it dissolves completely. Do not boil it. Stir until no visible granules remain.
Step 3: Combine the Gelatin and Pineapple
Add a small spoonful of the cooled pineapple puree to the dissolved gelatin and stir well. Repeat with another spoonful or two to gradually bring the gelatin closer to the temperature of the puree.
Pour the gelatin mixture into the remaining pineapple puree while stirring continuously. Mix thoroughly to distribute the gelatin evenly throughout the fruit mixture.
Allow the mixture to cool until it is no longer warm but is still fluid. If it becomes too cold and begins to set, gently loosen it before proceeding. Avoid pouring hot gelatin directly into whipped cream.
Step 4: Whip the Cream
Pour the cold heavy whipping cream into a chilled mixing bowl. Add the powdered sugar and beat with an electric mixer until medium peaks form.
Medium peaks should hold their shape while the tips bend slightly when the beaters are lifted. Avoid whipping the cream too far, as overwhipped cream can become grainy and difficult to fold smoothly into the pineapple mixture.
Step 5: Fold Everything Together
Add approximately one-third of the whipped cream to the pineapple mixture and stir gently to lighten it. Next, add the remaining whipped cream in two portions.
Use a spatula to fold the mixture from the bottom of the bowl upward, turning the bowl as you work. Continue until the color is even and no large streaks of cream remain.
Work gently rather than stirring vigorously. Folding helps preserve the air in the whipped cream, which gives pineapple mousse its characteristic light and fluffy texture.
Step 6: Fill the Serving Glasses
Spoon or pipe the mousse into six small dessert glasses or ramekins. Tap each glass lightly against the counter to remove large air pockets, but avoid pressing the mixture down too firmly.
Wipe the rims of the glasses if necessary, then cover them loosely with plastic wrap. Arrange the glasses on a flat refrigerator shelf so the mousse can chill undisturbed.
Step 7: Chill Until Set
Refrigerate the mousse for at least 4 hours, or until it has set sufficiently to hold its shape. Larger serving dishes may require additional chilling time.
For the best texture, prepare the dessert the day before serving whenever possible. This gives the gelatin enough time to set and allows the pineapple flavor to develop throughout the mousse.
Step 8: Garnish and Serve
Just before serving, garnish each glass with a small pineapple piece, a little finely chopped fruit, or a fresh mint leaf. You can also add a light swirl of whipped cream for a more decorative presentation.
Keep the garnishes simple so the pineapple remains the star of the dessert. Serve the mousse cold and enjoy its creamy texture and refreshing tropical flavor.
Expert Tips for Perfect Pineapple Mousse
Make Sure the Pineapple Mixture Is Cool
Temperature is one of the most important factors in this recipe. A warm puree can melt the whipped cream and make the mousse dense. Allow the fruit mixture to cool before folding it into the cream, but do not let the gelatin mixture set completely before combining the ingredients.
Drain Canned Pineapple Thoroughly
Excess liquid can dilute the pineapple flavor and affect the consistency. Drain the fruit well before blending, especially if the canned pineapple is packed in juice or syrup. If you use pineapple packed in syrup, you may also want to reduce the added sugar.
Fold Gently to Preserve Air
The light texture comes from the air incorporated into the whipped cream. Use a flexible spatula and gentle folding movements rather than beating the combined mixture. This helps prevent the mousse from becoming heavy.
Measure the Gelatin Carefully
Gelatin provides structure, but using too much can produce a firm, rubbery texture. Measure the gelatin and water accurately, and make sure the gelatin dissolves completely before adding it to the pineapple puree.
Allow Enough Chilling Time
Do not rush the setting process. Although the surface may look firm before the center is fully set, the mousse needs enough time in the refrigerator to develop a consistent texture throughout each serving.
Delicious Variations to Try
Coconut Pineapple Mousse
For a tropical twist, replace a small portion of the heavy cream with well-chilled coconut cream suitable for whipping. The coconut adds a gentle sweetness and pairs beautifully with pineapple. Make sure the coconut cream is stable enough to whip before substituting it.
Pineapple and Mango Mousse
Replace part of the pineapple puree with ripe mango puree for a sweeter, fuller tropical flavor. Blend the fruit until smooth and keep the total puree quantity consistent with the original recipe. Taste the mixture before adding the sugar because ripe mango can be naturally very sweet.
Pineapple Mousse with a Biscuit Base
For extra texture, place a thin layer of crushed digestive biscuits or graham crackers mixed with a little melted butter at the bottom of each glass. Spoon the mousse over the base and refrigerate as directed. The crunchy layer contrasts nicely with the soft filling.
Layered Pineapple Dessert
Alternate layers of pineapple mousse with finely diced fruit, biscuit crumbs, or a thin layer of prepared fruit puree. Use transparent glasses to display the layers. Keep any additional fruit layer relatively thin so it does not overpower the creamy mousse.
Reduced-Sugar Pineapple Mousse
Use pineapple packed in its own juice, drain it well, and reduce the added sugar according to taste. Keep in mind that changing the sugar content can affect the final flavor and that sweeteners may behave differently from regular sugar.
What to Serve with Pineapple Mousse
This refreshing dessert pairs well with a variety of treats and drinks. Its fruity flavor makes it especially suitable after a rich or savory meal.
- Fresh fruit: Serve with strawberries, kiwi, mango, or small pineapple pieces.
- Light cookies: Butter cookies, vanilla wafers, and crisp biscuits provide a pleasant contrast to the creamy texture.
- Coconut desserts: Coconut macaroons or toasted coconut flakes complement the tropical flavor.
- Hot drinks: Coffee or unsweetened tea balances the sweetness of the mousse.
- Summer meals: Serve after grilled vegetables, seafood, chicken, or a light family dinner.
How to Store Creamy Pineapple Mousse
Refrigerator Storage
Keep the mousse covered in the refrigerator at 40°F (4°C) or below. For the best texture and flavor, enjoy it within 2 to 3 days. Store it in individual airtight containers or cover the serving glasses carefully to protect the dessert from absorbing other refrigerator odors.
Add fresh garnishes shortly before serving. This keeps mint leaves looking fresh and prevents fruit pieces from releasing excess juice onto the surface.
Can You Freeze Pineapple Mousse?
Freezing is not the best option if you want to preserve the original light and creamy texture. Thawing can cause the mousse to release liquid or become less smooth. For the best results, refrigerate the dessert and prepare only the quantity you expect to serve.
Can You Make It Ahead?
Yes. Pineapple mousse is an excellent make-ahead dessert. Prepare it the evening before your event, divide it into serving glasses, cover, and refrigerate overnight. Add the garnish shortly before bringing the dessert to the table.
Frequently Asked Questions
Why didn’t my pineapple mousse set?
The mousse may not set if the gelatin was not measured correctly, was not dissolved completely, or was not mixed evenly into the puree. Another possible cause is the use of untreated fresh pineapple, whose bromelain enzyme can interfere with gelatin. Cook fresh pineapple before using it in this recipe, or choose canned pineapple.
Can I make pineapple mousse without gelatin?
Yes, but you will need a different method to provide structure. Some recipes use a suitable setting agent such as agar-agar, while others rely on stabilized whipped cream and are served as softer desserts. Because setting agents behave differently, follow a recipe specifically developed for the alternative you choose.
Can I use canned crushed pineapple?
Yes. Drain it thoroughly and blend it until smooth. If the crushed pineapple contains long fibers, strain the puree for a silkier result.
Can I use fresh pineapple without cooking it?
For this gelatin-based recipe, cooking fresh pineapple first is recommended because its natural bromelain can prevent gelatin from setting properly. Simmer the fruit until tender, blend it, and allow the puree to cool before proceeding.
How long does pineapple mousse need to chill?
Allow at least 4 hours in the refrigerator. Overnight chilling is often convenient and gives the dessert plenty of time to set.
Can I prepare pineapple mousse in one large dish?
Yes. Pour the mixture into a suitable serving bowl instead of individual glasses. A larger dish may require extra chilling time, so check that the center is set before serving.
How can I make the mousse smoother?
Blend the pineapple thoroughly, strain the puree if necessary, dissolve the gelatin completely, and fold the cooled fruit mixture gently into properly whipped cream. These steps help create a smooth and airy result.
Final Thoughts
This Creamy Pineapple Mousse is a simple yet elegant dessert that brings refreshing tropical flavor to any occasion. With sweet pineapple, smooth whipped cream, and a delicate texture, it offers a delicious alternative to heavier baked desserts.
Prepare it in individual glasses for parties, family gatherings, or weekend treats, and finish with fresh pineapple or mint for an attractive presentation. By following the temperature and chilling tips in this recipe, you can create a creamy pineapple dessert that looks beautiful and tastes wonderful.