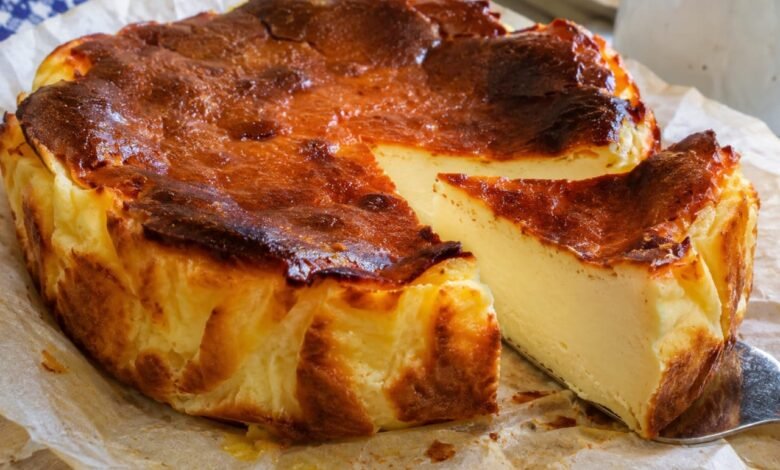
If you love rich, creamy desserts, this Basque cheesecake is one recipe worth adding to your baking collection. Also known as Burnt Basque Cheesecake or Spanish Basque Cheesecake, this famous dessert features a deeply golden-brown, caramelized top and an incredibly smooth, creamy center.
Unlike traditional cheesecakes, this recipe doesn’t require a biscuit crust, a water bath, or complicated decorating. Instead, it relies on a simple cream cheese batter and high-temperature baking to create its signature rustic appearance and luxurious texture.
Whether you’re preparing dessert for a family gathering or simply craving something special, this homemade Basque cheesecake delivers impressive results with surprisingly little effort.
What Is Basque Cheesecake?
Basque cheesecake originated at La Viña, a restaurant in San Sebastián in Spain’s Basque Country. It is widely associated with chef Santiago Rivera, who developed the now-famous dessert in the 1990s.
Unlike traditional New York-style cheesecake, Basque cheesecake is intentionally baked at a high temperature. This creates its distinctive dark, caramelized surface while the inside remains soft and creamy.
Its rustic appearance is part of its charm. Cracks, uneven edges, and a deeply browned top are all welcome features rather than baking mistakes.
Why You’ll Love This Basque Cheesecake Recipe
- No crust required: The rich cheesecake filling is delicious on its own.
- No water bath: You can bake it directly in the oven without complicated preparation.
- Incredibly creamy: The center stays soft and smooth after chilling.
- Simple ingredients: You only need a handful of everyday baking ingredients.
- Beautifully rustic: The dark top and natural cracks make every cheesecake unique.
Ingredients You’ll Need
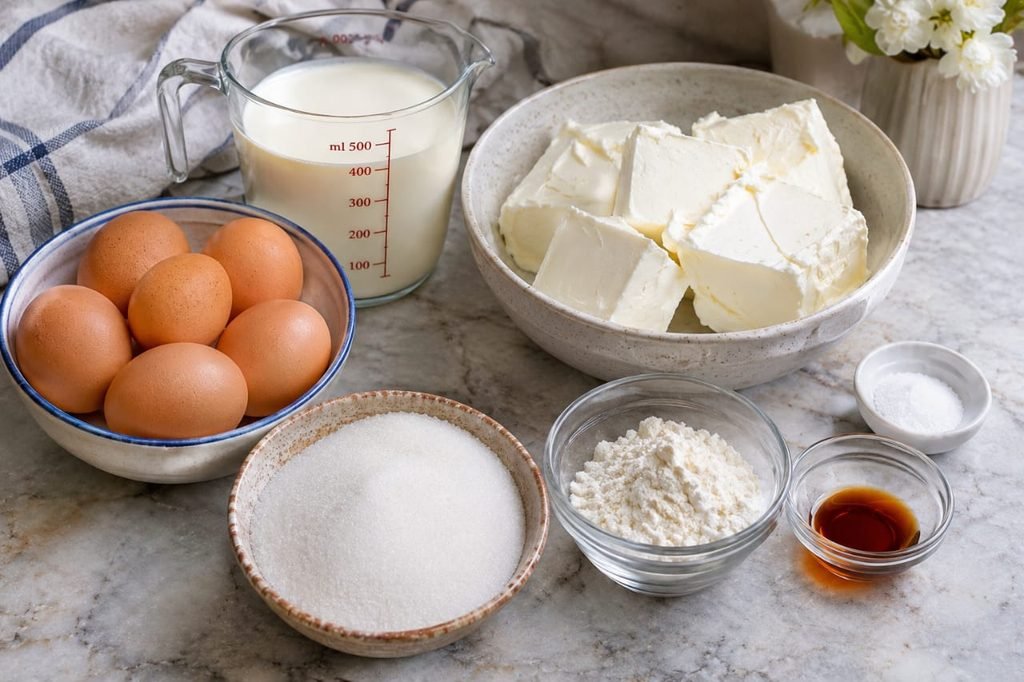
The secret to a smooth Basque cheesecake is using good-quality full-fat cream cheese and allowing the cold ingredients to reach room temperature before mixing.
- 900g (32 oz) full-fat cream cheese: The main ingredient responsible for the rich, creamy texture.
- 300g (1 1/2 cups) granulated sugar: Sweetens the filling and balances the tanginess of the cream cheese.
- 6 large eggs: Help bind the batter and give the cheesecake structure.
- 480ml (2 cups) heavy cream: Creates a silky, luxurious consistency.
- 40g (about 1/3 cup) all-purpose flour: Helps the cheesecake set while maintaining a creamy center.
- 2 teaspoons vanilla extract: Adds warmth and enhances the overall flavor.
- A pinch of salt: Balances the sweetness and brings out the cream cheese flavor.
Equipment You’ll Need
- 9-inch (23cm) springform pan recommended, or a deep 8-inch pan with sufficient capacity.
- Parchment paper.
- Stand mixer or electric hand mixer.
- Large mixing bowl.
- Rubber spatula.
- Kitchen scale or measuring cups.
Important: This is a generous amount of batter. Make sure your pan is deep enough and that the parchment paper extends at least 2 inches above the rim. Do not fill the pan beyond a safe level; if necessary, bake any extra batter separately in a small oven-safe dish.
How to Make Basque Cheesecake Step by Step
Step 1: Prepare the Oven and Pan
Preheat your oven to 425°F (220°C). Place a rack in the middle position.
Take two large sheets of parchment paper and crumple them into balls before opening them again. This makes the paper easier to fit into the springform pan.
Press the parchment into the pan, allowing the edges to extend at least 2 inches above the rim. The paper doesn’t need to be perfectly smooth. Its folded, rustic appearance is traditional for this cheesecake.
Step 2: Beat the Cream Cheese
Add the room-temperature cream cheese to a large mixing bowl. Beat on medium speed for approximately 2–3 minutes until completely smooth and free of lumps.
Stop occasionally to scrape down the sides and bottom of the bowl. Starting with smooth cream cheese makes it much easier to achieve a silky batter.
Step 3: Add the Sugar
Gradually add the granulated sugar while mixing on low speed. Once incorporated, increase the speed to medium and beat for another 2–3 minutes until creamy.
Make sure the sugar is evenly distributed throughout the cream cheese mixture.
Step 4: Incorporate the Eggs
Reduce the mixer speed to low. Add the eggs one at a time, mixing just until each egg disappears into the batter before adding the next.
Avoid overmixing at this stage. Too much incorporated air can cause excessive rising and contribute to uneven cracks as the cheesecake cools.
Step 5: Finish the Cheesecake Batter
Pour in the heavy cream and add the vanilla extract and salt. Mix gently until combined.
Sift the flour over the mixture and mix on low speed just until no dry flour remains. Scrape the bowl with a spatula if necessary.
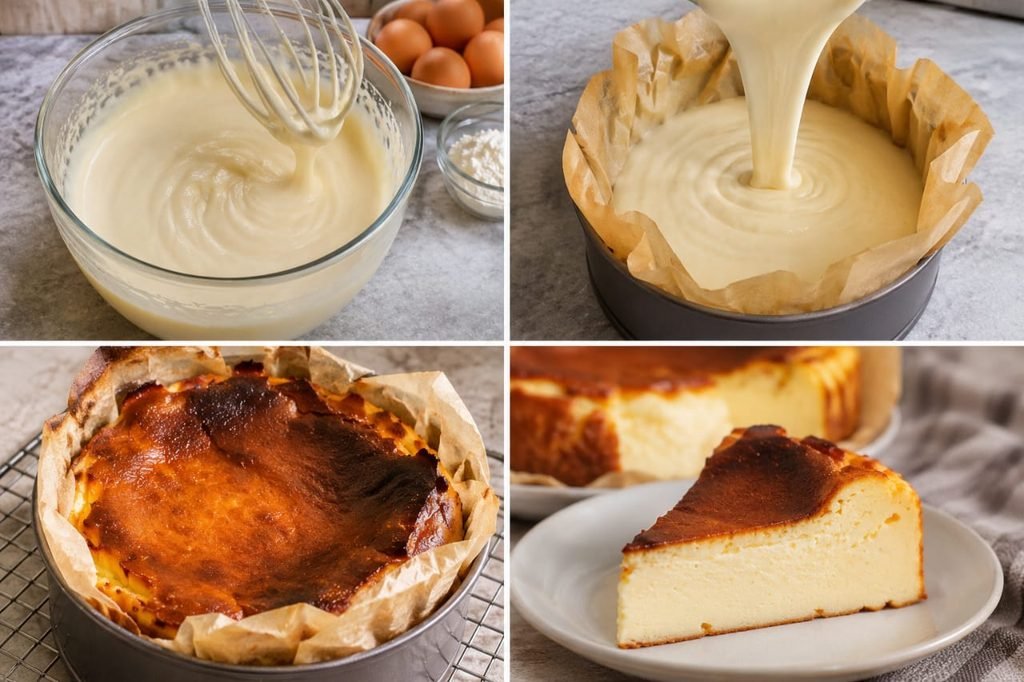
The finished batter should be smooth, thick, and pourable, without visible lumps.
Step 6: Bake Until Deeply Browned
Pour the batter into the prepared pan, making sure it does not overflow. Gently tap the pan against the counter to release large air bubbles.
Bake for approximately 50–60 minutes at 425°F (220°C). The surface should become deeply golden brown, with some darker spots. The cheesecake will rise during baking, which is completely normal.
The center should still have a noticeable jiggle when you gently move the pan. It will continue setting as it cools.
Baking tip: Oven temperatures vary, so start checking the cheesecake toward the end of the baking time. If the surface becomes dark too quickly, check your oven temperature and position rather than automatically extending the baking time.
Step 7: Cool and Chill
Remove the cheesecake from the oven and place it on a wire rack. It will gradually sink as it cools, creating its characteristic rustic shape.
Allow it to cool completely in the pan at room temperature. Once cooled, cover it loosely and refrigerate for at least 2 hours, preferably overnight.
Chilling is important because it allows the center to firm up while retaining its creamy texture.
Step 8: Slice and Serve
Carefully release the springform pan and peel away the parchment paper from the sides.
For neat slices, dip a sharp knife into hot water and wipe it dry between cuts.
Serve slightly chilled for a firmer texture or allow individual slices to sit at room temperature briefly for an even softer, creamier bite.
Expert Tips for the Best Basque Cheesecake
- Use room-temperature ingredients: Cold cream cheese and eggs can create lumps in the batter.
- Choose full-fat cream cheese: Reduced-fat varieties may produce a different texture.
- Don’t overmix: Mix only until the ingredients are combined and smooth.
- Use enough parchment: The cheesecake rises significantly in the oven, so the paper must extend above the pan.
- Embrace the dark top: The deeply caramelized surface is the defining characteristic of Basque cheesecake.
- Allow enough chilling time: Cutting the cheesecake before it has cooled and set can result in a very soft center.
Common Basque Cheesecake Problems and How to Fix Them
Why Did My Basque Cheesecake Crack?
Cracks are normal in Basque cheesecake and are part of its rustic appearance. Excessive mixing, temperature changes, and rapid cooling can contribute to larger cracks. Fortunately, they won’t affect the delicious flavor.
Why Is My Cheesecake Too Runny?
The cheesecake may need more chilling time, or it may have been removed from the oven too early. Allow it to cool completely and refrigerate overnight before deciding whether the texture is too soft.
Why Isn’t the Top Dark Enough?
Basque cheesecake needs high heat to develop its signature caramelized surface. Check that your oven is fully preheated to 425°F (220°C) and that the cheesecake is positioned on the middle rack.
Why Does My Cheesecake Have Lumps?
This usually happens when the cream cheese is too cold or hasn’t been beaten sufficiently before adding the other ingredients. Always bring the cream cheese to room temperature and beat it until smooth first.
Delicious Ways to Serve Basque Cheesecake
Basque cheesecake is delicious on its own, but you can also serve it with simple toppings that complement its rich flavor.
- Fresh berries: Strawberries, raspberries, or blueberries add a refreshing contrast.
- Berry compote: A spoonful of homemade berry sauce brings a pleasant fruity flavor.
- Fresh fruit: Serve with sliced seasonal fruit for a lighter dessert plate.
- Whipped cream: A small amount of lightly sweetened whipped cream makes each slice extra indulgent.
- Coffee or tea: The creamy cheesecake pairs beautifully with a freshly brewed drink.
How to Store Basque Cheesecake
Proper storage helps maintain the cheesecake’s creamy texture and fresh flavor.
- Refrigerator: Store covered in an airtight container for up to 5 days.
- Freezer: Individual slices can be wrapped tightly and frozen for up to 2 months for best quality.
- Thawing: Thaw frozen slices overnight in the refrigerator before serving.
Keep the cheesecake refrigerated when not serving, as it contains dairy and eggs.
Frequently Asked Questions
Is Basque cheesecake supposed to look burnt?
Yes! Its deeply browned, caramelized top is the signature feature of this dessert. The dark exterior contrasts beautifully with the soft, creamy center.
What is the difference between Basque cheesecake and New York cheesecake?
Basque cheesecake has no traditional crust, is baked at a higher temperature, and develops a dark, caramelized top. New York cheesecake usually has a biscuit crust and a more uniform, dense texture.
Does Basque cheesecake need a water bath?
No. One of the best things about this recipe is that it doesn’t require a water bath. It is baked directly in the oven at a high temperature.
Can I make Basque cheesecake a day ahead?
Absolutely. In fact, making it a day ahead is a great idea. Refrigerating overnight allows the cheesecake to set properly and makes slicing easier.
Can I make Basque cheesecake without flour?
Some Basque cheesecake recipes are naturally flourless. However, this particular version includes a small amount of all-purpose flour to help stabilize the filling. Removing it may change the final texture.
Should Basque cheesecake be served cold or at room temperature?
Both options work well. Chilled cheesecake has a firmer texture, while cheesecake served after resting briefly at room temperature tastes softer and creamier.
Final Thoughts
This homemade Basque cheesecake proves that an impressive dessert doesn’t need complicated techniques or perfect decoration. Its deeply caramelized top, creamy center, and simple ingredient list make it a wonderful recipe for both experienced bakers and beginners.
Remember to use room-temperature ingredients, avoid overmixing, and give the cheesecake enough time to chill before slicing. Don’t worry if the top cracks or looks extra dark. That’s exactly what makes this Spanish-inspired dessert so special.
Serve a slice with fresh berries or your favorite cup of coffee, and enjoy every creamy bite!