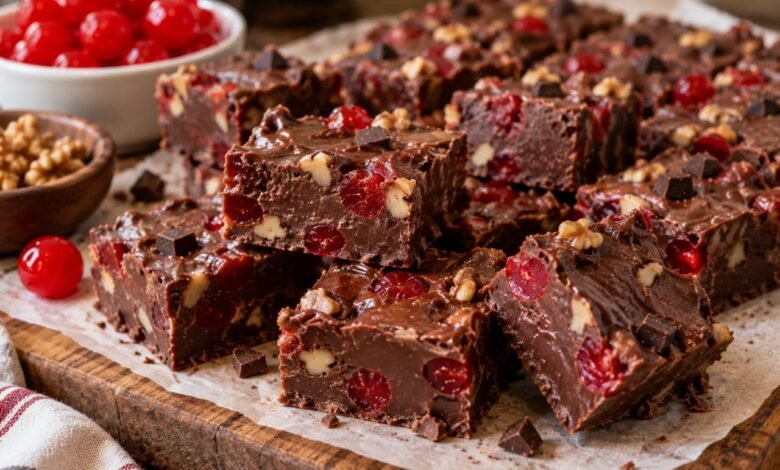
This cherry chocolate fudge combines rich semi-sweet chocolate, dark chocolate chunks and sweet maraschino cherries in a soft, firm fudge that is easy to slice.
The key to getting the texture right is controlling the moisture from the cherries. Instead of adding wet cherries straight to the chocolate mixture, they are drained and patted dry first. This helps the fudge set properly while keeping the bright cherry flavor.
It is a simple no-thermometer fudge recipe that works well for holidays, parties, edible gifts or whenever you want a chocolate dessert with a strong cherry flavor.
Why This Cherry Chocolate Fudge Works
- Two types of chocolate: Semi-sweet chocolate creates the smooth base while dark chocolate chunks add deeper chocolate flavor.
- Dry cherries: Removing excess cherry liquid helps prevent soft or poorly set fudge.
- Sweetened condensed milk: It provides sweetness and helps create the creamy fudge texture without cooking sugar syrup.
- Low heat: Gentle melting reduces the chance of scorching or separating the chocolate.
- Easy slicing: Proper chilling and a warm knife give you cleaner squares.
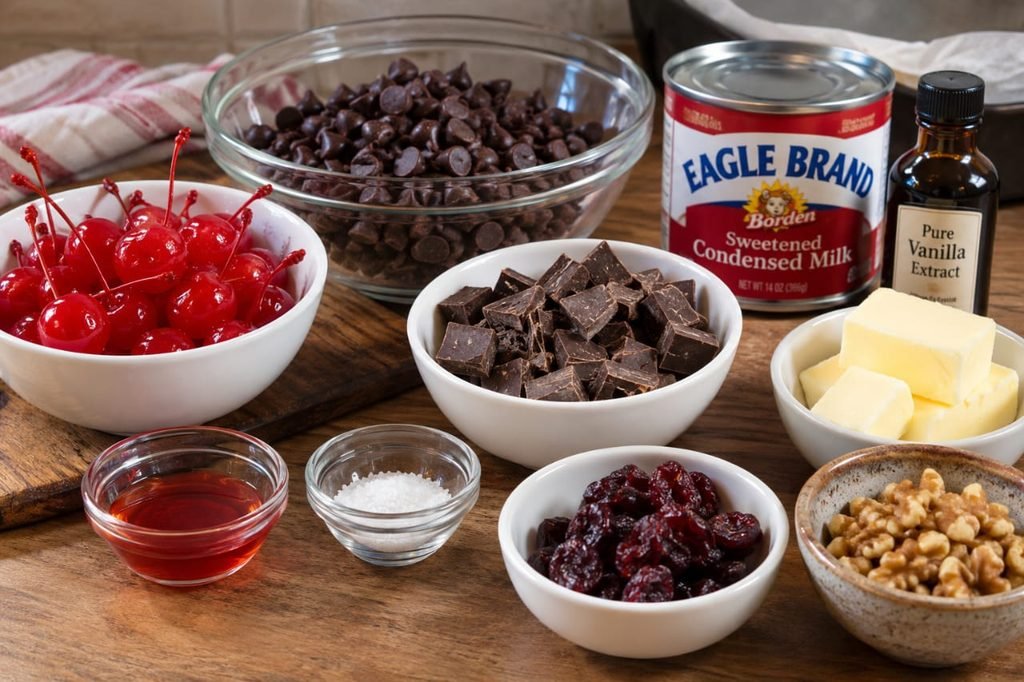
Ingredients
Cherry Mixture
- 1/2 cup maraschino cherries, drained and finely chopped
- 1 teaspoon maraschino cherry juice
- 1 teaspoon vanilla extract
Chocolate Fudge
- 14 oz sweetened condensed milk
- 3 cups semi-sweet chocolate chips
- 1/4 cup unsalted butter
- 1/2 teaspoon salt
- 1 cup dark chocolate chunks or finely chopped dark chocolate
- 1/4 cup dried cherries, finely chopped, optional
- 1/2 cup toasted chopped walnuts, optional
How to Make Cherry Chocolate Fudge
1. Prepare the Pan
Line an 8-inch square baking pan with parchment paper, leaving some parchment hanging over the sides. This creates handles that make the chilled fudge easier to lift from the pan.
2. Dry the Maraschino Cherries
Drain the cherries thoroughly. Chop them finely, then place them between layers of paper towel and gently press to remove as much excess moisture as possible.
This step is important. Too much cherry liquid can make the fudge softer and more difficult to cut cleanly.
Transfer the chopped cherries to a small bowl and mix with the vanilla and 1 teaspoon of cherry juice.
3. Melt the Chocolate Base
Add the sweetened condensed milk, semi-sweet chocolate chips, butter and salt to a heavy-bottomed saucepan.
Heat over low heat, stirring frequently, until the chocolate is completely melted and the mixture becomes smooth.
Do not use high heat. Chocolate can scorch quickly, and overheating can cause the mixture to become greasy or lose its smooth texture.
4. Add the Dark Chocolate
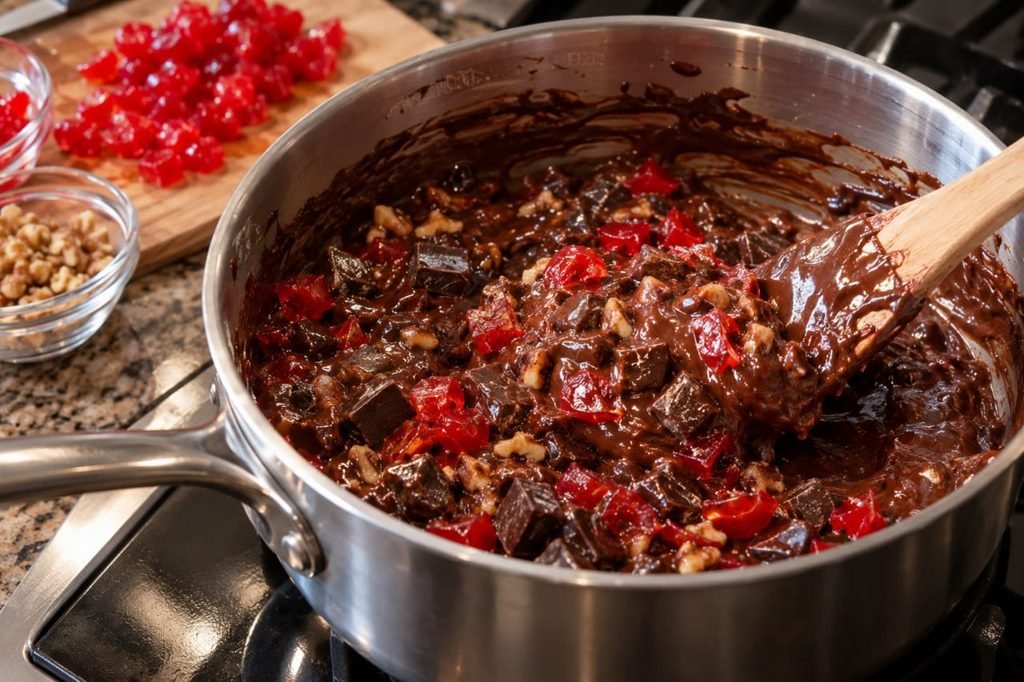
Remove the saucepan from the heat and immediately stir in the dark chocolate chunks.
Continue stirring until the remaining chocolate melts into the warm mixture.
The result should be thick, glossy and smooth.
5. Add the Cherry Flavor
Fold the prepared chopped cherries into the chocolate mixture.
If using dried cherries or toasted walnuts, fold them in at this stage as well. Avoid excessive stirring because the red cherry color can bleed into the chocolate.
6. Fill the Pan
Immediately transfer the fudge mixture to the prepared pan.
Use a spatula or the back of a spoon to spread it into an even layer. Work fairly quickly because the mixture becomes thicker as it cools.
7. Chill Until Firm
Refrigerate the fudge for at least 3 hours, or until completely firm.
For the cleanest slices, chilling overnight works especially well.
8. Slice the Fudge
Lift the chilled fudge from the pan using the parchment paper.
For neat squares, place a sharp knife under hot water, dry it thoroughly and slice the fudge. Wipe the blade between cuts and repeat as needed.
The Secret to Firm Cherry Chocolate Fudge
The biggest problem with fruit-filled fudge is excess moisture.
Maraschino cherries are stored in liquid, so simply draining them is not always enough. After chopping, pat them thoroughly with paper towels before mixing them into the chocolate.
This small step helps preserve the firm texture of the finished fudge while still giving every piece a noticeable cherry flavor.
Why You Should Melt the Chocolate Over Low Heat
Fudge does not need aggressive heat. The goal is simply to melt the chocolate and combine it with the condensed milk and butter.
Keep the heat low and stir frequently. Once the mixture is smooth, remove it from the heat before adding the dark chocolate chunks.
The residual heat will finish melting the chocolate without unnecessarily overheating the mixture.
How to Prevent Grainy or Greasy Fudge
- Use low heat when melting the chocolate.
- Stir frequently but do not aggressively whip the mixture.
- Do not add wet cherries directly from the jar.
- Do not boil the chocolate mixture.
- Use good-quality chocolate for the best texture and flavor.
- Let the fudge chill completely before cutting.
How to Get Clean Fudge Squares
Allow the fudge to become completely firm before slicing. A warm, dry knife works better than a cold knife because it moves through the dense chocolate more smoothly.
For the cleanest presentation, wipe the knife after every cut.
If the fudge becomes soft while cutting, return it to the refrigerator for 15 to 20 minutes before continuing.
Cherry Garcia-Style Flavor Without Making Ice Cream
The combination of cherries and chocolate gives this fudge the familiar flavor profile associated with Cherry Garcia-style desserts, but the texture is completely different: dense, creamy and sliceable rather than frozen.
The semi-sweet chocolate keeps the fudge from becoming overwhelmingly sweet, while the dark chocolate chunks add a deeper cocoa flavor.
Should You Add Walnuts?
Walnuts are completely optional, but toasted walnuts add a useful contrast to the soft fudge and cherries.
If using them, toast the chopped walnuts in a dry skillet over medium-low heat until lightly fragrant. Let them cool completely before adding them to the fudge.
For a nut-free version, simply leave them out.
Common Mistakes to Avoid
Adding Wet Cherries
Extra cherry liquid can soften the fudge and make it harder to slice. Drain and pat the cherries dry before adding them.
Using High Heat
High heat can scorch chocolate or cause the mixture to become oily. Low heat is all you need.
Cutting Before the Fudge Is Firm
If the center still feels soft, give it more chilling time. Cutting too early can produce uneven pieces.
Using Too Much Cherry Juice
A small amount of cherry juice gives the chocolate a stronger cherry note. Too much additional liquid can interfere with the firm texture, so keep the amount controlled.
Overmixing the Cherries
Fold them in gently near the end. Excessive mixing can cause the cherry color to spread throughout the fudge.
Make-Ahead Instructions
This fudge is an excellent make-ahead dessert.
Prepare it the day before serving, chill it overnight and cut it shortly before serving. Keeping the slab intact until needed also helps prevent the edges from drying out.
How to Store Cherry Chocolate Fudge
Store the fudge in an airtight container in the refrigerator.
Place parchment paper between layers if you stack the pieces. For the best texture, allow individual pieces to sit at room temperature for a few minutes before serving.
Can You Freeze Cherry Fudge?
Yes. Wrap the completely chilled fudge tightly, place it in a freezer-safe container or bag and freeze.
For the best texture, thaw it in the refrigerator before serving and then let it sit for a few minutes at room temperature.
Frequently Asked Questions
Can I use fresh cherries instead of maraschino cherries?
Fresh cherries contain considerably more water, so they are not a direct substitute in this recipe. Maraschino cherries provide the concentrated cherry flavor and texture this fudge is designed around.
Can I use dark chocolate instead of semi-sweet chocolate?
Yes. Dark chocolate can be used for a less sweet, more intense chocolate flavor. Keep in mind that the final fudge will taste noticeably richer.
Can I leave out the walnuts?
Absolutely. The fudge works well without nuts and remains rich and creamy.
Why is my fudge too soft?
The most common reasons are excess liquid from the cherries, insufficient chilling or adding more liquid than the recipe calls for. Drain and dry the cherries thoroughly and allow the fudge to chill completely.
Why did my chocolate become oily?
The chocolate may have been overheated or exposed to excessive heat. Melt the ingredients slowly over low heat and remove the pan from the heat as soon as the mixture is smooth.
How long does cherry fudge need to chill?
Chill it for at least 3 hours until firm. For the easiest slicing, leaving it refrigerated overnight is even better.
Serving Ideas
Cut the fudge into small squares and serve it as a dessert with coffee, tea or a glass of cold milk.
It also makes an attractive homemade edible gift during the holidays. Arrange the pieces in a small lined box or dessert tray and keep them chilled until ready to serve.
Final Tips for Perfect Cherry Chocolate Fudge
- Dry the maraschino cherries thoroughly.
- Use low heat when melting the chocolate.
- Do not boil the chocolate mixture.
- Use a small amount of cherry juice for flavor without adding unnecessary moisture.
- Fold the cherries in gently.
- Chill completely before slicing.
- Use a warm, dry knife for cleaner squares.
The result: rich chocolate fudge with bright cherry flavor, deep dark-chocolate notes and a firm, creamy texture that makes every square easy to serve and share.
For more general food safety and nutrition guidance, see the Harvard T.H. Chan School of Public Health Nutrition Source.
You Might Also Like
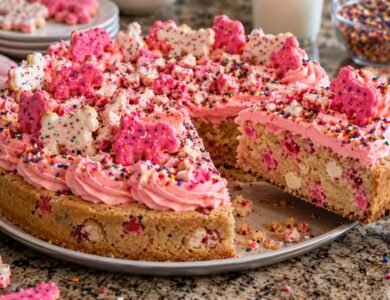
- How to Make a Fun & Colorful Circus Animal Cookie Cake (Easy Recipe)
- The Ultimate Guide to Soft Frosted Sugar Cookies (Better Than Bakery Style!)
- The Easiest No-Bake Cookie Recipe for Beginners: A Foolproof Guide