These crispy roasted chickpeas are a crunchy, savory snack made with simple pantry ingredients. They are lightly coated with olive oil and flavorful spices, then roasted until golden on the outside. Enjoy them straight from the bowl, sprinkle them over salads, or serve them as a tasty alternative to packaged snacks.
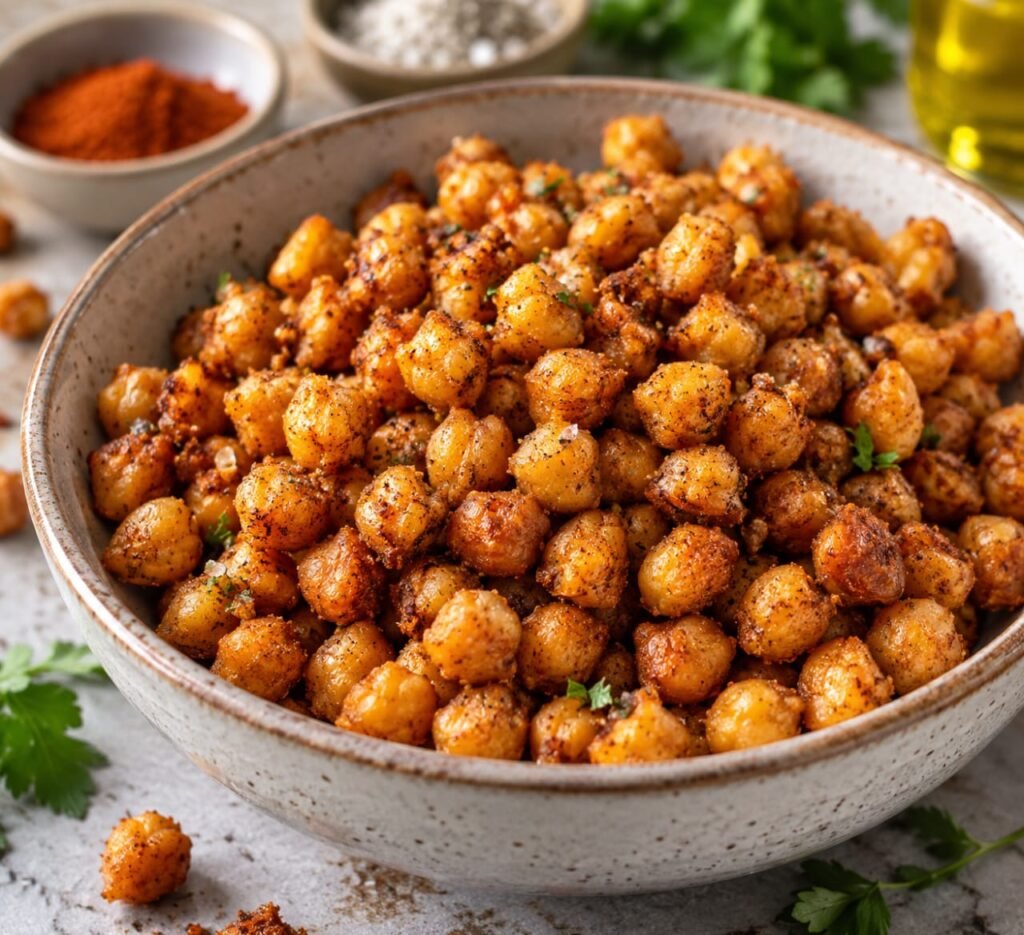
The secret to better roasted chickpeas is simple: dry them thoroughly, give them enough room to roast, and add delicate spices near the end. This recipe includes both oven and air fryer instructions, plus easy seasoning ideas for every craving.
Why You’ll Love These Crispy Roasted Chickpeas
- Easy to make: You only need a few everyday ingredients.
- Plant-based: Chickpeas provide plant protein and dietary fiber.
- Customizable: Choose smoky paprika, garlic, cumin, or a spicy seasoning blend.
- Two cooking methods: Use your oven or air fryer.
- Versatile: Enjoy them as a snack or add crunch to salads, soups, and grain bowls.
Ingredients You’ll Need
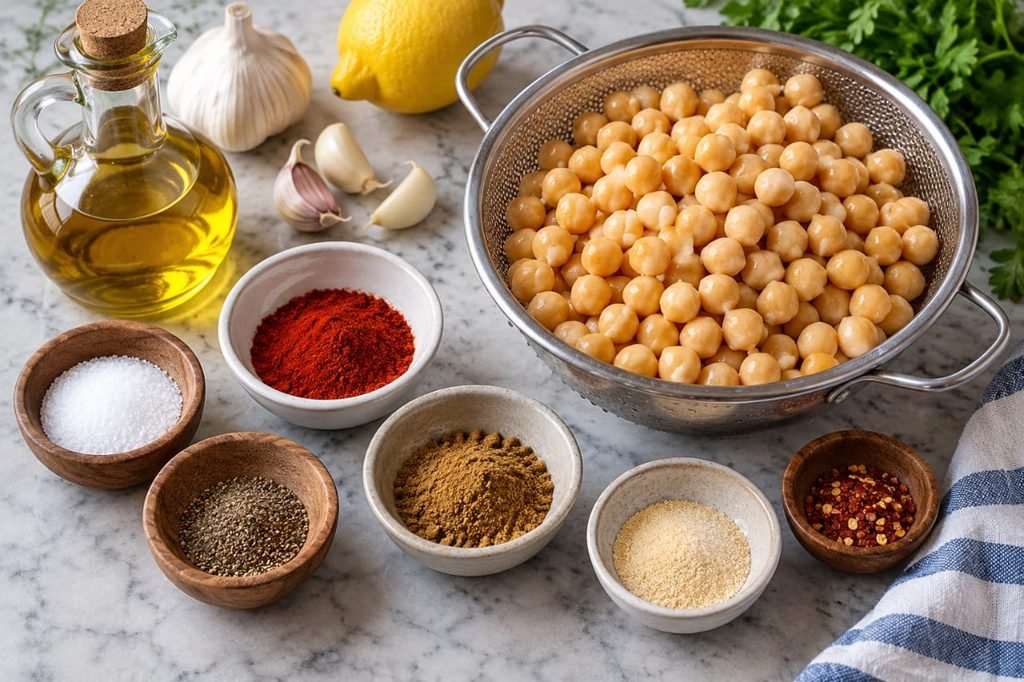
Use canned chickpeas for convenience. Before roasting, drain, rinse, and dry them very well to remove excess surface moisture.
- 1 can chickpeas: 15 ounces (425 g), drained and rinsed.
- 1 tablespoon olive oil: Helps the chickpeas brown and allows the seasoning to cling.
- 1/2 teaspoon fine salt: Adjust to taste.
- 1 teaspoon smoked paprika: Adds a warm, smoky flavor.
- 1/2 teaspoon ground cumin: Gives the chickpeas an earthy, savory taste.
- 1/2 teaspoon garlic powder: Adds a delicious garlic flavor.
- 1/4 teaspoon black pepper: Adds mild heat.
Optional: Add a pinch of cayenne pepper for extra heat, or use your favorite spice blend.
How to Make Crispy Roasted Chickpeas
Step 1: Preheat the Oven
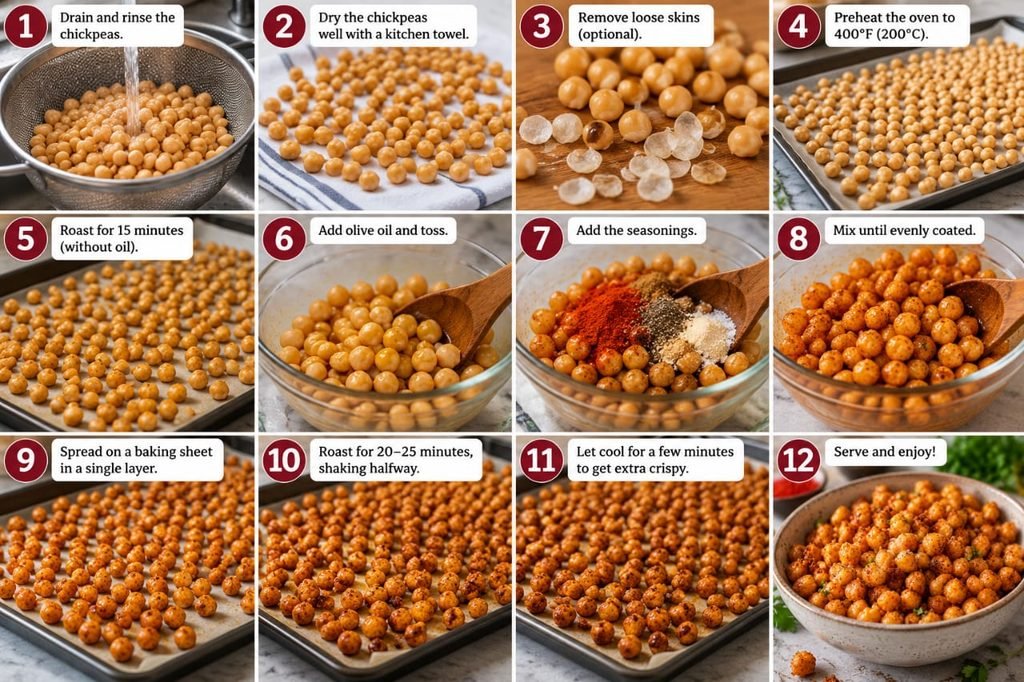
Preheat your oven to 400°F (200°C). Prepare a large baking sheet. You can line it with parchment paper for easier cleanup.
Step 2: Drain, Rinse, and Dry the Chickpeas
Drain the canned chickpeas in a colander and rinse them under cool water. Spread them on a clean kitchen towel and pat them thoroughly dry. Remove any loose skins that come away easily.
Important tip: Do not rush this step. Wet chickpeas are more likely to steam than roast, making it harder to achieve a crunchy exterior.
Step 3: Start Roasting
Spread the dried chickpeas in a single layer on the baking sheet. Roast them for 15 minutes before adding the oil and seasonings. This first stage helps remove additional moisture.
Step 4: Add the Olive Oil
Carefully remove the baking sheet from the oven. Toss the warm chickpeas with the olive oil, making sure they are lightly coated. Return the tray to the oven and roast for another 15 to 25 minutes, shaking the pan occasionally.
Step 5: Check for Crispness
Continue roasting until the chickpeas are golden and dry on the outside. Cooking time varies depending on their size, moisture level, and your oven. Let one cool briefly before tasting, since the texture becomes firmer as the chickpeas cool.
Step 6: Add the Seasonings
Transfer the hot chickpeas to a bowl and toss with the paprika, cumin, garlic powder, black pepper, and salt if needed. Adding most of the spices after roasting helps prevent them from scorching during the long cooking time.
Step 7: Cool and Serve
Spread the chickpeas out and let them cool for several minutes. Serve them once they have cooled enough to develop a crisp exterior. They are especially enjoyable shortly after roasting.
How to Make Crispy Chickpeas in an Air Fryer
An air fryer is a convenient option when you want a smaller batch without heating the oven.
- Drain, rinse, and thoroughly dry the chickpeas.
- Preheat the air fryer to 390°F (200°C), if your model requires preheating.
- Toss the chickpeas with olive oil and arrange them in a single layer in the basket. Cook in batches if necessary.
- Air-fry for approximately 12–18 minutes, shaking the basket every 4–5 minutes.
- Check for a golden, dry exterior and continue cooking in short intervals if needed.
- Toss with the seasonings and allow the chickpeas to cool briefly before serving.
Air fryers vary, so use the cooking time as a guide rather than a guarantee. Watch closely near the end to prevent burning.
Easy Seasoning Ideas
Once you have mastered the basic recipe, try one of these flavor combinations.
Smoky Paprika
Combine smoked paprika, garlic powder, cumin, and black pepper for a warm, savory snack.
Spicy Chili
Use chili powder, cumin, garlic powder, and a small pinch of cayenne pepper.
Lemon and Herb
Toss the finished chickpeas with dried oregano, black pepper, and a little finely grated lemon zest.
Curry-Spiced Chickpeas
Use curry powder, cumin, and a pinch of black pepper for a fragrant, savory variation.
Tips for Extra-Crispy Roasted Chickpeas
- Dry them thoroughly: Remove as much surface moisture as possible before roasting.
- Avoid overcrowding: Spread the chickpeas in a single layer so hot air can circulate.
- Use a moderate amount of oil: A light coating is usually enough for one can.
- Add delicate spices near the end: Paprika and garlic powder can become bitter if they burn.
- Check before removing them: Some ovens need a little more time than others.
- Let them cool uncovered: Trapped steam can soften the exterior.
Why Are My Roasted Chickpeas Not Crispy?
They Were Still Wet Before Roasting
Excess moisture can prevent the outside from becoming crisp. Pat the chickpeas dry and allow them to air-dry briefly before cooking.
The Baking Sheet Was Crowded
Chickpeas placed too close together can release moisture into the surrounding space. Use a larger tray or roast them in batches.
They Need More Cooking Time
Cooking times depend on the oven, the chickpeas, and how much moisture remains. Roast for a few additional minutes at a time, checking frequently.
They Softened After Cooling
Roasted chickpeas may lose some crispness as they sit, especially in humid conditions. If they soften, spread them on a baking sheet and warm them in a 375°F (190°C) oven for about 5–8 minutes, checking often.
How to Store Roasted Chickpeas
Allow the chickpeas to cool completely before storing them. Keep them in a clean container at room temperature, away from moisture. A tightly sealed container can trap residual moisture and make them soften, so make sure they are completely cool and dry before deciding how to store them.
For the best texture, enjoy them the day they are made. If they lose their crunch, briefly reheat them in the oven or air fryer and let them cool before serving. Avoid refrigerating them if your goal is to maintain a crunchy texture.
Frequently Asked Questions
Are roasted chickpeas healthy?
Chickpeas contain plant protein, dietary fiber, and several important nutrients. The nutritional value of this recipe depends on the amount of oil, salt, and seasoning used, as well as the serving size.
Do I need to remove the chickpea skins?
No. Removing loose skins can help with drying, but it is optional. You do not need to remove every skin to make roasted chickpeas.
Can I use dried chickpeas instead of canned?
Yes. First soak and cook dried chickpeas until tender, then drain and dry them thoroughly before roasting. Do not roast uncooked dried chickpeas directly using this recipe.
When should I add the spices?
For this method, add most ground spices after roasting. This helps protect them from burning and keeps their flavors fresh.
Can I make these chickpeas without oil?
You can experiment with an oil-free version, but the texture and browning may differ. Check them frequently and adjust the cooking time as needed.
Final Thoughts
These crispy roasted chickpeas are easy to customize and simple to prepare with pantry staples. With careful drying, enough space on the tray, and close attention to the cooking time, you can make a flavorful snack for everyday munching or a crunchy topping for your favorite meals.
Try the smoky paprika version first, then experiment with your favorite seasonings. Which flavor would you choose: smoky, spicy, lemon-herb, or curry?