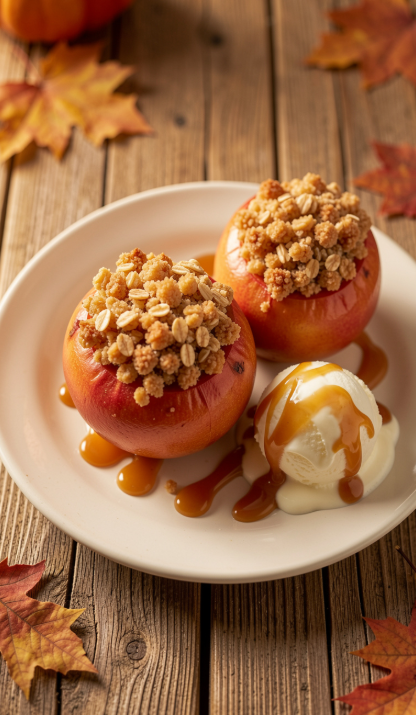
There are some desserts that simply taste like autumn in every single bite. These Apple Crisp Stuffed Baked Apples deliver the nostalgic warmth and comfort of a classic apple crisp, but in a charming, perfectly portioned package. Instead of baking a large dish, you’re creating an edible bowl out of a fresh apple, filling it with a spiced, buttery apple mixture, and topping it with an irresistibly crispy oat crumble. The result? A dessert that is not only delicious but also visually stunning and wonderfully easy to serve .
I remember the first time I made these for a small dinner party. The moment I pulled the baking dish out of the oven, the whole kitchen filled with the most incredible aroma of cinnamon, brown sugar, and baked apples. And when I served each person their own stuffed apple with a scoop of melting vanilla ice cream, the reactions were priceless. It’s a simple dessert that feels incredibly special.
Table of Contents
Recipe Overview
- Prep Time: 15 minutes
- Cook Time: 35 minutes
- Total Time: 50 minutes
- Servings: 4 servings
- Cuisine: American
- Course: Dessert
- Calories (Approximate): 320-473 per serving
Why You’ll Love This Recipe
This recipe takes everything wonderful about the classic dessert and makes it even better. Here’s why it’s destined to become a fall favorite:
- Portion Perfection: Each apple is its own serving, eliminating the need for slicing and serving from a large pan. It’s a beautiful and mess-free presentation.
- The Best of Both Worlds: You get the tender, caramelized apple flesh on the outside and a warm, spiced apple filling on the inside, all topped with the crispy, buttery crunch of a classic crisp topping .
- Incredibly Customizable: This recipe is a wonderful base for your own creative touches. Add chopped nuts, swap the spices, or drizzle with your favorite caramel sauce.
- Perfect for Entertaining: These stuffed apples are a guaranteed showstopper. They’re impressive to look at but surprisingly simple to prepare, making them ideal for dinner parties and holiday gatherings.
- Beginner-Friendly: With straightforward steps and simple ingredients, this is a fantastic dessert for bakers of all skill levels.
Ingredients
For the Stuffed Apples:
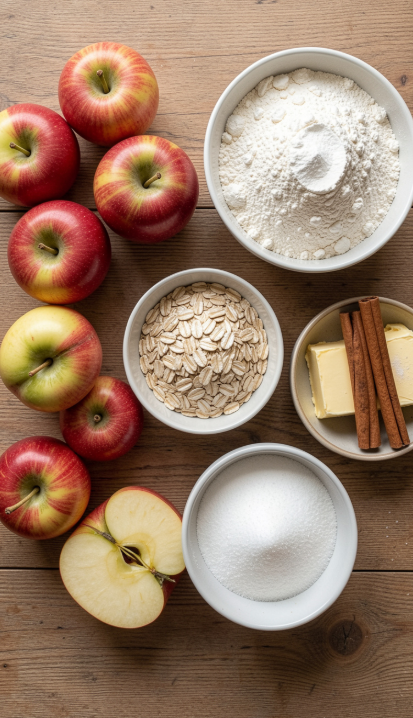
- 4 medium apples (firm varieties like Honeycrisp, Fuji, or Gala work best)
- 2 tablespoons butter
- ¼ cup light brown sugar
- ½ teaspoon ground cinnamon
For the Crisp Topping:
- ½ cup all-purpose flour
- ¼ cup rolled oats (use certified gluten-free if needed)
- ⅓ cup light brown sugar
- ¼ cup granulated sugar
- ½ teaspoon ground cinnamon
- ¼ teaspoon salt
- 4 tablespoons unsalted butter, chilled and cut into small cubes
For Serving (Optional):
- Vanilla ice cream
- Caramel sauce
Ingredient Notes
Apples: Choosing the right apple is crucial for this recipe. You’ll want a variety that is firm enough to hold its shape during baking. Honeycrisp and Gala apples are excellent choices for their sweet flavor and sturdy texture . Granny Smith apples offer a wonderful tartness that balances the sweetness of the filling .
Topping: The combination of all-purpose flour and rolled oats creates the perfect crumbly topping. The key to getting that irresistible crispy texture is using cold butter and cutting it into the dry ingredients until the mixture resembles coarse meal .
Spices: Feel free to get creative with the spices. A dash of ground ginger, nutmeg, or cardamom can add a lovely warmth and complexity .
Step-by-Step Instructions
1. Preheat and Prep
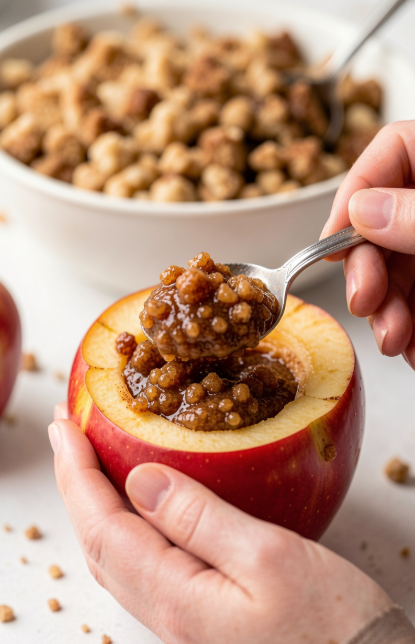
Preheat your oven to 375°F (190°C) . Wash and thoroughly dry the apples. Using a sharp paring knife, carefully cut off the top of each apple (about 1/2 inch) and set the tops aside. Use a small spoon or a melon baller to hollow out the center of each apple, creating a well about 1 inch wide. Be careful not to cut through the bottom. You’ll be making a little “bowl” .
2. Make the Crisp Topping
In a medium bowl, whisk together the flour, oats, brown sugar, granulated sugar, cinnamon, and salt. Add the cold, cubed butter. Using a pastry blender or your fingertips, work the butter into the dry ingredients until the mixture resembles coarse crumbs with some pea-sized pieces of butter remaining .
3. Prepare the Filling
While the topping chills, prepare the filling. In a medium saucepan over medium heat, melt the 2 tablespoons of butter. Add the brown sugar and cinnamon and stir until the sugar has dissolved and the mixture is bubbling slightly. Remove from heat and set aside.
4. Prep the Apple “Bowls”
Place the hollowed apples in a baking dish. Drizzle a little of the butter-sugar mixture into each apple cavity and brush some over the top rim to ensure maximum flavor .
5. Stuff the Apples
Generously pack the crisp topping mixture into the cavity of each apple, mounding it slightly over the top. Don’t be shy—a full, packed topping is what creates that beautiful, crispy dome .
6. Bake
Pour about ¼ inch of water into the bottom of the baking dish. This creates steam that helps the apples cook evenly and prevents them from drying out . Bake for 35-40 minutes, or until the apples are tender when pierced with a fork and the topping is golden brown and crisp.
7. Cool and Serve
Let the apples cool in the dish for about 10 minutes before serving. This resting time allows the juices to thicken slightly and makes them safe to handle . Serve warm with a scoop of vanilla ice cream and a generous drizzle of caramel sauce if desired.
Expert Tips
- Don’t Overfill: Be careful not to overstuff the apples. While a generous topping is great, overpacking can cause the apples to split during baking.
- Add Water: Adding water or a splash of apple cider to the bottom of the baking dish is a simple but crucial step that keeps the apples moist and prevents the bottoms from burning .
- Check for Doneness: The baking time can vary depending on the size and variety of your apples. Start checking for tenderness at the 30-minute mark. The apples should be fork-tender but not mushy.
Variations
- Nutty Crumble: For extra texture and flavor, stir ¼ cup of finely chopped pecans or walnuts into the crisp topping mixture .
- Spiced Filling: Instead of just cinnamon, add a pinch of ground nutmeg, cardamom, or ginger to your filling for a more complex spice profile .
- Boozy Option: For an adult twist, add a splash of bourbon or dark rum to the brown sugar butter mixture .
- Healthier Version: Use a gluten-free flour blend and certified gluten-free oats. You can also use coconut sugar in place of brown sugar .
Storage Instructions
Store leftover baked apples in an airtight container in the refrigerator for up to 4 days . The topping may lose some of its crispness upon storage.
Reheating Tips
To reheat and restore some crispness to the topping, place the apples on a baking sheet and warm them in a 350°F (175°C) oven for 8-10 minutes. You can also microwave individual apples for 30-45 seconds, but the topping will be softer.
Common Mistakes to Avoid
- Using Soft Apples: Avoid soft varieties like Red Delicious, which will turn to mush during baking. Stick with firm apples like Honeycrisp, Gala, or Fuji .
- Skipping the Water: The water at the bottom of the pan is essential for steaming the apples. Skipping this step can lead to dry or burnt apples.
- Not Chilling the Butter: For a perfectly crumbly topping, your butter must be cold. Warm butter will melt into the dry ingredients, resulting in a dense, greasy topping instead of a crisp crumble .
What to Serve With
- Vanilla Ice Cream: The classic and most perfect pairing. The hot and cold contrast is irresistible .
- Whipped Cream: A dollop of lightly sweetened whipped cream adds a lighter, airy touch.
- Caramel Sauce: A generous drizzle of warm caramel sauce takes this dessert over the top .
Frequently Asked Questions
Q: Can I make this recipe vegan?
A: Yes! Use a plant-based butter substitute in both the filling and the crisp topping. The recipe will still be incredibly delicious .
Q: Can I use a different type of apple?
A: Absolutely. Just make sure to choose a firm, crisp variety that will hold its shape. Honeycrisp, Gala, Fuji, and Pink Lady are all excellent choices .
Q: Why do I need to add water to the baking dish?
A: The water creates steam in the oven, which helps the apples cook evenly and prevents them from drying out .
Q: How do I prevent the apples from toppling over in the pan?
A: If your apples are unstable, you can slice a tiny piece off the bottom to create a flat base. Just be careful not to cut all the way through.
Q: Can I prepare these apples ahead of time?
A: Yes! You can core the apples and prepare the crumble topping separately up to a day in advance. Store them in the refrigerator and assemble just before baking .
Q: How do I get a really crispy topping?
A: The key is using cold butter and not overworking the mixture. Chilling the topping in the fridge for 15 minutes before putting it on the apples also helps achieve a crunchier result.
Conclusion
These Easy Apple Crisp Stuffed Baked Apples are a celebration of the best fall flavors. They’re warm, comforting, and filled with the sweet and spicy goodness of cinnamon and brown sugar. The tender apple paired with the crunchy oat topping is a textural delight, and the individual serving size makes them a memorable and elegant dessert for any occasion.
I hope you give this recipe a try and experience the pure joy of pulling a tray of these beautiful baked apples out of your oven. They’re guaranteed to be a hit with family and friends alike.
Have you tried making these Apple Crisp Stuffed Baked Apples? I’d love to hear how they turned out! Share your photos, tips, and any creative variations in the comments below. Happy baking!
You Might Also Like
- The Ultimate Berry Yogurt Parfait Recipe: A Healthy & Stunning Breakfast Treat
- Strawberry Cheesecake Stuffed French Toast: The Ultimate Decadent Brunch Recipe
- Old Fashioned Pancakes: A Timeless Recipe for the Perfect Fluffy Breakfast