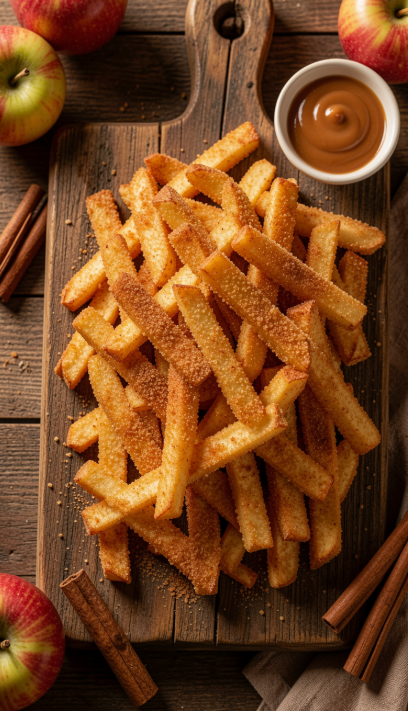
There’s something magical about biting into a warm, crispy apple fry that perfect contrast between the golden, crunchy coating and the tender, juicy apple inside. It’s like apple pie in finger-food form, but even better because you can dip it in caramel sauce or vanilla yogurt. Whether you’re looking for a cozy fall treat, a fun dessert for the kids, or just a simple snack to satisfy your sweet tooth, these apple fries hit the spot every single time .
I first discovered apple fries at a local fair. You know, one of those indulgent foods you can’t resist. They were fried, of course, but the flavor combo of crispy apples dusted with cinnamon and dipped in caramel was unforgettable. I couldn’t help but wonder if I could recreate that experience at home without all the oil and guilt. That’s where the air fryer comes in a total game-changer.
These apple fries are perfect for those moments when you need a comforting snack that feels a little special but is super easy to whip up. The air fryer gives the apples that golden-brown crispiness without deep-frying, while the cinnamon-sugar coating adds just the right touch of sweetness . And let’s not forget the dipping sauce caramel, vanilla yogurt, chocolate sauce, you name it. The possibilities are endless.
Apple Fries: The Crispy Sweet Snack Everyone Will Love
There’s something magical about biting into a warm, crispy apple fry that perfect contrast between the golden, crunchy coating and the tender, juicy apple inside. It’s like apple
Table of Contents
Recipe Overview
- Prep Time: 15 minutes
- Cook Time: 10 minutes
- Total Time: 25 minutes
- Servings: 4 servings
- Cuisine: American
- Course: Dessert, Snack
- Calories (Approximate): 200-250 per serving
Why You’ll Love This Recipe
- Crispy Outside, Tender Inside: The air fryer gives you that perfect golden crunch with soft apple centers .
- Quick & Easy: Ready in under 30 minutes, making it perfect for busy days .
- Healthier Than Deep-Fried: No oil splatters, no deep fryer required, and significantly less fat .
- Versatile: Serve with caramel sauce, vanilla yogurt, chocolate sauce, or even peanut butter .
- Kid-Friendly: A fun way to enjoy fruit that both kids and adults will love .
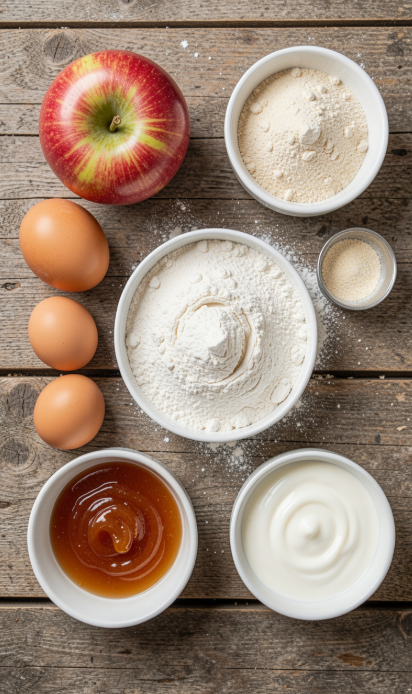
Ingredients
For the Apple Fries:
- 2 large firm apples (Honeycrisp, Granny Smith, or Fuji work best)
- ½ cup all-purpose flour
- 2 large eggs, beaten
- 1 cup panko breadcrumbs (for that extra crunch)
- 2 teaspoons ground cinnamon
- 2 tablespoons granulated sugar
- Cooking spray
For Dipping (Optional but Recommended):
Ingredient Notes
Apples: Choose firm apples that will hold their shape during cooking. Granny Smith apples offer a tart contrast to the sweet coating, while Honeycrisp apples provide a juicy, sweet flavor . Fuji and Gala also work well for a softer, more dessert-like fry .
Panko Breadcrumbs: These are key for achieving that extra crispy texture. Regular breadcrumbs work in a pinch, but panko gives you that signature crunch .
Flour vs. Cornstarch: While some recipes use cornstarch for a lighter coating, flour provides a better base for the egg and breadcrumbs to adhere . Either works, but I prefer flour for a more substantial crunch.
Dipping Sauces: Caramel sauce is the classic choice, but vanilla yogurt is a lighter, equally delicious option . You can also try chocolate sauce, peanut butter, or whipped cream.
Step-by-Step Instructions
1. Prep the Apples
Wash the apples and slice them into fry-shaped wedges, about ½ inch thick . You can peel them if you prefer, but leaving the skin on adds extra texture and nutrients . Pat the apple slices dry with a paper towel this helps the coating stick better .
2. Set Up Your Breading Station
This is the key to a smooth, mess-free process. Prepare three shallow bowls:
- Bowl 1: All-purpose flour
- Bowl 2: Beaten eggs
- Bowl 3: Panko breadcrumbs mixed with half of the cinnamon-sugar mixture
3. Coat the Apple Slices
Working one slice at a time:
- Dredge the apple slice in the flour, shaking off any excess .
- Dip it into the beaten eggs, ensuring it’s fully coated .
- Press it firmly into the panko-cinnamon mixture, making sure the coating sticks evenly .
For extra crunch, you can double-coat by repeating the egg and breadcrumb steps .
4. Air Fry to Crispy Perfection
Preheat your air fryer to 375°F (190°C) for about 3 minutes . Lightly spray the basket with cooking spray.
Arrange the breaded apple slices in a single layer in the basket don’t overcrowd them, or they’ll steam instead of crisp . You may need to cook in batches depending on the size of your air fryer.
Lightly spray the tops with cooking spray to encourage browning . Air fry for 8-10 minutes, flipping halfway through, until golden brown and crispy .

5. Finish and Serve
Remove the apple fries from the air fryer and sprinkle with the remaining cinnamon-sugar mixture . Serve them immediately while warm and crispy, with caramel sauce or vanilla yogurt on the side for dipping .
Expert Tips
- Choose the Right Apples: Firm apples like Honeycrisp, Fuji, or Granny Smith hold their shape best during cooking .
- Don’t Overcrowd the Basket: Air frying in a single layer ensures even cooking and crispiness. Overcrowding leads to soggy fries .
- Pat the Apples Dry: Removing excess moisture helps the coating stick and prevents sogginess .
- Flip Halfway Through: This ensures both sides get golden and crispy .
- Serve Immediately: Apple fries are at their crispiest and most delicious right out of the air fryer .
Variations
- Extra Crunch: Double-coat the apple slices by repeating the egg and breadcrumb steps .
- Different Spices: Add a pinch of nutmeg, cardamom, or pumpkin pie spice to the breadcrumb mixture for a warm, aromatic twist .
- Healthier Version: Use a sugar substitute like monk fruit or stevia, and serve with vanilla yogurt instead of caramel sauce .
- Oven-Baked Alternative: If you don’t have an air fryer, bake at 400°F (200°C) for 20-25 minutes, flipping halfway through .
- Fruit Mix: Try this recipe with pears or firm peaches for a different fruit twist .
Storage Instructions
Apple fries are best enjoyed fresh, but if you have leftovers:
- Store in an airtight container in the refrigerator for up to 2 days .
- They will lose some crispness, but you can reheat them to restore it .
Reheating Tips
To bring back that crispy texture:
- Reheat in the air fryer at 350°F (175°C) for 2-3 minutes .
- Avoid microwaving, as it will make the coating soft and soggy .
Common Mistakes to Avoid
- Skipping the Egg Wash: The eggs are essential for helping the breadcrumb coating stick .
- Using Too Much Apple: Overcrowding the air fryer basket prevents proper crisping .
- Not Patting Apples Dry: Excess moisture prevents the coating from adhering and leads to sogginess .
- Overcooking: Keep an eye on them they’re done when golden and crispy, not burnt .
What to Serve With
- Caramel Sauce: The classic pairing warm, sweet, and indulgent .
- Vanilla Yogurt: A lighter, tangy option that balances the sweetness .
- Chocolate Sauce: For a decadent twist.
- Peanut Butter: A creamy, nutty dip that pairs beautifully with apples .
- Whipped Cream: A simple, airy topping.
Frequently Asked Questions
Q: What apples work best for apple fries?
A: Firm apples like Honeycrisp, Fuji, Gala, or Granny Smith hold their shape best and provide a great balance of sweet and tart flavors .
Q: Can I leave the peel on the apples?
A: Yes! Leaving the skin on adds extra texture and nutrients. Just make sure to wash them thoroughly .
Q: Can I bake these instead of air-frying?
A: Absolutely. Preheat your oven to 400°F (200°C), arrange the coated apple fries on a parchment-lined baking sheet, and bake for 20-25 minutes, flipping halfway through .
Q: How do I make these gluten-free?
A: Substitute the all-purpose flour with almond flour and use gluten-free breadcrumbs .
Q: Can I freeze apple fries?
A: Freezing is not recommended as it will affect the texture of the apples. They’re best enjoyed fresh .
Q: Can I reduce the sugar?
A: Yes, you can reduce the sugar in the coating or use a sugar substitute like monk fruit or stevia .
Q: What’s the best dipping sauce for apple fries?
A: Caramel sauce is the classic choice, but vanilla yogurt, chocolate sauce, and peanut butter are also excellent options .
Q: Can I make these ahead of time?
A: You can slice and coat the apples in advance, but they’re best air-fried just before serving for maximum crispiness .
Conclusion
These Apple Fries are proof that simple ingredients can create something truly magical. They’re crispy, sweet, and endlessly customizable, making them a perfect snack for any occasion. Whether you’re enjoying them as a cozy fall treat, a fun dessert, or a healthier alternative to traditional fries, they’re guaranteed to be a hit with everyone at the table.
I hope this recipe brings a little warmth and sweetness to your kitchen. And remember, don’t be afraid to experiment try different apple varieties, swap out the spices, or discover your own favorite dipping sauce.
Have you tried making apple fries? I’d love to hear how they turned out! Share your photos, tips, and favorite dipping sauces in the comments below. Happy cooking