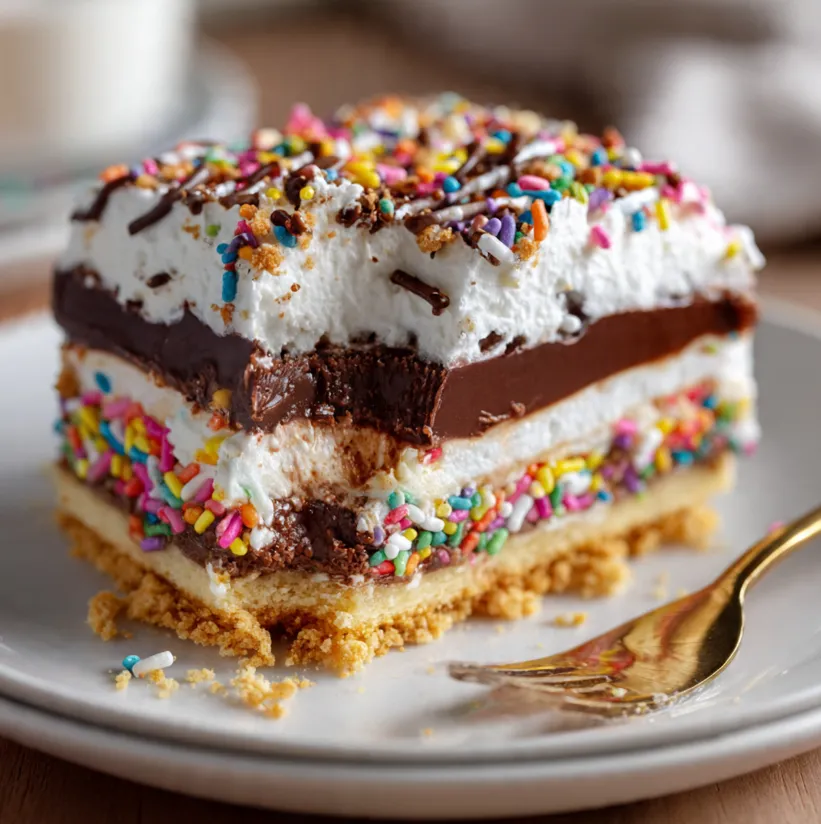
The Ultimate No-Fuss, Crowd-Pleasing Dessert
Are you craving a decadent, chocolatey dessert but dread the thought of turning on the oven? Do you need a guaranteed showstopper for your next potluck or family gathering that requires minimal effort and maximum praise? Look no further. This No-Bake Chocolate Sprinkle Dessert is about to become your secret weapon in the kitchen.
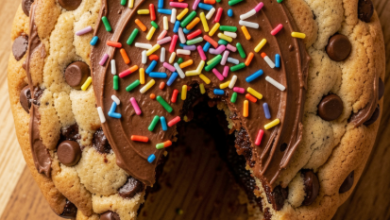
Imagine a dessert that combines a crisp, buttery crust with a rich, velvety chocolate filling, all topped with a cloud of whipped cream and a joyful shower of colorful sprinkles. The best part? It requires zero baking skills and comes together in under 30 minutes of active prep time. Perfect for busy weeknights, last-minute guests, or when your sweet tooth demands immediate satisfaction, this treat is as fun to make as it is to eat. Let’s dive into the simple magic of creating this effortless delight.
Everything You Need: Simple, Pantry-Friendly Ingredients
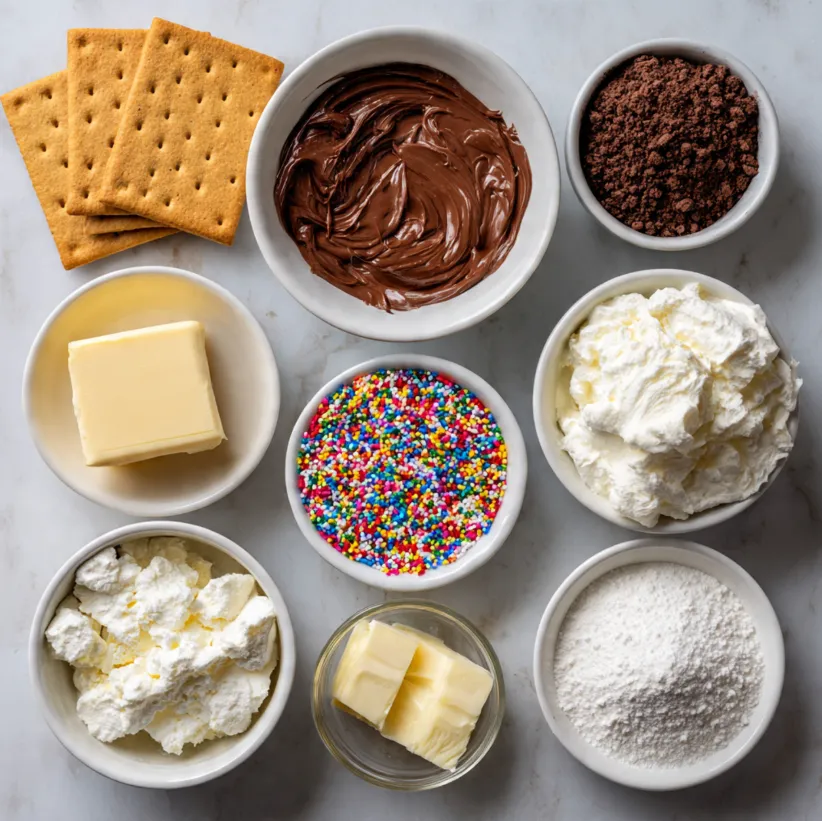
One of the joys of this recipe is its simplicity. You likely have most of these items in your pantry already. Here’s your complete shopping list, divided by component.
For the Graham Cracker Crust:
- 2 cups (about 200g) graham cracker crumbs (from roughly 15 full sheets)
- 1/2 cup (115g or 1 stick) unsalted butter, melted
- 1/4 cup (50g) granulated sugar
- A pinch of salt
For the No-Bake Chocolate Filling:
- 1 package (8 oz or 225g) full-fat cream cheese, softened to room temperature
- 1 cup (120g) powdered sugar, sifted
- 1/3 cup (30g) unsweetened cocoa powder, sifted (Dutch-process or natural both work)
- 1 teaspoon pure vanilla extract
- 1 1/2 cups (360ml) cold heavy whipping cream
For the Topping:
- 1 cup (240ml) cold heavy whipping cream
- 2 tablespoons powdered sugar
- 1/2 teaspoon vanilla extract
- 1/2 cup (or more!) of multi-colored sprinkles (jimmies or quins work best)
Kitchen Tools You’ll Need: 9×9 inch square baking pan (or a 9-inch pie dish), mixing bowls, electric hand mixer or stand mixer, spatula, measuring cups/spoons.
Step-by-Step Instructions: Your Foolproof Guide to Dessert Success
Follow these simple, numbered steps for a perfect result every single time.
Step 1: Prepare the Pan and Make the Crust
Lightly grease your 9×9 inch pan or line it with parchment paper for easy lifting. In a medium bowl, combine the graham cracker crumbs, melted butter, sugar, and salt. Mix with a fork until the crumbs are uniformly moist and resemble wet sand. Press this mixture firmly and evenly into the bottom of your prepared pan. Use the bottom of a flat glass or measuring cup to get a compact, smooth layer. Place the crust in the refrigerator to set while you make the filling.
Step 2: Whip Up the Chocolate Cream Cheese Filling
In a large mixing bowl, beat the softened cream cheese with an electric mixer on medium speed until it’s completely smooth and creamy, about 1-2 minutes. Add the sifted powdered sugar, sifted cocoa powder, and vanilla extract. Beat again on low speed initially (to avoid a powder cloud!), then increase to medium until everything is well combined and smooth. Scrape down the sides of the bowl as needed.
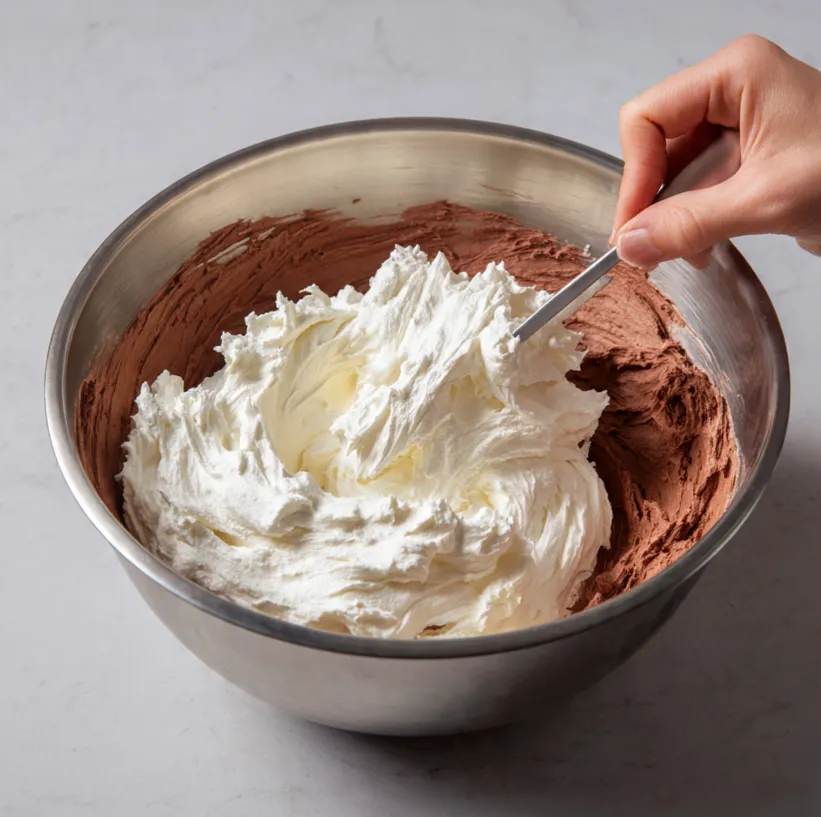
Step 3: Incorporate the Whipped Cream
In a separate, clean, chilled bowl, pour in the 1 1/2 cups of cold heavy whipping cream. Using the electric mixer, beat on medium-high speed until stiff peaks form. This means when you lift the beaters, the cream stands straight up and holds its shape.
Gently fold about one-third of the whipped cream into the chocolate cream cheese mixture using a spatula. This lightens the dense mixture. Once incorporated, carefully fold in the remaining whipped cream until no white streaks remain. Be gentle to keep the filling airy and light.
Step 4: Assemble and Chill
Remove the crust from the refrigerator. Pour the luxurious chocolate filling over the crust. Use your spatula to spread it into an even layer, reaching all the corners. Smooth the top. Cover the pan with plastic wrap and refrigerate for at least 4 hours, or ideally overnight. This chilling time is non-negotiable—it allows the dessert to set firmly so you can get clean slices.
Step 5: Add the Final Toppings and Serve
Just before serving, make the whipped cream topping. In your cleaned, chilled bowl, whip the remaining 1 cup of heavy cream with 2 tablespoons of powdered sugar and 1/2 teaspoon vanilla until medium-stiff peaks form. Spread or pipe this over the entire set chocolate layer.
Now, for the fun part: generously cover the whipped cream with rainbow sprinkles! For the cleanest slices, use a sharp knife dipped in hot water and wiped dry between cuts.
Pro Tips for a Flawless No-Bake Dessert
- Room Temperature is Key: Ensure your cream cheese is truly softened. This prevents lumps in your filling and makes for a silky-smooth texture.
- Chill Your Bowls: For the best whipped cream, pop your mixing bowl and beaters in the freezer for 10-15 minutes before whipping. Cold equipment equals faster, more stable whipped cream.
- Press the Crust Firmly: A well-compacted crust won’t crumble when you slice the dessert. Apply even pressure across the whole pan.
- Sifting Matters: Don’t skip sifting the cocoa and powdered sugar. It breaks up lumps and incorporates more easily, giving you a perfectly smooth filling.
- Sprinkle Strategy: Add sprinkles right before serving to prevent them from bleeding color into the whipped cream.
- Flavor Twists: Add a tablespoon of instant espresso powder to the chocolate filling for a mocha kick, or mix some crushed Oreos into the crust for a cookies-and-cream variation.
Conclusion: Your Dessert Repertoire Just Got a Major Upgrade
And there you have it the simplest, most satisfying no-bake chocolate sprinkle dessert that delivers on every promise: incredible flavor, stunning looks, and breathtaking ease. This recipe proves you don’t need fancy equipment or advanced skills to create something truly special. It’s a celebration in a pan, a guaranteed smile-maker, and your new reliable recipe for any occasion.
So, what are you waiting for? Gather those simple ingredients, clear a little space in your fridge, and treat yourself and your loved ones to this magnificent easy treat. Don’t forget to share your creations online—we bet it will inspire your friends to make their own! Happy no-baking