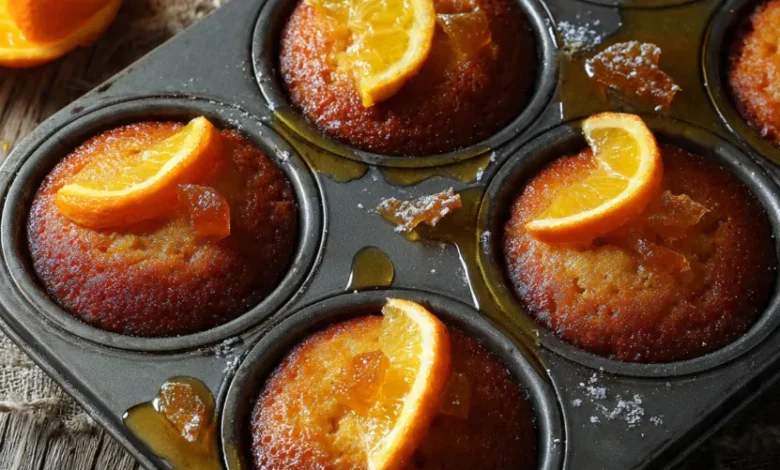
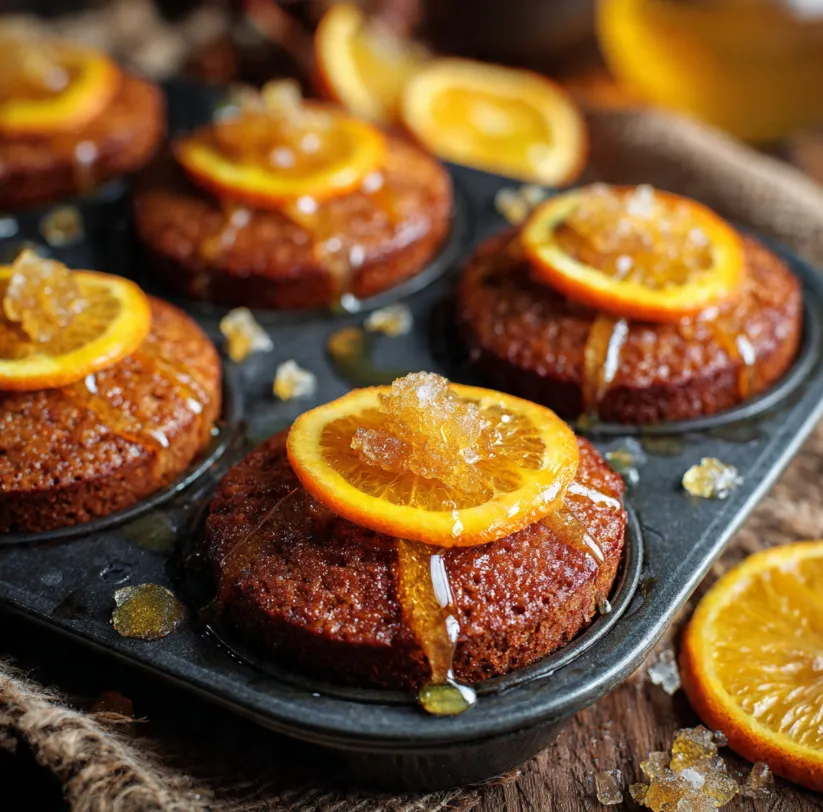
Imagine biting into a perfectly moist, tender cake where the bright, sunny flavor of orange dances with the warm, spicy kick of ginger, all sweetened with the rich, floral notes of pure honey. That’s the magic of these Honey Ginger Orange Cakes. More than just a dessert, this recipe is a comforting experience, filling your kitchen with an aroma that promises something truly special.
Whether you’re a seasoned baker or this is your first time cracking an egg, this guide is designed for you. We’ll walk through every single step, demystifying the process and ensuring you end up with stunning, delicious individual cakes that are perfect for afternoon tea, a dinner party finale, or a well-deserved sweet treat. Let’s turn simple ingredients into something extraordinary.
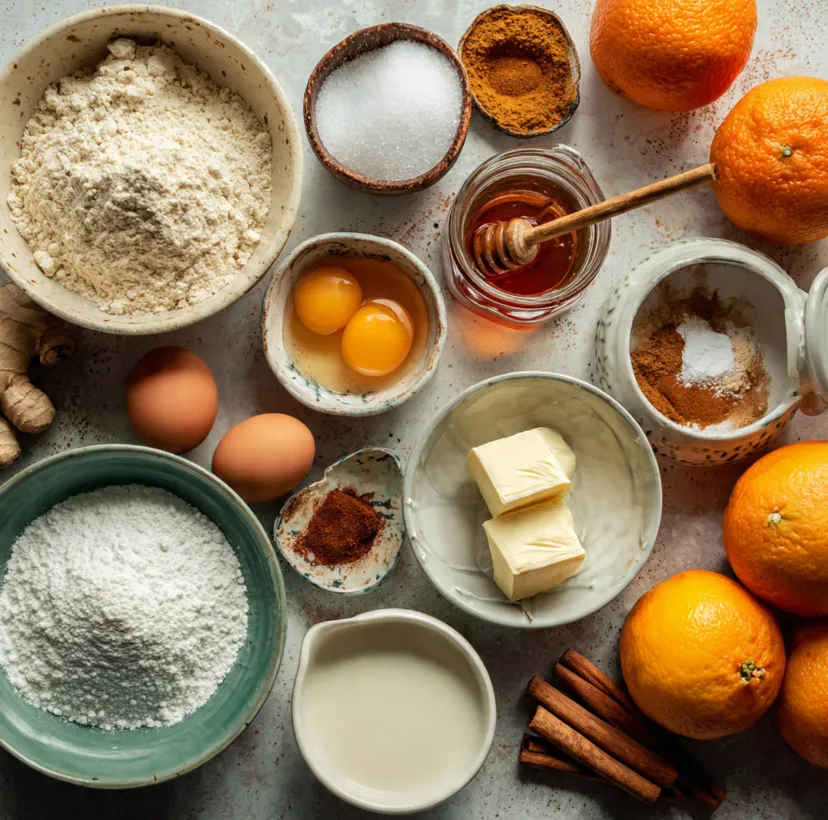
Everything You Need: Honey Ginger Orange Cakes Ingredients
Gathering your ingredients is the first step to success. Using fresh, good-quality components makes a noticeable difference. Here’s your shopping and prep list:
For the Cakes:
- 2 large oranges (for zest and juice)
- 2 cups (250g) all-purpose flour
- 1 ½ teaspoons baking powder
- ½ teaspoon baking soda
- ¼ teaspoon salt
- 2 teaspoons ground ginger
- ½ cup (115g) unsalted butter, softened to room temperature
- ¾ cup (150g) granulated sugar
- ½ cup (120ml) pure honey (orange blossom honey works wonderfully)
- 2 large eggs, at room temperature
- 1 teaspoon vanilla extract
- ½ cup (120ml) plain yogurt or buttermilk (for supreme moisture)
For the Honey-Orange Syrup:
- ⅓ cup (80ml) fresh orange juice
- ¼ cup (60ml) honey
- 1 tablespoon finely chopped crystallized ginger (optional, for extra spice)
For Garnish (Optional):
- Orange zest
- Thin orange slices
- Small pieces of crystallized ginger
Step-by-Step Baking Instructions
Follow these numbered steps carefully for foolproof results. Remember, baking is a science, but with this guide, it’s a simple and enjoyable one!
Step 1: Prep Your Kitchen
Preheat your oven to 350°F (175°C). Grease a 12-cup muffin tin or line it with paper liners. Zest and juice your oranges. You’ll need about 2 tablespoons of finely grated zest and ½ cup + ⅓ cup of juice separately (one for the batter, one for the syrup).
Step 2: Combine the Dry Ingredients
In a medium bowl, whisk together the flour, baking powder, baking soda, salt, and ground ginger. This aerates the flour and ensures the leavening agents are evenly distributed, which is key for an even rise. Set this bowl aside.
Step 3: Cream Butter and Sugars
In a large mixing bowl, use an electric mixer (or a sturdy whisk and arm power!) to beat the softened butter with the granulated sugar and honey. Beat on medium-high speed for 2-3 minutes until the mixture is light, fluffy, and pale in color. This step incorporates air, which is crucial for texture.
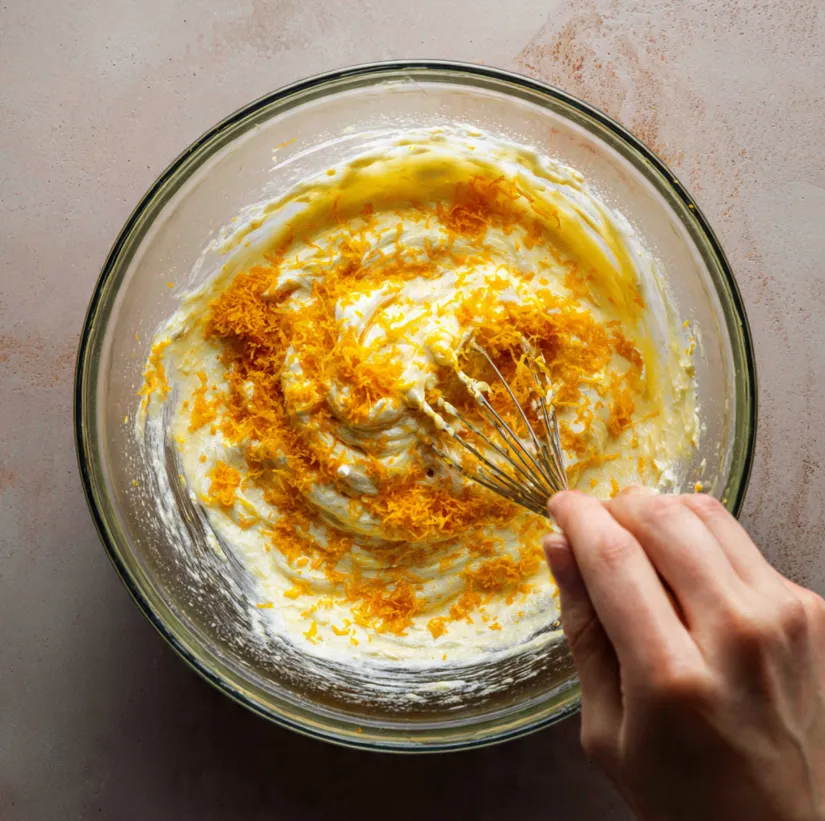
Step 4: Incorporate Eggs and Flavorings
Add the eggs one at a time, beating well after each addition to fully incorporate. Then, mix in the vanilla extract and the 2 tablespoons of fresh orange zest. The mixture should look smooth and creamy.
Step 5: Alternate Dry and Wet Ingredients
With your mixer on low speed, add one-third of the dry flour mixture to the butter mixture, mixing until just combined. Follow with half of the yogurt/orange juice mix. Repeat, ending with the final third of the flour. Do not overmix! Stir only until no large streaks of flour remain. A few small lumps are okay.
Step 6: Bake to Perfection
Divide the batter evenly among the 12 prepared muffin cups, filling each about ¾ full. Bake for 18-22 minutes, or until a toothpick inserted into the center of a cake comes out clean or with just a few moist crumbs.
Step 7: Make the Glazing Syrup
While the cakes bake, make the syrup. In a small saucepan, combine the ⅓ cup of fresh orange juice, ¼ cup of honey, and the chopped crystallized ginger. Heat over medium, stirring, until the honey dissolves and the mixture simmers for 1-2 minutes. Remove from heat.
Step 8: The Soaking Secret
As soon as the cakes come out of the oven, and while they are still hot in the tin, use a skewer or toothpick to poke several holes all over the top of each cake. Slowly spoon or brush the warm honey-orange syrup over each one. This allows the syrup to soak deep into the cakes, making them incredibly moist and flavorful.
Step 9: Cool and Serve
Let the cakes cool in the tin for 10 minutes, then carefully transfer them to a wire rack to cool completely. The syrup will set into a beautiful, glossy glaze.
Pro Tips for Perfect Honey Ginger Orange Cakes Every Time
- Room Temperature is Key: Ensure your butter, eggs, and yogurt are at room temperature. This allows them to emulsify and incorporate into the batter more easily, preventing a dense texture.
- Zest Smartly: When zesting your oranges, avoid the white pith (the bitter layer beneath the skin). Only grate the bright orange outer zest.
- Don’t Overmix: Overmixing the batter after adding the flour develops gluten, leading to tough, dense cakes. Mix until just combined.
- Honey Variety: Experiment with different honeys! Orange blossom honey enhances the citrus, while wildflower or clover honey adds deeper notes.
- Storage: Store cooled cakes in an airtight container at room temperature for up to 2 days, or in the fridge for up to 5 days. They also freeze beautifully for up to 2 months.
Frequently Asked Questions (FAQs)
Can I make this as one large cake?
Absolutely! Pour the batter into a greased and lined 9-inch round or loaf pan. Increase the baking time to 40-50 minutes, checking for doneness with a toothpick.
What can I use instead of yogurt?
An equal amount of sour cream, buttermilk, or even full-fat milk with a teaspoon of lemon juice added will work well. The acidity helps tenderize the crumb.
My syrup is too runny. How can I thicken it?
Let it simmer for an extra 3-4 minutes to reduce and thicken. You can also add a teaspoon of orange marmalade for body and flavor.
Ready to Fill Your Home with This Heavenly Aroma?
These Honey Ginger Orange Cakes are more than just a recipe—they’re a simple way to create a moment of joy. The process is therapeutic, the scent is intoxicating, and the final result is a guaranteed crowd-pleaser that tastes as wonderful as it looks.
So, tie on your apron, grab those oranges, and trust the process. You have all the knowledge, tips, and visual guides you need to succeed. We can’t wait for you to experience the bright, spicy-sweet delight of your very own homemade Honey Ginger Orange Cakes. Happy baking! Don’t forget to share your beautiful creations online and tag them—we’d love to see your results