The Ultimate Chocolate M&M’s and Chocolate Chip Cookie Dough Ice Cream Cake: A Showstopper Dessert!

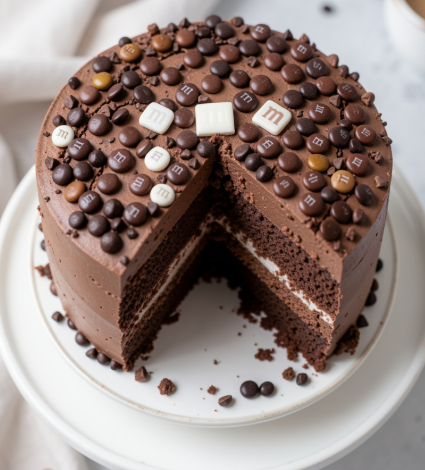
There are desserts, and then there are showstopper desserts. You know the ones they make everyone stop mid-conversation when you bring them to the table, and they’re the first thing people ask for at every gathering. This Chocolate M&M’s and Chocolate Chip Cookie Dough Ice Cream Cake is exactly that kind of dessert.
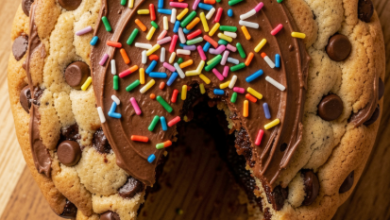
Imagine layers of creamy vanilla and chocolate ice cream, studded with colorful M&M’s and gooey chunks of edible chocolate chip cookie dough, all sitting on a crunchy Oreo cookie crust. To top it all off, a silky, rich chocolate ganache ties every layer together. It’s a celebration of textures and flavors: the chewiness of the cookie dough, the crunch of the candies, the smooth creaminess of the ice cream, and the fudgy depth of the ganache.
What I absolutely adore about this recipe is that despite its “wow” factor, it’s a no-bake dessert. You don’t need to be a pastry chef to create this masterpiece. It’s the perfect project for a weekend, a guaranteed hit for birthdays, summer BBQs, or any festive occasion where you want to impress without spending hours in a hot kitchen.
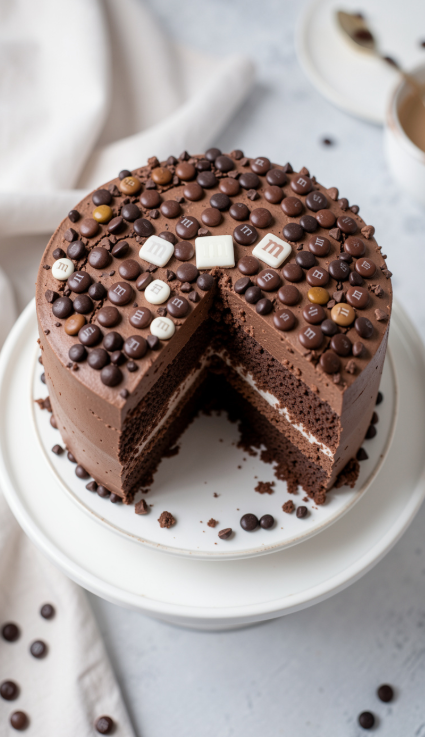
The Ultimate Chocolate M&M’s and Chocolate Chip Cookie Dough Ice Cream Cake: A Showstopper Dessert!
There are desserts, and then there are showstopper desserts. You know the ones they make everyone stop mid-conversation when you bring them to the table, and they’re the first thin
Table of Contents
Recipe Overview
- Prep Time: 35 minutes
- Cook Time: 0 minutes (No-Bake!)
- Total Freezing Time: 6-8 hours (Overnight is best)
- Total Time: Approximately 7 hours
- Servings: 12-16 slices
- Cuisine: American
- Course: Dessert
- Calories (Approximate): 480-520 per slice
Why You’ll Love This Recipe
- No Oven, No Problem: This is a completely no-bake dessert, making it perfect for warm weather or when you don’t want to heat up the kitchen.
- The Ultimate Textural Experience: This cake is a journey for your taste buds. It delivers the crunch of the cookie crust and M&M’s, the creamy smoothness of the ice cream, and the chewy, nostalgic goodness of edible chocolate chip cookie dough.
- Incredibly Customizable: This is a fantastic base recipe to make your own. Swap ice cream flavors, add different candies, or even incorporate peanut butter for a fun twist.
- Make-Ahead Marvel: This cake is a busy host’s best friend. It can and should be made ahead of time. Simply prepare it a day or two before your event and keep it in the freezer until you’re ready to wow your guests.
Ingredients
For the Crust:
- 1 ½ sleeves (about 25) Oreo cookies, crushed into fine crumbs
- 6 tablespoons (85g) unsalted butter, melted
For the Edible Chocolate Chip Cookie Dough Layer:
- ½ cup (1 stick) unsalted butter, softened
- ¼ cup (50g) granulated sugar
- ½ cup (110g) packed light brown sugar
- 2 tablespoons milk
- 1 teaspoon vanilla extract
- 1 cup (130g) all-purpose flour, heat-treated
- ½ teaspoon salt
- ¾ cup mini chocolate chips
For the Ice Cream Layer:
- 2 pints (about 1 quart) chocolate ice cream, slightly softened
- 2 pints (about 1 quart) vanilla ice cream, slightly softened
- 1 cup M&M’s candies (mini or regular)
For the Ganache Topping:
- 1 cup (240ml) heavy cream
- 1 cup (175g) semi-sweet chocolate chips
- 1 tablespoon unsalted butter
For Garnish:
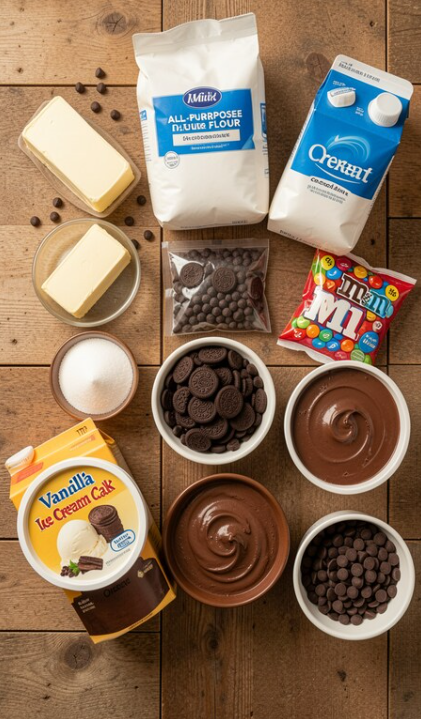
Ingredient Notes
Edible Cookie Dough Safety
The key to this dessert is that the cookie dough layer is safe to eat raw. This requires two things:
- No eggs: This recipe is egg-free.
- Heat-Treated Flour: Raw flour can contain bacteria. To make it safe, you must heat-treat it.
Ice Cream
Let the ice cream soften at room temperature for 10-15 minutes. It should be spreadable but not melted. This is the “sweet spot” for easy layering without creating a soupy mess.
Substitutions
- Crust: Swap Oreos for graham crackers for a different flavor.
- Ice Cream: Use any flavor you love. Cookie dough, mint chocolate chip, or peanut butter cup would all be incredible.
- Mix-Ins: M&M’s are classic, but you could use chopped peanut butter cups, sprinkles, or chocolate chunks.
Step-by-Step Instructions
1. Prepare the Crust
In a medium bowl, combine the crushed Oreo crumbs and melted butter. Mix until the texture resembles wet sand. Press this mixture firmly and evenly into the bottom of a 9-inch springform pan. You can use the bottom of a glass to pack it down tightly. Freeze for 15-20 minutes to set.
2. Make the Edible Cookie Dough
In a large bowl, beat the softened butter, brown sugar, and granulated sugar until light and fluffy. Mix in the milk and vanilla. Add the heat-treated flour and salt and mix until just combined. Fold in the mini chocolate chips. Set aside.
3. Build the Layers
Remove the pan from the freezer.
- First Ice Cream Layer: Scoop the softened chocolate ice cream over the crust and spread it evenly with a spatula. Return to the freezer for 30 minutes.
- Cookie Dough Layer: Take about half of the cookie dough and crumble or press it gently over the frozen chocolate ice cream layer. Freeze for 30 minutes.
- Second Ice Cream Layer: Scoop the softened vanilla ice cream over the cookie dough. Gently fold the M&M’s into the ice cream before spreading, or press them into the top of the layer. Freeze for 1-2 hours, or until very firm.
4. Make the Ganache
In a small saucepan, heat the heavy cream over medium heat until it just begins to steam (do not boil). Pour the hot cream over the chocolate chips and butter in a heat-safe bowl. Let it sit for 2 minutes, then stir gently until smooth and glossy. Allow the ganache to cool slightly to room temperature.
5. Top and Finish
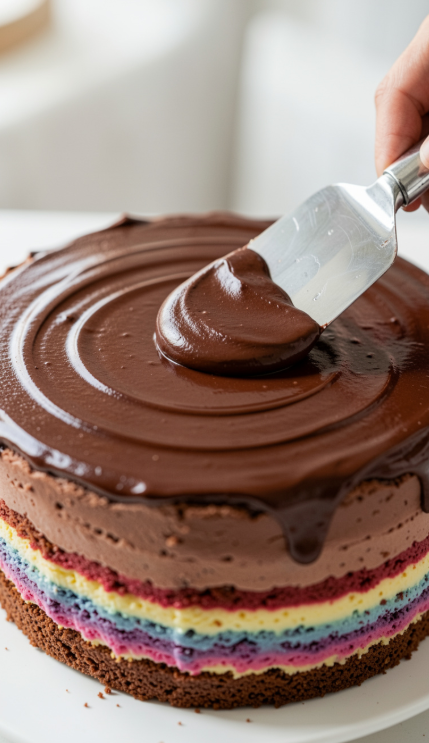
Pour the slightly cooled ganache over the top of the frozen cake. Use a spatula to spread it evenly, letting it drip down the sides slightly. Immediately garnish with extra M&M’s and mini cookies before the ganache sets. Return the cake to the freezer for at least 30-45 minutes to set the ganache fully.
6. Serve
Remove the cake from the freezer 5-10 minutes before serving to let it soften slightly. Run a sharp knife under hot water, wipe it dry, and slice. Clean the knife between each cut for neat, beautiful slices.
Expert Tips
- Patience is Key: The hardest part of this recipe is the waiting! Rushing the freezing steps will cause your layers to mix and ruin the clean lines of the cake.
- Line Your Pan: For easy removal, line the bottom of your springform pan with a circle of parchment paper before adding the crust.
- The Hot Knife Trick: This is the secret to a perfect slice. Warm your knife under hot water and wipe it dry before each cut. This prevents the layers from cracking and smearing.
Variations
- Peanut Butter Lover’s: Add peanut butter chips to the cookie dough and drizzle warm peanut butter over the ganache.
- Mint Chocolate: Use mint chocolate chip ice cream with a dark chocolate ganache for a refreshing version.
- Funfetti Style: Use sugar cookie dough and rainbow sprinkles instead of M&M’s for a more colorful, birthday-themed cake.
- Gluten-Free: Use gluten-free chocolate cookies for the crust and a gluten-free flour blend for the cookie dough.
Storage Instructions
This cake is best stored in the freezer. Cover it tightly with plastic wrap or store it in an airtight container. It will keep well for up to 1 week in the freezer.
Common Mistakes to Avoid
- Not Freezing Long Enough: This is the most common issue. If the layers aren’t completely firm before you add the next one, they will mix together. Be patient!
- Skipping Flour Heat-Treatment: This is a safety risk. Always heat-treat your flour to make it safe to eat raw.
- Using Ice Cream That’s Too Soft: If the ice cream is melted, it will create a soupy mess. Wait for it to become scoopable but not runny.
What to Serve With
- Decadent Treat on Its Own: This cake is so rich and flavorful that it’s a perfect dessert all by itself.
- Extra Drizzle: Serve with extra hot fudge sauce for the ultimate chocolate fix.
- Fresh Berries: A side of fresh strawberries or raspberries adds a welcome tartness that cuts through the richness.
- A Hot Drink: Pair a slice with a strong cup of black coffee or espresso to balance the sweetness.
Frequently Asked Questions
Q: Is the cookie dough safe to eat raw?
A: Yes! This recipe uses an egg-free dough and the flour is heat-treated to eliminate any bacteria, making it completely safe.
Q: Can I use store-bought cookie dough?
A: It’s not recommended. Store-bought cookie dough is usually intended to be baked and contains raw eggs and untreated flour. For safety, use the homemade edible recipe provided.
Q: How long should I let the ice cream soften?
A: Let it sit at room temperature for about 10-15 minutes until it’s easy to scoop and spread, but still very cold.
Q: Why do my layers look messy?
A: This happens when a layer isn’t frozen solid before you add the next one. Make sure to follow the recommended freezing times for each step.
Q: Can I use a different crust?
A: Absolutely! Graham cracker crust or a crust made from crushed chocolate wafers are both great substitutes.
Q: How do I get clean slices?
A: Let the cake sit at room temperature for 5-10 minutes before slicing. Then, use a sharp knife dipped in hot water and wiped clean between each cut.
Conclusion
This Chocolate M&M’s and Chocolate Chip Cookie Dough Ice Cream Cake is more than just a dessert; it’s a delicious experience. It’s the kind of cake that creates happy memories, becomes a family favorite, and is requested year after year. The perfect blend of creamy, crunchy, and gooey textures will delight guests of all ages. Don’t be intimidated by the layers—it’s an incredibly forgiving and fun recipe to assemble.
So, gather your ingredients, clear some space in your freezer, and get ready to create a dessert that will be the talk of your next party.
Have you tried making this epic ice cream cake? I’d love to hear about your version! Share your photos, tips, and favorite add-ins in the comments below. Happy freezing!