Ultimate Banana Pudding Rice Krispie Treats: A Nostalgic Twist on a Classic

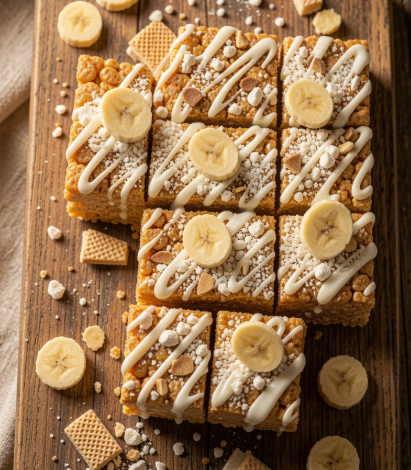
There are desserts that simply satisfy a sweet tooth, and then there are desserts that bring back a flood of childhood memories the kind of treats that make you feel like a kid again. These Banana Pudding Rice Krispie Treats are exactly that. They combine the beloved crunch of classic Rice Krispie squares with the creamy, nostalgic flavor of banana pudding, creating a dessert that’s both familiar and wonderfully new.
What makes this recipe so special is how it captures the essence of banana pudding the sweet banana flavor, the vanilla warmth, the creamy texture in a handheld, no-bake bar. It’s the perfect mash-up of two American classics: the crispy, buttery Rice Krispie treat and the comforting, pudding-filled dessert we all grew up loving. Plus, it’s endlessly customizable, so you can make it your own. Let’s get started on a treat that’s sure to become a new family favorite.
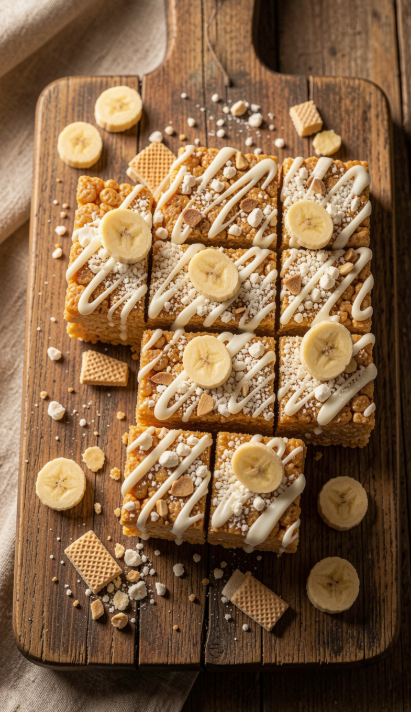
Ultimate Banana Pudding Rice Krispie Treats: A Nostalgic Twist on a Classic
There are desserts that simply satisfy a sweet tooth, and then there are desserts that bring back a flood of childhood memories the kind of treats that make
Table of Contents
Recipe Overview
- Prep Time: 15 minutes
- Cook Time: 5 minutes
- Total Time: 20 minutes (plus 2 hours chilling)
- Servings: 12-16 bars
- Cuisine: American
- Course: Dessert, Snack
- Calories (Approximate): 240 per bar
Why You’ll Love This Recipe
- No-Bake Simplicity: Ready in just 20 minutes of active time no oven required.
- Nostalgic Flavors: All the creamy, banana-vanilla goodness of classic banana pudding, wrapped in a crispy, chewy Rice Krispie bar.
- Perfect for Sharing: Makes a generous batch, ideal for parties, potlucks, or a cozy treat at home.
- Kid-Friendly: A fun, easy recipe the whole family can help make.
- Endlessly Customizable: Add white chocolate chips, nuts, or a drizzle of caramel to make it your own.
Ingredients
For the Base:
- 6 tablespoons unsalted butter
- 1 (10 oz) bag marshmallows (or 4 cups mini marshmallows)
- ¼ cup banana cream pudding mix (instant, dry mix)
- 1 teaspoon vanilla extract
- 5 cups Rice Krispies cereal
For the Topping:
- ½ cup white chocolate chips (or vanilla baking chips)
- ½ cup vanilla wafers, crushed
- ¼ cup banana chips, crushed (optional)
- Sprinkles (optional, for fun)
Ingredient Notes
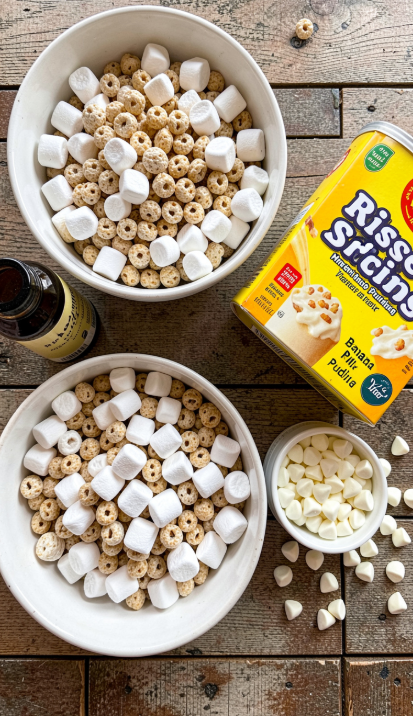
Banana Cream Pudding Mix: This is the star of the show. Look for instant banana cream pudding mix in the baking aisle. It adds concentrated banana flavor without the moisture of actual bananas, so the bars stay perfectly crisp.
Marshmallows: Use fresh, soft marshmallows for the best melting texture. If you’re using mini marshmallows, they melt faster and more evenly.
Cereal: Traditional Rice Krispies are the classic choice, but you can use any crisp rice cereal. For a gluten-free version, ensure your cereal is certified gluten-free.
Vanilla Wafers: Crushed vanilla wafers add the classic banana pudding texture and flavor. You can also use Nilla Wafers or a similar brand.
Step-by-Step Instructions
1. Prepare Your Pan
Line a 9×13-inch baking dish with parchment paper, leaving some overhang on two sides for easy removal. Alternatively, you can lightly grease the pan with butter or non-stick spray.
2. Melt the Butter and Marshmallows
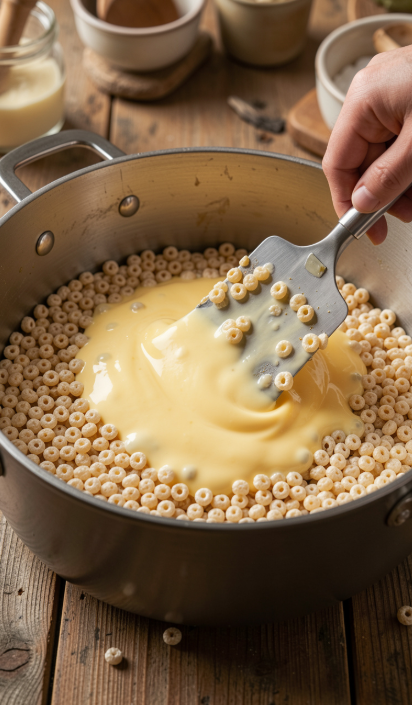
In a large pot over low heat, melt the butter. Add the marshmallows and stir continuously until they are completely melted and the mixture is smooth. This should take about 5-7 minutes.
3. Add the Pudding Mix and Vanilla
Remove the pot from the heat. Stir in the banana cream pudding mix and vanilla extract until fully incorporated. The mixture will thicken slightly and turn a pale golden color.
4. Fold in the Cereal
Add the Rice Krispies cereal to the marshmallow mixture. Gently fold until the cereal is evenly coated. Work quickly—the mixture will start to set as it cools.
5. Press into the Pan
Transfer the mixture to your prepared baking dish. Use a spatula or your hands (lightly buttered to prevent sticking) to press the mixture firmly and evenly into the pan. Don’t press too hard, or the bars will be dense instead of light and chewy.
6. Add the Toppings
Immediately sprinkle the crushed vanilla wafers, banana chips, and white chocolate chips over the top. Gently press them into the surface so they stick.
7. Chill and Set
Refrigerate for at least 2 hours until firm. This allows the bars to set properly and makes them easier to slice.
8. Slice and Serve
Once set, use the parchment paper overhang to lift the block out of the pan. Place it on a cutting board and slice into bars or squares. Serve at room temperature.
Expert Tips
- Work Quickly: The marshmallow mixture sets fast. Have all your ingredients measured and ready before you start melting .
- Don’t Over-Press: Press the mixture firmly enough to hold together, but not so hard that the bars become dense .
- Use Fresh Marshmallows: Stale marshmallows won’t melt as smoothly and can result in a grainy texture .
- Add Toppings Immediately: The toppings need to be added while the surface is still tacky so they stick properly.
Variations
- Chocolate Banana Pudding Treats: Add ½ cup of mini chocolate chips to the mixture along with the cereal .
- Peanut Butter Banana Treats: Stir in ½ cup of peanut butter with the melted marshmallows for a delicious twist .
- Caramel Drizzle: Drizzle caramel sauce over the top before adding the toppings .
- Gluten-Free: Use certified gluten-free crisp rice cereal .
- Vegan Version: Use vegan marshmallows and plant-based butter .
Storage Instructions
Store the treats in an airtight container at room temperature for up to 5 days . For longer storage, refrigerate for up to 2 weeks or freeze for up to 3 months. If freezing, wrap individually in plastic wrap and place in a freezer-safe bag.
Reheating Tips
These treats are best enjoyed at room temperature. If they’ve been refrigerated, let them sit out for 10-15 minutes before serving for the best texture.
Common Mistakes to Avoid
- Overheating the Marshmallows: Cooking them over too high heat can make them tough and chewy. Use low heat .
- Adding the Pudding Mix Too Early: The pudding mix should be added after the marshmallows are fully melted, not before .
- Pressing Too Hard: Over-pressing compresses the cereal and results in dense, hard bars .
- Skipping the Chill Time: Letting the bars set in the fridge is essential for clean slicing.
What to Serve With
- A Glass of Milk: The classic pairing for Rice Krispie treats .
- Coffee or Tea: A warm beverage balances the sweetness beautifully.
- Vanilla Ice Cream: Crumble the treats over ice cream for a fun dessert.
Frequently Asked Questions
Q: Can I use fresh bananas instead of pudding mix?
A: Fresh bananas add moisture, which can make the treats soggy. The pudding mix gives you the banana flavor without the extra liquid.
Q: Can I use a different flavor pudding mix?
A: Absolutely! Vanilla, chocolate, or butterscotch pudding mix would all work beautifully.
Q: Why are my treats hard and dense?
A: This usually happens when the marshmallows are overheated or the mixture is pressed too firmly into the pan.
Q: Can I make these ahead of time?
A: Yes! These treats are perfect for making a day or two ahead. Just store them in an airtight container at room temperature.
Q: How do I keep them from sticking to the pan?
A: Line your pan with parchment paper with overhang on the sides. This makes removal easy.
Q: Can I use a different cereal?
A: Yes! Try using Fruity Pebbles, Cocoa Krispies, or any crisp rice cereal.
Conclusion
These Ultimate Banana Pudding Rice Krispie Treats are the perfect blend of nostalgia and creativity. They take the classic Rice Krispie treat we all know and love and infuse it with the comforting, creamy flavor of banana pudding. With their crispy texture, sweet banana undertones, and delightful toppings, they’re guaranteed to be a hit at any gathering or just as a special treat for yourself.
The beauty of this recipe is its simplicity no oven required, minimal prep time, and endless possibilities for customization. So go ahead, gather your ingredients, and get ready to create a dessert that will bring back fond memories and create new ones.
Have you tried making these Banana Pudding Rice Krispie Treats? I’d love to hear how they turned out! Share your photos, tips, and any creative variations in the comments below. Happy cooking!