If you love rich chocolate desserts but don’t want to turn on the oven, this No-Bake Chocolate Sprinkle Dessert is just what you need. It features a buttery graham cracker crust, a smooth chocolate cream cheese filling, fluffy homemade whipped cream, and a generous topping of colorful sprinkles.
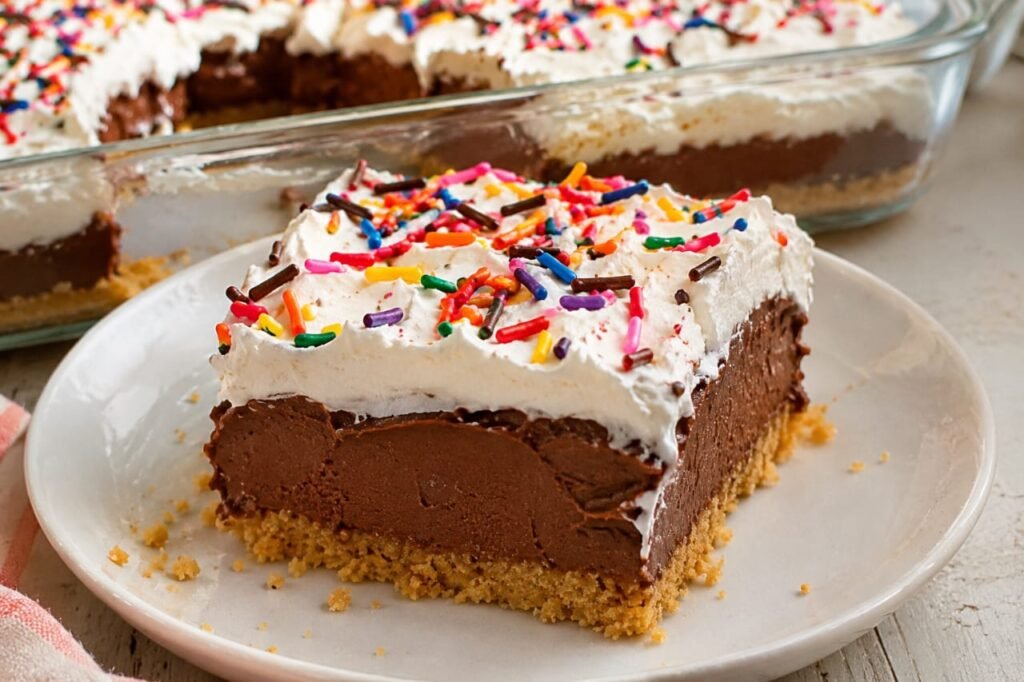
Every bite brings together a little crunch from the crust and a wonderfully creamy chocolate center. The rainbow sprinkles add a cheerful finishing touch, making this dessert perfect for birthday parties, potlucks, family gatherings, holidays, or an easy weekend treat.
Best of all, you only need about 25 to 30 minutes of active preparation. The refrigerator does the rest of the work while the layers chill and become firm enough to slice.
Why You’ll Love This No-Bake Chocolate Sprinkle Dessert
- No oven required: The crust and chocolate filling are prepared without baking.
- Rich chocolate flavor: Unsweetened cocoa powder gives the filling a deep chocolate taste.
- Light and creamy texture: Whipped heavy cream makes the chocolate layer airy and smooth.
- Simple ingredients: Graham crackers, cream cheese, cocoa, butter, and pantry staples create an impressive dessert.
- Perfect for sharing: The square pan makes it easy to cut into individual portions.
- Make-ahead friendly: Prepare the dessert in advance and add the whipped cream and sprinkles before serving.
What Is a No-Bake Chocolate Sprinkle Dessert?
A no-bake chocolate sprinkle dessert is a chilled layered treat made with a crumb crust, a creamy chocolate filling, and a whipped cream topping. Instead of baking the layers, you allow them to firm up in the refrigerator.
This version uses cream cheese, cocoa powder, powdered sugar, and freshly whipped cream to create a cheesecake-like chocolate filling. A layer of sweetened whipped cream and colorful sprinkles finishes the dessert, giving it a fun appearance and a soft, creamy texture.
Ingredients You’ll Need
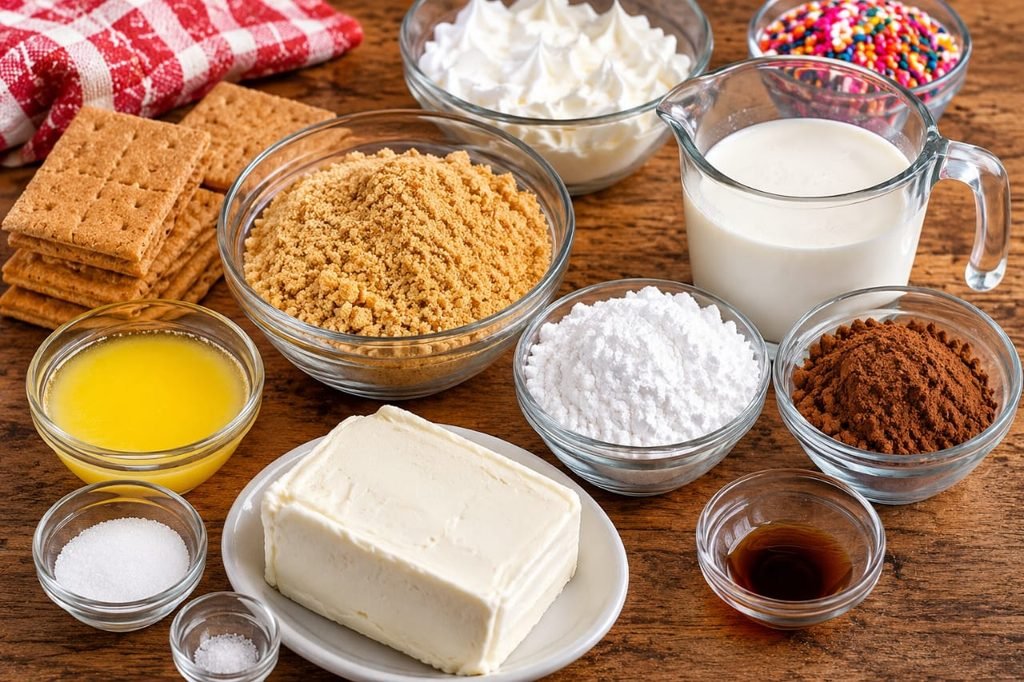
You only need a handful of everyday ingredients to make this easy chocolate dessert. For the best texture, use full-fat cream cheese and cold heavy whipping cream.
For the Graham Cracker Crust
- 2 cups graham cracker crumbs: These create the buttery, slightly crunchy base.
- 1/2 cup unsalted butter, melted: Holds the crumbs together.
- 1/4 cup granulated sugar: Adds sweetness to the crust.
- A pinch of salt: Balances the sweetness and enhances the buttery flavor.
For the No-Bake Chocolate Filling
- 8 ounces full-fat cream cheese, softened: Gives the filling its rich, creamy texture.
- 1 cup powdered sugar, sifted: Sweetens the filling without adding graininess.
- 1/3 cup unsweetened cocoa powder, sifted: Provides the chocolate flavor. Dutch-process or natural cocoa both work.
- 1 teaspoon pure vanilla extract: Adds warmth and depth.
- 1 1/2 cups cold heavy whipping cream: Whipped and folded into the chocolate mixture for a light texture.
For the Whipped Cream Topping
- 1 cup cold heavy whipping cream: Creates the fluffy topping.
- 2 tablespoons powdered sugar: Adds a gentle sweetness.
- 1/2 teaspoon vanilla extract: Enhances the flavor.
- 1/2 cup rainbow sprinkles: Adds color and a festive finish.
Kitchen Tools You’ll Need
- One 9×9-inch square baking pan or a 9-inch pie dish
- Large and medium mixing bowls
- Electric hand mixer or stand mixer
- Rubber spatula
- Measuring cups and spoons
- Food processor or rolling pin for crushing graham crackers
- Parchment paper or plastic wrap
How to Make No-Bake Chocolate Sprinkle Dessert
Follow these simple steps to create a smooth chocolate filling, a firm crust, and a fluffy topping. Allow enough chilling time so the dessert can set properly before slicing.
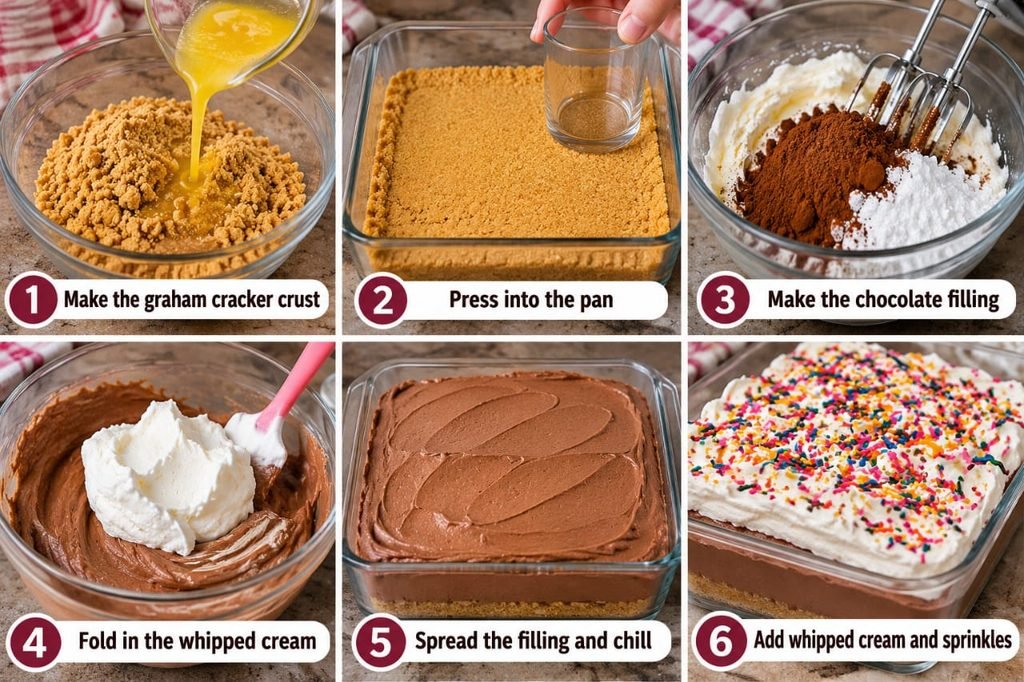
Step 1: Prepare the Graham Cracker Crust
Lightly grease a 9×9-inch square pan or line it with parchment paper, leaving a little overhang on the sides for easy removal.
In a medium bowl, combine the graham cracker crumbs, melted butter, granulated sugar, and salt. Stir until the crumbs are evenly coated and resemble damp sand.
Transfer the mixture to the prepared pan. Press it firmly and evenly across the bottom using the back of a spoon or the flat bottom of a measuring cup. Place the pan in the refrigerator while you prepare the filling.
Step 2: Make the Chocolate Cream Cheese Mixture
Place the softened cream cheese in a large mixing bowl. Beat with an electric mixer on medium speed for about 1 to 2 minutes, until completely smooth.
Add the sifted powdered sugar, cocoa powder, and vanilla extract. Start mixing on low speed, then increase to medium until the mixture becomes thick, smooth, and evenly chocolate-colored.
Scrape the sides and bottom of the bowl with a spatula to make sure no cream cheese or cocoa powder remains unmixed.
Step 3: Whip the Heavy Cream
Pour 1 1/2 cups of cold heavy whipping cream into a separate chilled mixing bowl. Beat on medium-high speed until stiff peaks form.
To check the consistency, lift the beaters out of the cream. The peaks should hold their shape rather than immediately falling back into the bowl.
Fold about one-third of the whipped cream into the chocolate cream cheese mixture to lighten it. Then gently fold in the remaining whipped cream until the filling looks uniform and no white streaks remain.
Avoid vigorous stirring because it can deflate the whipped cream and make the filling less airy.
Step 4: Assemble and Chill the Dessert
Remove the crust from the refrigerator. Spoon the chocolate filling over the chilled crust and spread it into an even layer with a spatula.
Smooth the surface, cover the pan, and refrigerate for at least 4 hours. For the firmest texture and cleanest slices, chilling overnight is even better.
Do not rush this step. The filling needs enough time to become firm before you add the final topping and cut the dessert.
Step 5: Prepare the Whipped Cream Topping
Just before serving, pour the remaining 1 cup of cold heavy whipping cream into a clean, chilled bowl.
Add the powdered sugar and vanilla extract. Beat with an electric mixer until medium-stiff peaks form. The whipped cream should hold its shape but remain smooth and spreadable.
Spread the whipped cream evenly over the chilled chocolate layer, or transfer it to a piping bag if you prefer a decorative finish.
Step 6: Add the Rainbow Sprinkles and Serve
Scatter the rainbow sprinkles generously over the whipped cream. Add them shortly before serving to help prevent their colors from bleeding into the topping.
For neat squares, dip a sharp knife into hot water, wipe it dry, and cut through the dessert. Clean the knife between slices for the best presentation.
Keep the dessert refrigerated until you’re ready to serve.
Expert Tips for the Best Results
- Soften the cream cheese properly: Let it sit at room temperature until soft. This helps prevent lumps in the chocolate filling.
- Keep the whipping cream cold: Cold cream and chilled beaters make whipping easier and help the cream hold its shape.
- Press the crust firmly: A compact crust is less likely to crumble when you cut the dessert.
- Sift the cocoa powder: Cocoa powder can contain small lumps, so sifting helps create a smoother filling.
- Fold gently: Use a spatula to incorporate the whipped cream without losing too much air.
- Allow enough chilling time: Four hours is the minimum recommended setting time. Overnight chilling gives the best results.
- Add sprinkles at the end: Some sprinkles can release color when they sit on moist whipped cream for too long.
Common Mistakes and How to Avoid Them
1. Using Cold Cream Cheese
Cold cream cheese is difficult to beat smoothly and can leave small lumps in the filling. Let it soften at room temperature before mixing.
2. Overmixing the Whipped Cream
Whipping cream for too long can make it grainy and eventually cause it to separate. Stop when it reaches the desired peaks.
3. Not Pressing the Crust Enough
A loose crust may fall apart when you serve the dessert. Press the crumbs firmly into an even layer, especially around the corners.
4. Cutting Before the Dessert Is Set
If the chocolate filling has not chilled long enough, the slices may lose their shape. Refrigerate for at least 4 hours before cutting.
5. Adding Sprinkles Too Early
Some colorful sprinkles can bleed into the whipped cream. For the brightest appearance, add them shortly before serving.
Easy Variations to Try
This no-bake chocolate dessert is easy to customize. Try one of these variations when you want to change the flavor or presentation.
Oreo Chocolate Sprinkle Dessert
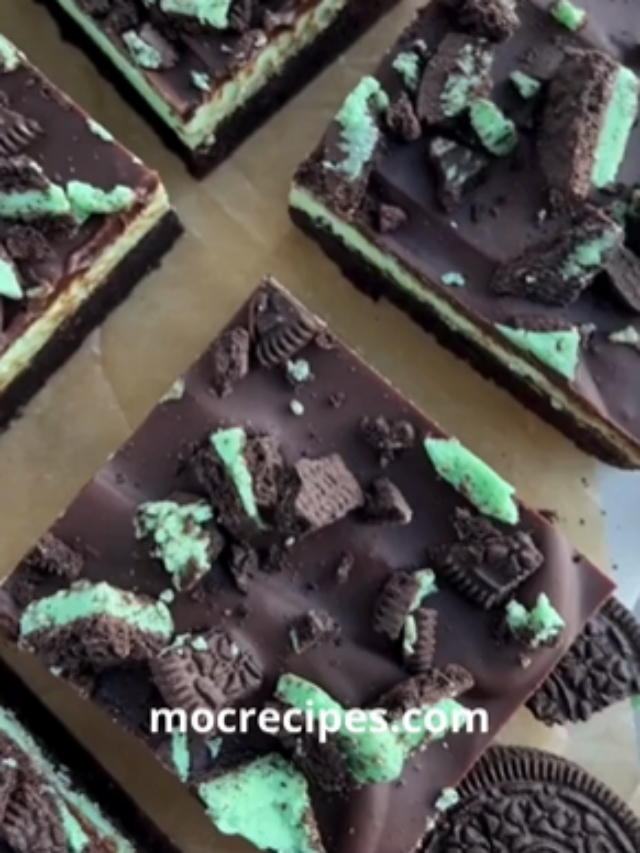
Replace the graham cracker crumbs with finely crushed Oreo cookies. You can reduce or omit the granulated sugar in the crust because the cookies are already sweet.
Mocha Chocolate Dessert
Add 1 tablespoon of instant espresso powder to the chocolate filling. Mix it thoroughly with the cocoa powder for a deeper chocolate flavor with a subtle coffee note.
Chocolate Chip Topping
Replace some of the rainbow sprinkles with mini chocolate chips or finely chopped chocolate for a more chocolate-forward finish.
Birthday Party Dessert
Use sprinkles that match your party colors. You can also pipe small whipped cream rosettes around the edges for a festive presentation.
Chocolate Graham Cracker Crust
Use chocolate graham crackers instead of regular ones for an extra chocolatey base.
How to Store No-Bake Chocolate Sprinkle Dessert
Because this dessert contains cream cheese and fresh whipped cream, it should always be stored in the refrigerator.
Refrigerator
Cover the pan tightly with plastic wrap or transfer individual slices to an airtight container. Refrigerate for up to 3 days for the best texture and freshness.
Make-Ahead Instructions
You can prepare the crust and chocolate filling a day ahead. Cover the pan and refrigerate overnight. Prepare the whipped cream topping and add the sprinkles shortly before serving for the freshest appearance.
Can You Freeze It?
You can freeze the dessert, although the whipped cream topping may change texture slightly after thawing. For better results, freeze the crust and chocolate filling without the final topping. Wrap the pan tightly and freeze for up to 1 month.
Thaw overnight in the refrigerator, then prepare the whipped cream topping and add the sprinkles before serving.
What to Serve with This Chocolate Dessert
This creamy chocolate treat is delicious on its own, but it also pairs well with a few simple additions:
- Fresh strawberries or raspberries for a fruity contrast.
- Hot coffee or espresso to balance the sweetness.
- A glass of cold milk for a classic dessert pairing.
- Fresh berries and a little extra whipped cream for a more elegant presentation.
Frequently Asked Questions
Can I make No-Bake Chocolate Sprinkle Dessert the day before?
Yes. This dessert is an excellent make-ahead option. Prepare the crust and chocolate filling, cover the pan, and refrigerate overnight. Add the whipped cream topping and sprinkles shortly before serving.
How long does this dessert need to chill?
It needs at least 4 hours in the refrigerator to firm up. Overnight chilling is recommended if you want especially neat slices.
Can I use store-bought whipped topping instead of heavy cream?
Freshly whipped heavy cream is recommended for this recipe because it gives the filling and topping a light, creamy texture. Store-bought whipped topping may work as a substitute, but the sweetness and consistency can differ. Follow the product’s instructions and adjust the powdered sugar if needed.
Why is my chocolate filling too soft?
The filling may be too soft if the cream was not whipped enough, the cream cheese mixture was too warm, or the dessert did not chill long enough. Make sure the whipped cream reaches stiff peaks and refrigerate the assembled dessert for at least 4 hours.
Can I use a different pan?
Yes. A 9-inch pie dish works well. You can also use a similar-sized rectangular dish, although the thickness of the layers and the final number of servings may change.
What kind of sprinkles work best?
Jimmies and larger quins generally hold their shape better on whipped cream. Very small nonpareils may release color more easily, so add them immediately before serving.
Does this dessert need to stay refrigerated?
Yes. The cream cheese and whipped cream layers need refrigeration. Keep the dessert chilled and return leftovers to the refrigerator promptly after serving.
Final Thoughts
This No-Bake Chocolate Sprinkle Dessert is proof that an impressive homemade treat doesn’t have to involve complicated steps or a hot oven. With its buttery graham cracker crust, rich chocolate cream cheese filling, fluffy whipped cream, and colorful sprinkles, every layer brings something delicious to the table.
Make it for a birthday celebration, a family dinner, a potluck, or simply when you’re craving something chocolatey and fun. Prepare it ahead, let the refrigerator do the work, and enjoy a dessert that’s as easy to share as it is to love.
If you make this recipe, leave a comment and let us know how it turned out. We’d love to hear which topping or variation you tried!