Unveiling the Burnt Beauty: Your Ultimate Guide to Basque Cheesecake
The Cheesecake That Broke All the Rules
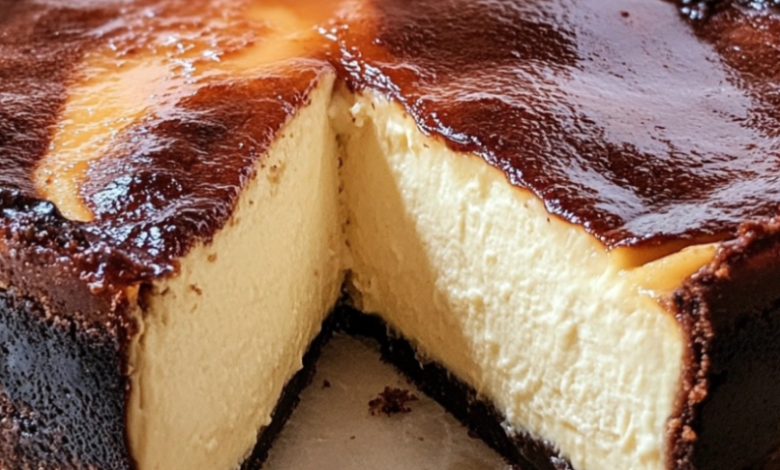
In the world of desserts, where precision and perfection often reign supreme, a beautiful rebel emerged from the heart of Spain’s Basque Country. Meet the Basque Cheesecake, also known as “Burnt Basque Cheesecake” or Tarta de Queso. With its deeply caramelized, almost charred top and a luxuriously creamy, jiggly center, this cheesecake is a stunning paradox. It defies the conventional rules of baking no water bath, no crumb crust, and absolutely no fear of a little (or a lot of) color.
This isn’t a dessert that hides its imperfections; it celebrates them. Each crack on its dark surface tells a story of high heat and rapid rise, promising an interior that is nothing short of sublime. If you’ve ever been intimidated by traditional cheesecake, this is your gateway to confidence and culinary delight. This comprehensive guide will walk you through its fascinating history, the simple science behind its success, and a foolproof recipe to create your own masterpiece at home.
A Slice of History: The Accidental Masterpiece from San Sebastián
Unlike ancient recipes passed down through generations, the Basque Cheesecake is a relatively modern creation. Its origin is credited to Santiago Rivera, the owner of La Viña, a legendary bar and restaurant in the picturesque Old Town of San Sebastián.
In the 1990s, while experimenting with the classic Spanish tarta de queso, Rivera aimed for something creamier and less structured. The result was a high-heat baked cheesecake that developed a dark, rustic crust. This “burnt” appearance, initially perhaps a happy accident, became its signature. The contrast between the bitter, caramelized exterior and the sweet, velvety interior was a revelation.
Word of this unique dessert spread from the Basque Country across Spain and eventually around the globe. Its simplicity and profound flavor profile captivated chefs and home bakers alike, turning it into an international sensation and a must-try for any food lover.
The Science of Simplicity: Why This Cheesecake Works
The beauty of the Basque Cheesecake lies in its straightforward ingredient list and a baking technique that leverages simple scientific principles.
- High Heat is Key: Baking at a very high temperature (around 400°F / 200°C) causes two critical things to happen. First, the outside cooks rapidly, forming that characteristic dark crust through the Maillard reaction the same process that browns your steak and toast. Second, the inside heats up quickly, setting the structure while retaining a significant amount of moisture, resulting in the signature creamy, almost pudding-like center.
- No Crust, No Problem: By eliminating the traditional graham cracker or biscuit base, the focus shifts entirely to the rich, cheesy filling. The high heat naturally forms a firm outer layer that acts as a de facto container for the soft interior.
- Embrace the Jiggle: Unlike its dense New York cousin, doneness is not determined by a firm center. The center should still have a pronounced, dramatic jiggle when you shake the pan. The residual heat will continue to cook the cheesecake as it cools slowly, achieving the perfect texture.
The Ultimate Basque Cheesecake Recipe
This recipe stays true to the spirit of the original La Viña version, emphasizing high-quality ingredients and a fearless approach to baking.
Yields: One 8-inch cheesecake
Prep time: 15 minutes
Cook time: 50-60 minutes
Cooling time: 2+ hours (preferably overnight)
Ingredients:
- Cream Cheese: 900g (32 oz), full-fat, at room temperature
- Granulated Sugar: 300g (1 ½ cups)
- Large Eggs: 6, at room temperature
- Heavy Cream: 480ml (2 cups)
- All-Purpose Flour: 40g (⅓ cup), sifted
- Vanilla Extract: 2 teaspoons (or 1 teaspoon vanilla bean paste for extra flavor)
- A pinch of Salt: to enhance the flavors
Essential Equipment:
- 8-inch springform pan
- Parchment paper
- Stand mixer or electric hand mixer
- Large bowl
Step-by-Step Cooking Instructions
Step 1: Prepare the Pan
Preheat your oven to a scorching 425°F (220°C). This high initial temperature is non-negotiable. Take an 8-inch springform pan. Cut two large sheets of parchment paper. Crumple each one into a ball, then smooth them out this makes them more pliable. Press the sheets into the pan, one vertically and one horizontally, ensuring they overlap and cover all sides. The parchment should extend at least 2 inches above the rim of the pan; this is crucial as the cheesecake will rise significantly. Don’t worry about making it look neat the rustic, folded look is part of the charm.
Step 2: Combine the Base
In the bowl of your stand mixer fitted with the paddle attachment (or using a hand mixer), beat the room-temperature cream cheese on medium speed until it is completely smooth and free of lumps. This should take about 2-3 minutes. Scrape down the sides and the bottom of the bowl to ensure everything is incorporated.
Step 3: Incorporate the Sugar
Gradually add the granulated sugar to the smooth cream cheese while mixing on low speed. Once all the sugar is added, increase the speed to medium and beat for another 2-3 minutes until the mixture is smooth and creamy.
Step 4: Add the Eggs (One at a Time)
With the mixer on low, add the eggs one at a time, beating until each egg is just incorporated before adding the next. It’s important not to overmix at this stage, as incorporating too much air can lead to unwanted air pockets. Scrape down the bowl again after the last egg.
Step 5: Finish the Batter
Pour in the heavy cream, vanilla extract, and a pinch of salt. Mix on low speed until the batter is homogenous. Finally, sprinkle the sifted flour over the batter and mix on low until just combined. A few streaks of flour are okay; you can finish mixing with a spatula to avoid overworking the batter. The final batter should be very smooth, liquid, and silky.
Step 6: Bake to Perfection
Pour the batter into the prepared parchment-lined pan. Place the pan in the preheated oven on the middle rack. Bake for 50-60 minutes. The cake will puff up dramatically, and the top will become a very deep, dark brown it should look almost burnt, with blackened spots. This is exactly what you want! The center will still be very jiggly, like Jell-O. If it looks like it’s browning too quickly, do not open the oven door; trust the process.
Step 7: The Crucial Cool Down
Once baked, remove the cheesecake from the oven. It will begin to fall almost immediately—this is normal and creates its unique texture. Let it cool completely in the pan on a wire rack. Once at room temperature, transfer the entire pan to the refrigerator and chill for at least 2 hours, but preferably overnight. This resting period allows the flavors to meld and the center to set to the perfect creamy consistency.
Serving and Storing Your Masterpiece
To serve, gently lift the cheesecake out of the springform pan using the parchment paper. Peel the paper away from the sides. Use a sharp, thin-bladed knife, dipped in hot water and wiped dry between each cut, to slice clean portions.
Serve it slightly chilled or at room temperature. It needs no accompaniment, but a glass of sweet sherry, a dry cider, or a simple berry compote can be a wonderful pairing.
Store any leftovers covered in the refrigerator for up to 5 days. The dark top may soften slightly, but the flavor will remain incredible.
Conclusion: Embrace the Imperfect
The Basque Cheesecake is more than just a dessert; it’s a philosophy. It teaches us that beauty can be found in roughness, that the most profound flavors often come from the simplest techniques, and that sometimes, breaking the rules leads to the most delicious results. So, preheat your oven, embrace the “burn,” and get ready to bake one of the most rewarding and talked-about desserts of our time. Your taste buds will thank you.
