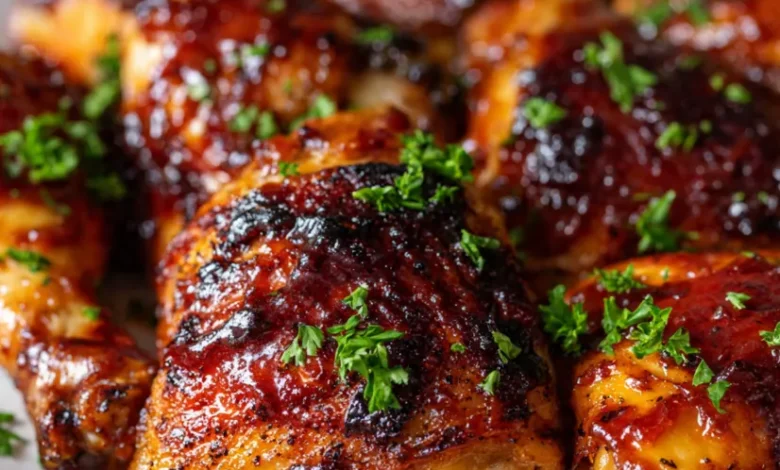
Is there anything more universally comforting and crowd-pleasing than a plate of perfectly baked BBQ chicken? The aroma alone smoky, sweet, and savory promises a delicious, hearty meal. Yet, achieving that ideal balance of juicy, tender meat on the inside with a caramelized, finger-licking-good glaze on the outside can be tricky. Grilling isn’t always an option, and we all know the disappointment of dry chicken or a sauce that burns before the meat cooks through.
Fear not! This ultimate guide is your blueprint for perfect oven-baked BBQ chicken every single time. We’re moving beyond simple instructions to a master technique that guarantees succulent results. Whether you’re a cooking novice or a seasoned home chef, this method will become your go-to for a stress-free, spectacular dinner that feeds a family or impresses guests. Forget the guesswork; let’s unlock the secrets to baking chicken that tastes like it came straight from the pitmaster’s smoker, all from the reliable comfort of your own oven.
Why Oven-Baking is Your Secret Weapon for BBQ Chicken
While grilling offers undeniable charm, your kitchen oven is a powerhouse of consistent, controlled heat. Oven-baking your BBQ chicken provides unmatched advantages:
- Consistent Results: No hot spots or flare-ups. The oven’s even heat surrounds the chicken, cooking it uniformly.
- Juice Lock-In: Starting at a high heat and finishing at a moderate temperature helps seal in those precious natural juices.
- Perfect Glaze Control: Baking allows the sauce to thicken and caramelize slowly without scorching, creating a sticky, glossy coating that clings to every bite.
- Year-Round Feasibility: Rain, snow, or shine your BBQ chicken dreams are never weather-dependent.
Gathering Your Ingredients for Flavorful Success
Great BBQ chicken starts with great ingredients. This recipe focuses on building layers of flavor, from a simple dry rub to a tangy-sweet homemade sauce. Here’s what you’ll need:
For the Dry Rub (The Flavor Foundation):
- 2 tablespoons brown sugar (light or dark)
- 1 tablespoon smoked paprika (key for that “grilled” flavor)
- 2 teaspoons garlic powder
- 2 teaspoons onion powder
- 1 teaspoon salt
- 1 teaspoon black pepper
- ½ teaspoon chili powder (adjust for heat preference)
- ½ teaspoon dry mustard
For the Chicken:
- 3-4 pounds of chicken pieces (a mix of bone-in, skin-on thighs and drumsticks is ideal for juiciness)
- 1 tablespoon olive oil or avocado oil
For the Simple Homemade BBQ Sauce (Optional but Recommended):
- 1 cup ketchup
- ¼ cup apple cider vinegar
- ¼ cup brown sugar
- 2 tablespoons molasses or honey
- 1 tablespoon Worcestershire sauce
- 1 teaspoon Dijon mustard
- ½ teaspoon garlic powder
- ½ teaspoon onion powder
- Salt and pepper to taste
*You can substitute with 1 ½ cups of your favorite store-bought sauce if you’re short on time.*

Step-by-Step Guide to Perfect Oven Baked BBQ Chicken
Follow these numbered steps carefully. Patience and technique are your best tools here.
Step 1: Prep & Preheat.
Pat your chicken pieces completely dry with paper towels. This is a non-negotiable step for getting crispy skin. Remove any excess moisture. While you prepare the rub, preheat your oven to 425°F (220°C). Place a wire rack inside a large, rimmed baking sheet. The rack is crucial—it allows hot air to circulate around the chicken, preventing the bottom from steaming in its own juices.
Step 2: Create & Apply the Dry Rub.
In a small bowl, mix all the dry rub ingredients thoroughly. Drizzle the olive oil over the dried chicken and massage it lightly to coat all pieces. This helps the rub adhere. Generously sprinkle the spice mixture over every surface of the chicken, rubbing it into the skin and crevices. Don’t be shy!
Step 3: The Initial High-Heat Bake.
Arrange the seasoned chicken pieces skin-side up on the prepared wire rack. Place the baking sheet in the preheated 425°F oven on the middle rack. Bake for 25 minutes. This initial blast of high heat will render some of the fat, crisp up the skin, and start the cooking process with a beautiful color.
Step 4: Prepare Your BBQ Sauce.
While the chicken bakes, combine all the sauce ingredients in a small saucepan. Whisk over medium-low heat for 5-7 minutes until smooth, slightly thickened, and heated through. Taste and adjust seasoning. Set aside to cool slightly.
Step 5: Lower, Slow, and Saucy Finish.
After 25 minutes, reduce the oven temperature to 375°F (190°C). Carefully remove the baking sheet. Using a basting brush, generously coat the top and sides of each chicken piece with your BBQ sauce. Return the sauced chicken to the oven and bake for an additional 20-25 minutes.
Step 6: The Final Glaze.
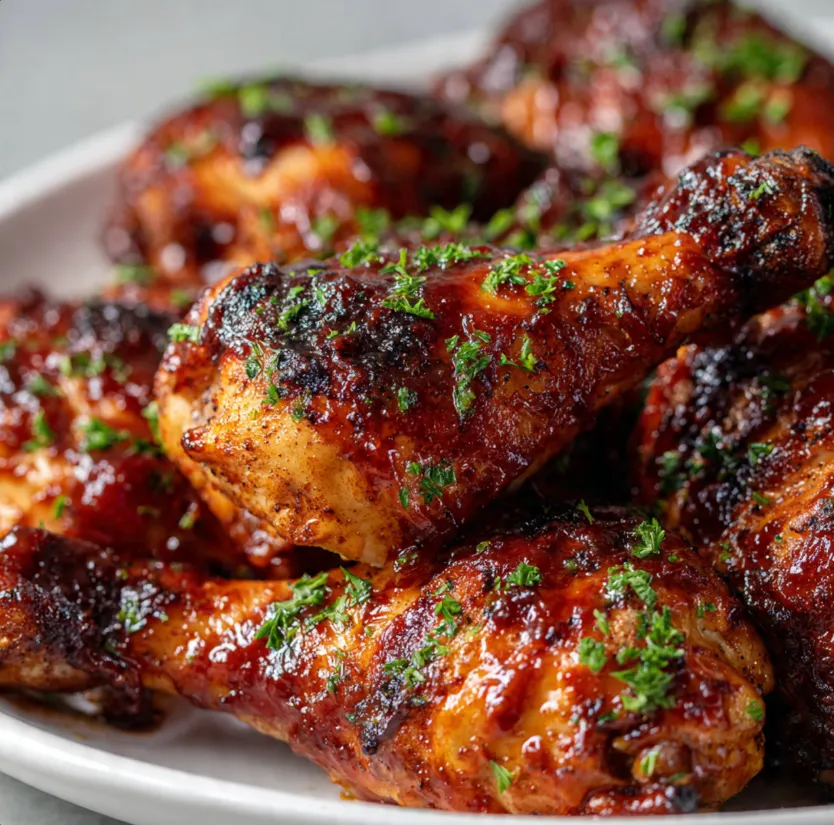
For a perfect, restaurant-quality finish, brush on a second, final layer of sauce. Switch your oven to broil/grill on HIGH. Place the chicken back in the oven, about 6 inches from the broiler element. Watch it CLOSELY for 2-4 minutes, just until the sauce is bubbly, set, and slightly caramelized in spots. This happens quickly, so don’t walk away!
Step 7: Rest and Serve.
Once out of the oven, let the chicken rest on the rack for 5-10 minutes. This allows the juices to redistribute throughout the meat, ensuring every bite is moist. Garnish with fresh chopped parsley or cilantro if desired.

Pro Tips for Guaranteed Perfection
- Chicken Choice Matters: Bone-in, skin-on dark meat (thighs, drumsticks) is far more forgiving and stays juicier than lean breast meat. For breasts, reduce the initial high-heat time by 5-7 minutes to prevent drying out.
- Don’t Skip the Wire Rack: This is the single best tip for achieving crispy skin all over. If you don’t have one, you can place the chicken directly on foil-lined baking sheets, but flip halfway through cooking.
- Sauce Timing is Key: Adding sauce too early (before the skin has crisped) can result in a soggy exterior. The two-stage saucing method outlined here is foolproof.
- Use a Thermometer: For absolute certainty, chicken is safely and perfectly cooked when a meat thermometer inserted into the thickest part (not touching bone) reads 165°F (74°C).
- Make it Ahead: The dry rub can be mixed days in advance. The sauce can be made and refrigerated for up to a week, allowing flavors to meld beautifully.
- Customize Your Sauce: Love heat? Add a pinch of cayenne or a diced chipotle in adobo. Prefer a tangier kick? Increase the apple cider vinegar by a tablespoon.
Serving Suggestions & Final Thoughts
Your masterpiece is ready! This perfect oven baked BBQ chicken pairs wonderfully with classic comfort sides: creamy coleslaw, baked beans, cornbread, mac and cheese, or a simple potato salad. The leftovers (if you have any!) are fantastic shredded for sandwiches, salads, or tacos the next day.
Mastering this recipe is about understanding the why behind each step. By controlling the oven temperature, using a rack, and timing your saucing, you’ve learned a technique that applies to many other dishes.
So, preheat that oven and gather your ingredients. The path to incredibly juicy, flavorful, and crispy oven baked BBQ chicken is clear. It’s time to roll up your sleeves, get a little saucy, and create a meal that will have everyone asking for seconds. Happy baking