The Ultimate Curried Rice Salad Recipe: A Delicious Vegan Twist
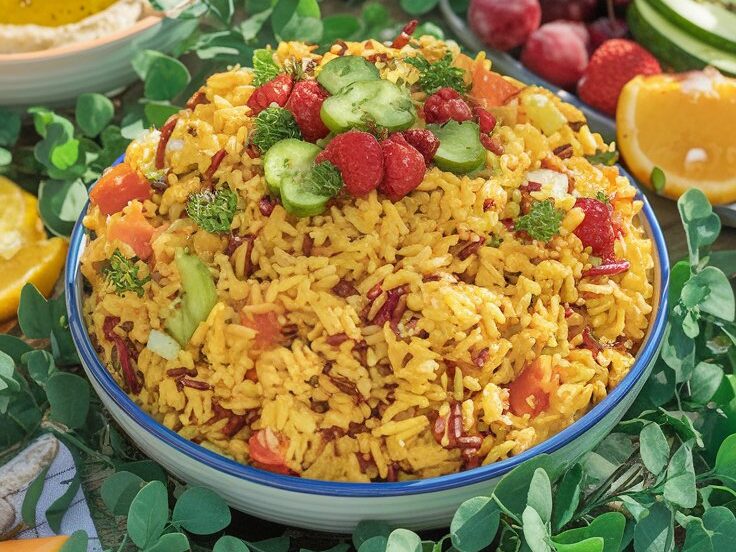
Rice salads are the perfect blend of texture, flavor, and convenience, and a curry rice salad takes it to the next level. Whether you’re looking for a refreshing vegan salad for summer or an exciting side dish for your next dinner party, this curried rice salad recipe is just what you need. Packed with vibrant curry flavors, crunchy vegetables, and sweet raisins, this salad is easy to make, versatile, and utterly delicious.
Read on, and you’ll discover a recipe that’s perfect for meal prep, ideal for potlucks, and can easily be made ahead of time. This guide will walk you through every step, from choosing the right type of rice to creating the perfect curry dressing that will elevate your rice salad to new heights!
1. What is a Curried Rice Salad?
A curried rice salad is a vegan salad made with rice, often brown rice or basmati rice, tossed with a zesty curry dressing. It’s a flavorful blend of savory and slightly sweet elements, thanks to the addition of raisins or other dried fruits. This salad typically features crunchy vegetables, aromatic onions, and fresh herbs, making it the perfect side dish or light lunch.
2. Why You’ll Love This Curry Rice Salad
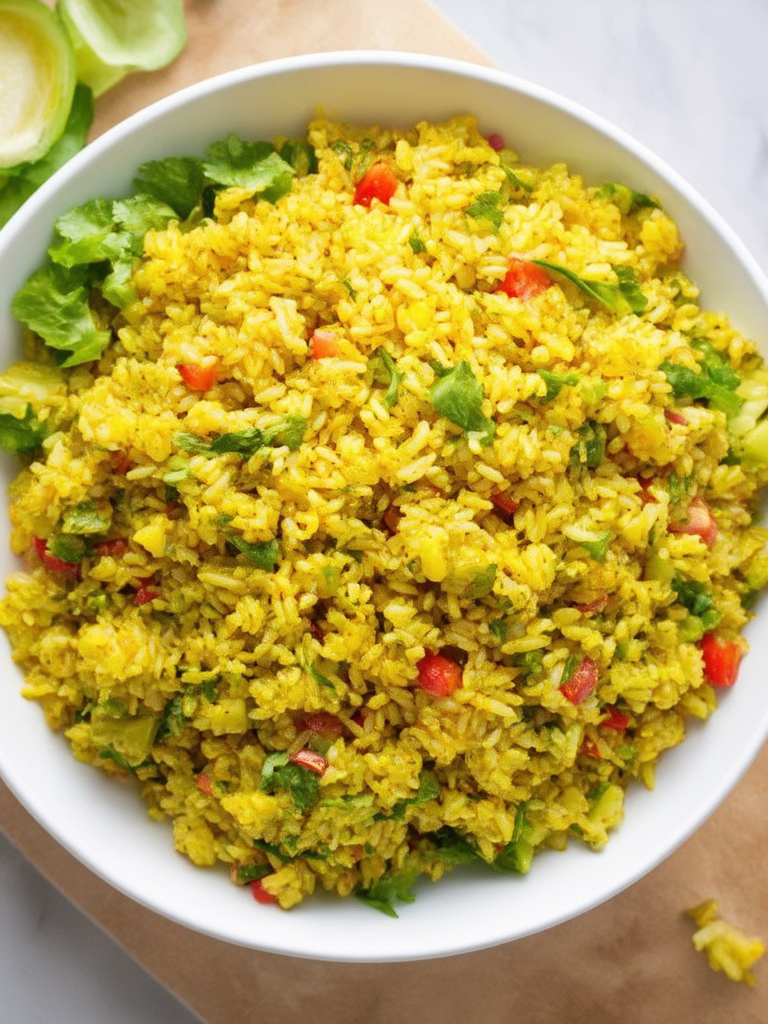
This rice salad hits all the right notes for both flavor and texture. With the mild curry flavor coming through in every bite, balanced by the sweetness of raisins and the crunchiness of finely chopped vegetables, it’s the perfect summer dish.
Why read on?
- Easy to prepare: You can make it ahead and refrigerate it until you’re ready to serve.
- Vegan-friendly: Completely plant-based and perfect for those who want to add more nutritious vegan options to their diet.
- Perfect for potlucks or BBQs: Serve it cold or at room temperature, making it an ideal side dish for parties or picnics.
3. Ingredients for Curried Rice Salad Recipe
Here’s what you’ll need to make this delectable curried rice salad recipe:
- 2 cups cooked brown rice (you can also use wild rice or basmati rice)
- 1/2 cup raisins (or substitute with dried cranberries)
- 1/2 cup finely diced red onion
- 1/2 cup chopped green onions
- 1 cup frozen peas, thawed
- 1/4 cup finely chopped parsley
- 1/4 cup fresh mint, chopped (optional)
- 1/2 cup chopped celery (for added crunch)
For the curry dressing:
- 3 tbsp olive oil
- 1 tbsp curry powder
- 1 tbsp rice vinegar
- 1 tsp Dijon mustard
- Salt and pepper to taste
- Juice of half a lemon (for a tangy kick)
4. How to Make Curried Rice Salad
Step-by-Step Preparation:
- Cook the Rice: Start by cooking your brown rice or basmati rice according to the package instructions. Let it cool to room temperature or refrigerate it if you plan on making this salad ahead of time.
- Make the Curry Dressing: In a small bowl, whisk together the olive oil, curry powder, add the rice vinegar, Dijon mustard, lemon juice, and salt and pepper. Set aside.
- Combine Salad Ingredients: In a large mixing bowl, combine the cooked rice, raisins, frozen peas, onions, parsley, and celery.
- Toss with Dressing: Pour the curry dressing over the rice mixture and toss gently to combine.
- Chill and Serve: Transfer the salad to a serving bowl and refrigerate for at least 30 minutes to allow the flavors to meld. Before serving, garnish with extra parsley or mint.
5. What Type of Rice Should You Use?
The key to a great rice salad is choosing the right type of rice. Brown rice works best due to its firm texture and nutty flavor, but you can also experiment with other grain rice options like wild rice or basmati rice. If you’re in a hurry, white rice can be used, but it won’t have the same depth of flavor or texture as brown rice or wild rice.
6. The Perfect Curry Dressing
A stellar curry rice salad hinges on its dressing. The bold flavor of curry powder, combined with the acidity of rice vinegar and the richness of olive oil, creates a dressing that perfectly complements the rice salad. Make sure to whisk the dressing thoroughly so that all the ingredients are well emulsified, ensuring each grain of rice is coated with flavor.
7. Adding Crunch and Sweetness: Vegetables and Raisins
To make the texture pop, adding finely diced onions, celery, and frozen peas creates a beautiful contrast to the soft rice. The sweetness of raisins (or dried cranberries) brings an unexpected but welcome burst of flavor, perfectly balancing the curry flavor. You can even toast them in a dry pan for added complexity.
8. Can You Make Curried Rice Salad Ahead of Time?
Absolutely! This curried rice salad recipe is even better when made a day ahead. The flavors develop and deepen as the salad rests in the fridge. You can make a big batch and enjoy it throughout the week for lunch or dinner. Just make sure to let the rice cool completely before adding it to the salad, as hot rice can make the salad soggy.
9. Tips for Customizing Your Rice Salad
- Swap the raisins for dried cranberries or other dried fruits like apricots for a different kind of sweetness.
- Experiment with herbs: Add some fresh cilantro or mint for a vibrant, herbal note.
- For extra protein, toss in some chickpeas or baked tofu.
- If you want a lighter version, use less oil in the curry dressing.
10. Serving Suggestions: When and How to Serve This Rice Salad
This vegan salad is perfect for:
- Potlucks and BBQs: Since it’s served cold or at room temperature, it’s ideal for gatherings.
- Light lunches: Enjoy it as a standalone meal during the hot summer months.
- Side dish: Serve it as an accompaniment to grilled vegetables or your favorite vegan main course.
11. How to Store Leftovers
Leftover curried rice salad can be stored in an airtight container in the refrigerator for up to 4 days. The flavors only get better as the days go by, making it a great option for meal prep.
12. Reader Interactions
We’d love to hear how your rice salad turned out! Leave a comment below or share your twist on this recipe.
13. Nutritional Information and Health Benefits
This curry rice salad is packed with nutrients:
- Brown rice provides fiber and keeps you full for longer.
- Olive oil and peas offer healthy fats and protein.
- Onions and parsley bring a dose of vitamins and antioxidants.
14. FAQs About Curried Rice Salad
- Can I use white rice instead of brown rice? Yes, but the brown rice or wild rice provides more texture and flavor.
- Is this salad gluten-free? Yes, this recipe is naturally gluten-free as long as all your ingredients are certified gluten-free.
- Can I add nuts for extra crunch? Absolutely! Toasted almonds or cashews work beautifully.
- Can I make this salad spicy? Add a pinch of cayenne pepper or chili flakes to the dressing for a spicy kick.
- How long does this salad last in the fridge? Up to 4 days in an airtight container.
15. Final Thoughts and Recipe Card
This curried rice salad recipe is a must-try for anyone looking for an easy salad recipe that’s vegan, nutritious, and packed with flavor. Whether you’re bringing it to a potluck or enjoying it at home, it’s sure to become a favorite. Love this recipe? Save it for later and share it with friends!
- Easy to make ahead.
- Flavorful and packed with texture.
- Perfect for warm days or meal prep.