Irresistible Salted Caramel Apple Tarts Recipe Perfect for Fall Desserts and Sweet Treats

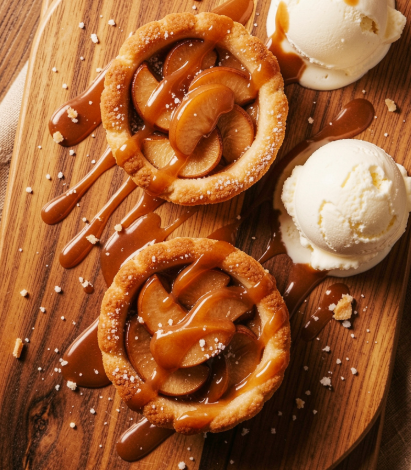
There’s something about the combination of tender, spiced apples and rich, buttery caramel that feels like autumn in a single bite. When you add a sprinkle of flaky sea salt to the mix, you create something truly magical a dessert that’s both comforting and sophisticated, familiar yet exciting.
These salted caramel apple tarts have become my go-to fall dessert for good reason. They’re stunning enough to serve at holiday gatherings, yet simple enough to whip up on a cozy weekend afternoon. The flaky, buttery crust provides the perfect vehicle for sweet-tart apples and that glorious salted caramel that ties everything together.
Move over, apple pie these individual tarts are here to steal the show. Whether you’re hosting Thanksgiving dinner, looking for a showstopping sweet treat for a fall party, or simply craving something special to enjoy with your afternoon coffee, this recipe delivers every single time.
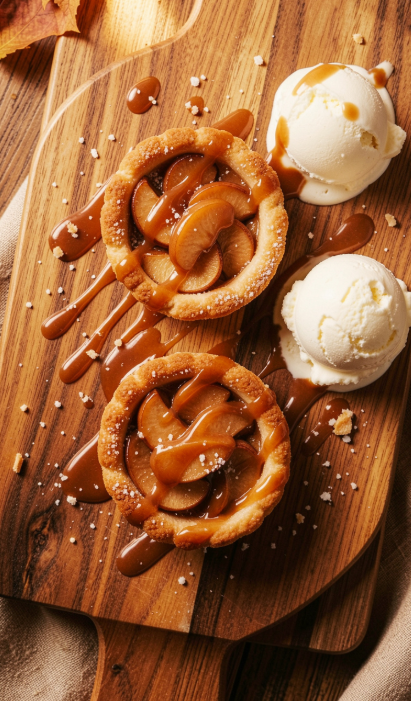
Irresistible Salted Caramel Apple Tarts Recipe Perfect for Fall Desserts and Sweet Treats
There's something about the combination of tender, spiced apples and rich, buttery caramel that feels like autumn in a single bite. When you add a sprinkle of flaky
Ingredients
- For the Tart Pastry
- ½ cups all-purpose flour
- ¼ cup granulated sugar
- ¼ teaspoon salt
- ¼ cup unsalted butter, cold and cubed
- egg yolk
- –6 tablespoons ice-cold water
- For the Apple Filling
- large apples (Honeycrisp or Granny Smith work beautifully)
- ⅓ cup brown sugar
- Juice of 1 lemon
- teaspoons ground cinnamon
- teaspoons vanilla extract
- tablespoons unsalted butter, cut into small pieces
- Pinch of granulated sugar for topping
- For the Salted Caramel Sauce
- cup granulated sugar
- tablespoons unsalted butter
- ½ cup heavy cream
- teaspoon flaky sea salt (adjust to taste)
Table of Contents
Recipe Overview
- Prep Time: 20 minutes
- Cook Time: 45 minutes
- Total Time: 1 hour 5 minutes (plus cooling)
- Servings: 6-8 tarts (depending on size)
- Cuisine: American
- Course: Dessert
- Calories (Approximate): 360-420 per tart
Why You’ll Love This Recipe
- Perfect Balance of Sweet and Salty: The rich caramel and sweet apples meet a subtle saltiness that elevates every bite.
- Beautiful Presentation: These tarts look like they came from a fancy bakery, but they’re surprisingly simple to make.
- Flexible & Adaptable: You can use store-bought dough for a quick version or make the crust from scratch for extra flakiness.
- Great for Any Occasion: These tarts are perfect for fall gatherings and festive dinners.
- Pairs Beautifully: Serve warm with vanilla ice cream or whipped cream for the ultimate indulgence.
Ingredients
For the Tart Pastry
- 1½ cups all-purpose flour
- ¼ cup granulated sugar
- ¼ teaspoon salt
- ¼ cup unsalted butter, cold and cubed
- 1 egg yolk
- 5–6 tablespoons ice-cold water
For the Apple Filling
- 4 large apples (Honeycrisp or Granny Smith work beautifully)
- ⅓ cup brown sugar
- Juice of 1 lemon
- 2 teaspoons ground cinnamon
- 2 teaspoons vanilla extract
- 2 tablespoons unsalted butter, cut into small pieces
- Pinch of granulated sugar for topping
For the Salted Caramel Sauce
- 1 cup granulated sugar
- 6 tablespoons unsalted butter
- ½ cup heavy cream
- 1 teaspoon flaky sea salt (adjust to taste)
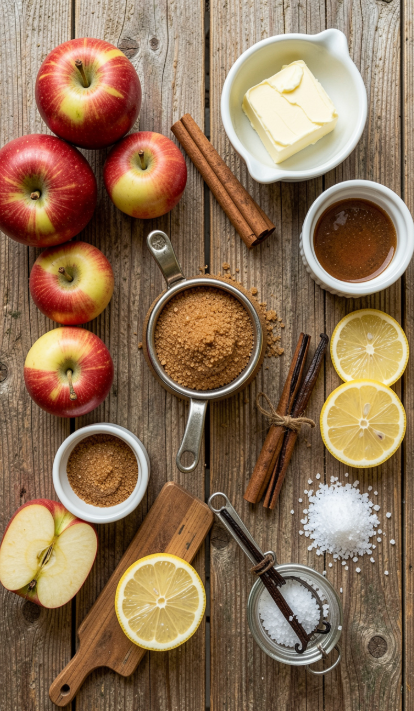
Ingredient Notes
Apples: Choose a firm, crisp apple that will hold its shape during baking. My favorites are Cosmic Crisp, Honeycrisp, and Granny Smith. Save soft or mealy apples like Red Delicious for other uses.
Caramel Sauce: Making your own caramel is easier than you might think, but you can absolutely use store-bought salted caramel sauce if you’re short on time.
Tart Crust: If you don’t have tart pans, you can make this in a standard pie plate. Using pre-made puff pastry also works beautifully.
Pecans Optional: This recipe is delicious with or without added nuts.
Step-by-Step Instructions
1. Make the Tart Pastry
In a food processor, pulse together the flour, sugar, and salt. Add the cold butter cubes and pulse until the mixture resembles coarse crumbs. Add the egg yolk and pulse until combined. Add ice-cold water one tablespoon at a time, pulsing after each addition, until the dough just comes together.
Turn the dough out onto a lightly floured surface, knead gently into a ball, flatten into a disk, wrap in plastic, and refrigerate for 30 minutes.
2. Prepare the Apples
While the dough chills, peel and core the apples, then slice them thinly (about ¼-inch thick). Place the slices in a large bowl and toss with lemon juice, brown sugar, cinnamon, and vanilla. Let them sit for 15–20 minutes to release some of their juices.
3. Roll and Shape the Tarts
Preheat your oven to 375°F (190°C) . On a lightly floured surface, roll the chilled dough to about ¼-inch thickness. Cut into circles using a 4–6 inch round cutter.
Press each dough circle into individual tart pans or place them on a parchment-lined baking sheet for a rustic free-form version.
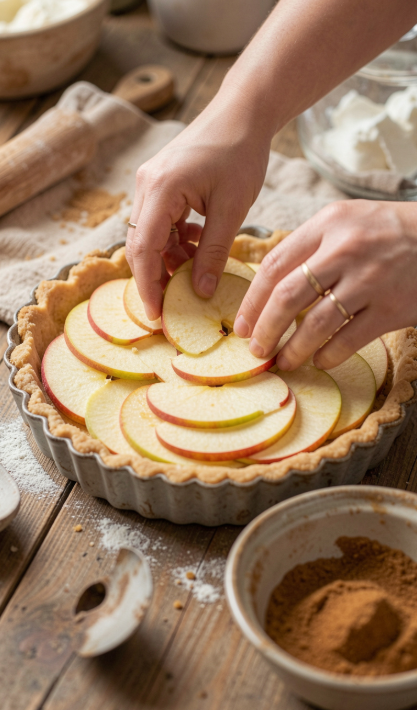
4. Arrange the Apples
For the prettiest presentation, arrange the apple slices in overlapping concentric circles, starting from the outside and working toward the center. Stand them up with the rounded edge on top for a stunning look. Sprinkle with a little granulated sugar and dot with butter pieces.
5. Make the Salted Caramel
While the tarts bake, make the caramel sauce. In a medium saucepan over medium heat, melt the granulated sugar, stirring constantly until it turns a deep amber color.
Remove from heat and carefully whisk in the butter until smooth (it will bubble vigorously). Slowly pour in the heavy cream while whisking continuously. Stir in the sea salt and set aside to cool slightly.
6. Bake the Tarts
Bake the tarts for 20 minutes, then remove from the oven and drizzle generously with the salted caramel sauce. Return to the oven and bake for another 20–25 minutes, until the apples are tender and the pastry is golden brown and bubbling.
7. Finish and Serve
Let the tarts cool for at least 10 minutes before removing from the pans. Sprinkle with additional flaky sea salt if desired. Serve warm or at room temperature with a scoop of vanilla ice cream or whipped cream.
Expert Tips
- Slice Apples Evenly: Aim for slices that are thin but not paper-thin. Even slices ensure they cook uniformly.
- Chill the Dough Well: This prevents the crust from shrinking during baking.
- Don’t Rush the Caramel: Let the sugar melt slowly over medium heat rushing can cause burning. The caramel is ready when it turns a beautiful amber color.
- Reserve Extra Caramel: Make a little extra caramel sauce to drizzle over individual servings your guests will thank you.
- Adjust Salt to Taste: Start with less salt and add more gradually. Different caramel sauces vary in saltiness.
Variations
- Nutty Apple Tart: Add chopped pecans or walnuts between the apple layers for extra crunch.
- Spiced Caramel: Add a pinch of cinnamon or cardamom to the caramel sauce for a warm, aromatic twist.
- Cheese-Enhanced: Spread a thin layer of cream cheese or mascarpone on the crust before adding apples.
- Pear & Apple: Substitute half the apples with ripe pears for a softer, more floral flavor.
- Gluten-Free: Use a gluten-free tart crust made with almond or oat flour.
Storage Instructions
Store leftover tarts at room temperature, covered with plastic wrap, for about 3 days. For best results, reheat in the oven before serving to restore the crispness of the pastry.
Reheating Tips
Reheat tarts in a 350°F oven for 5-7 minutes until warmed through. Avoid microwaving unless you don’t mind a soft, less crispy crust.
Common Mistakes to Avoid
- Burning the Caramel: Keep stirring and never walk away from the stove while caramel is cooking.
- Overfilling the Pastry: Too much filling can make the tarts soggy and messy.
- Using Overly Sweet Apples: The caramel is already sweet, so balance it with tart apples like Granny Smith.
- Skipping the Egg Wash: A light egg wash on the pastry edges helps them become beautifully golden and crisp.
What to Serve With
- Vanilla Ice Cream: The classic pairing—warm tart meets cold, creamy ice cream.
- Whipped Cream: A dollop of freshly whipped cream adds lightness.
- Crème Fraîche: For a tangy contrast to the sweet caramel.
- Coffee or Spiced Tea: The perfect warm beverage to accompany your fall dessert.
Frequently Asked Questions
Q: Can I use store-bought dough?
A: Absolutely! Puff pastry or store-bought pie dough works wonderfully and cuts your prep time significantly.
Q: What if I don’t have tart pans?
A: You can make these as free-form galettes on a baking sheet, or use a standard pie plate.
Q: How do I keep the crust from getting soggy?
A: Make sure to arrange the apples in a single layer and dot with butter this helps them caramelize rather than release too much juice.
Q: What’s the best way to slice the apples?
A: Use a sharp knife or a mandoline for even, thin slices that will cook uniformly.
Q: Can I make these ahead of time?
A: Yes! The tart crust can be prepped and blind-baked a day in advance. The assembled tarts are best served on the day they’re made.
Q: How do I reheat leftovers without making them soggy?
A: Reheat in a 350°F oven for 5-7 minutes rather than using a microwave.
Conclusion
These salted caramel apple tarts are the kind of dessert that makes people pause mid-bite and close their eyes. They capture the essence of fall in every single forkful warm, spiced apples, buttery, flaky pastry, and that rich, salted caramel that brings everything together.
Whether you’re making them for a holiday gathering, a cozy dinner party, or just because you’re craving something special, these tarts are guaranteed to impress. They’re surprisingly simple to make, stunning to look at, and absolutely delicious to eat.
So go ahead gather those crisp apples, make that luscious caramel, and create a dessert that will have everyone asking for the recipe. And don’t forget that scoop of vanilla ice cream; trust me, you won’t regret it!
Have you made these Salted Caramel Apple Tarts? I’d love to hear how they turned out! Share your photos, tips, and any creative variations in the comments below. Happy baking!