A Bite of Heaven: Your New Favorite No-Bake Dessert
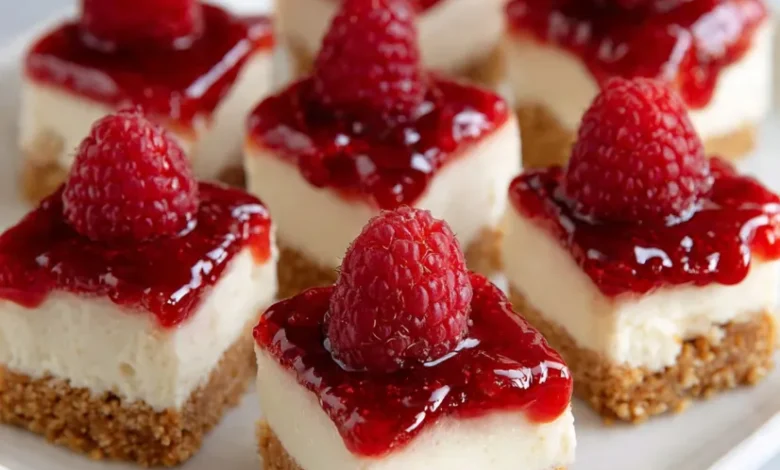
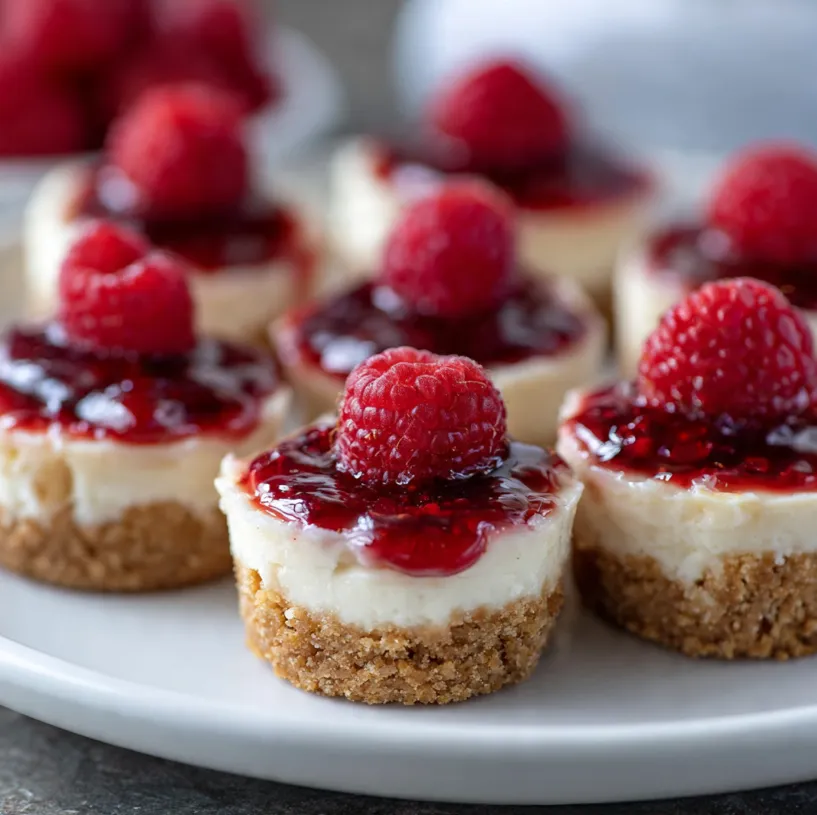
Are you dreaming of a show-stopping dessert that requires zero oven time, minimal effort, and delivers maximum flavor? Look no further than these irresistible No-Bake Raspberry Cheesecake Bites. Imagine a buttery, crunchy crust, a layer of luxuriously smooth and tangy cheesecake, all crowned with a vibrant, sweet-tart raspberry topping all in one perfect, pop-in-your-mouth morsel.
Perfect for summer parties, holiday platters, bridal showers, or simply satisfying a sweet craving, these bites are a lifesaver. They come together with just a few simple ingredients and are surprisingly easy to make, even for complete beginners in the kitchen. Let’s dive in and create these delightful little treats that are sure to earn you rave reviews!
Gather Your Ingredients
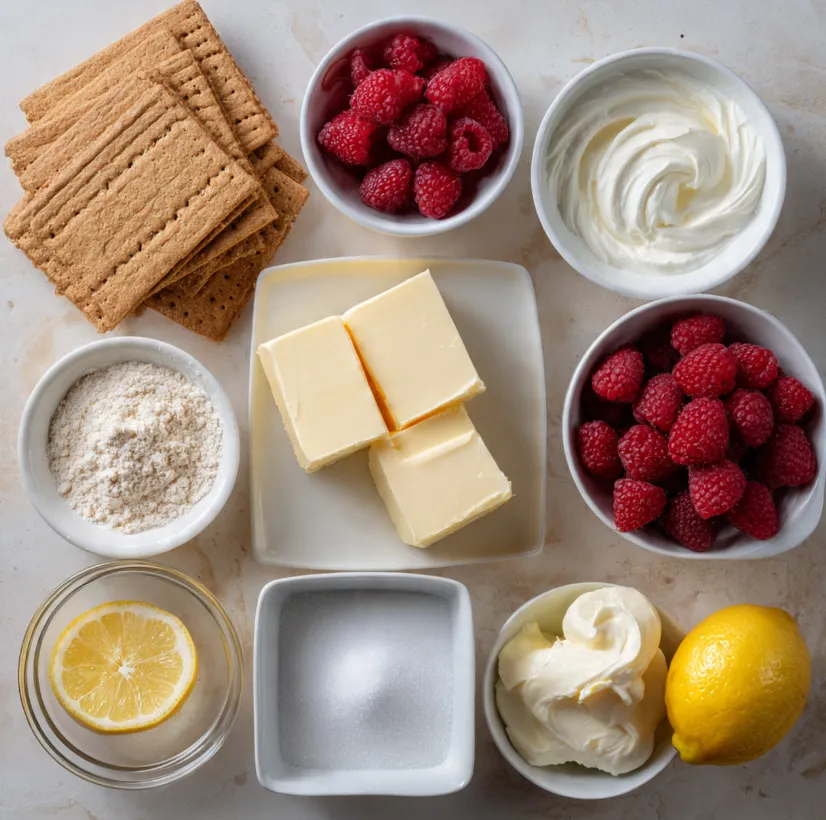
The beauty of this recipe lies in its simplicity. You likely have many of these items in your pantry already. Here’s what you’ll need for about 24 decadent bites:
For the Crust:
- 1 ½ cups (about 150g) graham cracker crumbs (from about 12 full sheets)
- 5 tablespoons (70g) unsalted butter, melted
- 2 tablespoons granulated sugar
For the Cheesecake Filling:
- 16 ounces (450g) full-fat cream cheese, softened to room temperature
- ⅓ cup (65g) granulated sugar
- 1 teaspoon pure vanilla extract
- 1 tablespoon freshly squeezed lemon juice
- ¾ cup (180ml) heavy whipping cream, cold
For the Raspberry Topping:
- 2 cups (about 250g) fresh or frozen raspberries (if frozen, do not thaw)
- ¼ cup (50g) granulated sugar
- 1 tablespoon lemon juice
- 1 teaspoon cornstarch mixed with 1 tablespoon cold water (slurry)
Equipment:
- A standard 12-cup muffin tin (you’ll make these in two batches or use a second tin)
- Paper or silicone cupcake liners
- Electric hand mixer or stand mixer
- Medium bowl, large bowl
- Small saucepan
- Food processor or zip-top bag and rolling pin for crushing crackers
Step-by-Step Preparation Guide
Follow these numbered steps for foolproof, perfect cheesecake bites every single time.
Step 1: Prepare the Pan and Make the Crust
- Line the Pan: Place paper or silicone liners in the cups of your muffin tin. This is crucial for easy removal.
- Make the Crumbs: If you’re starting with whole graham crackers, pulse them in a food processor until you have fine crumbs. Alternatively, place them in a sturdy zip-top bag and crush with a rolling pin.
- Combine: In a medium bowl, mix the graham cracker crumbs, melted butter, and 2 tablespoons of sugar until the mixture resembles wet sand and holds together when pinched.
- Form the Base: Spoon about 1 tablespoon of the crumb mixture into the bottom of each prepared muffin liner. Use the bottom of a small glass or a measuring spoon to press the crumbs down firmly and evenly to create a compact crust. Place the tin in the refrigerator to set while you make the filling.
Step 2: Create the Luxurious Cheesecake Filling
- Beat the Cream Cheese: In a large bowl using an electric mixer, beat the softened cream cheese on medium speed until completely smooth and creamy, about 2 minutes. Scrape down the sides of the bowl.
- Add Sugar & Flavor: Add the ⅓ cup sugar, vanilla extract, and lemon juice. Beat again on medium speed until fully combined and smooth.
- Whip the Cream: In a separate, clean bowl, beat the cold heavy whipping cream on medium-high speed until stiff peaks form. Tip: Ensure your bowl and beaters are cold for best results.
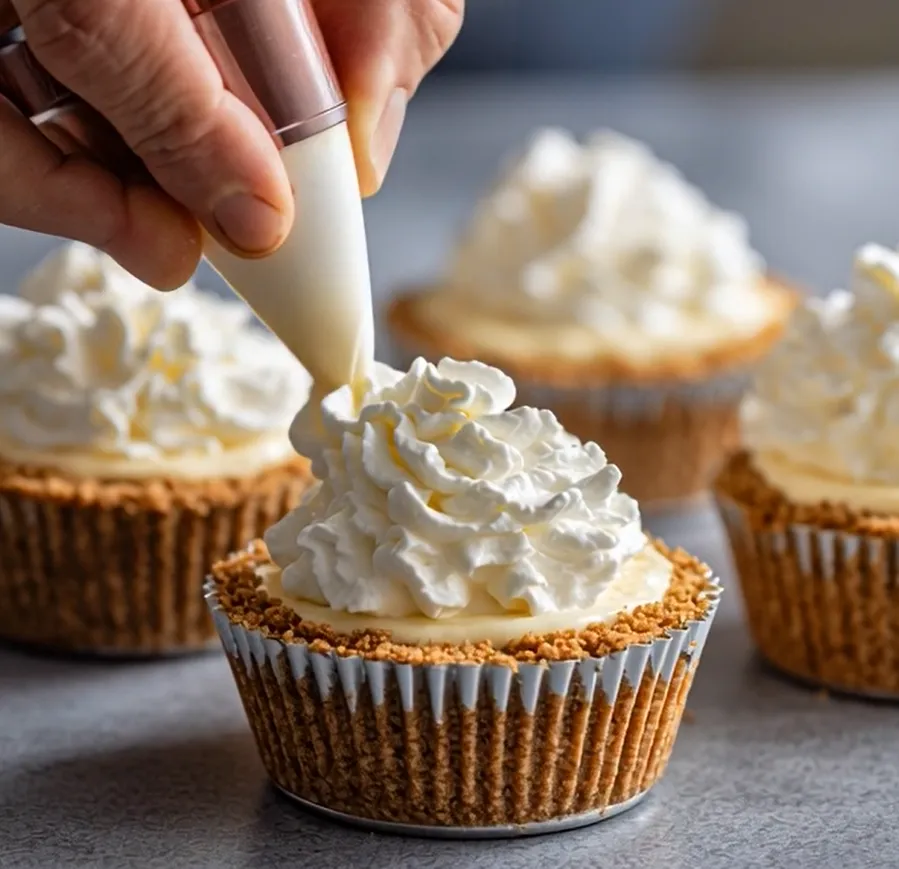
- Fold it Together: Gently fold the whipped cream into the cream cheese mixture using a spatula. Use a folding motion (cutting through the center and turning over) until no white streaks remain. Be gentle to keep the mixture light and airy.
Assembling the Layers
- Pipe or Spoon: Remove the crust-lined pan from the fridge. Spoon or pipe the cheesecake filling evenly over each crust, filling each liner about ¾ full. Smooth the tops with the back of a spoon or an offset spatula.
- Chill Firmly: Carefully transfer the muffin tin to the freezer. Let the bites chill for at least 1 hour (or up to 2) to become very firm before adding the topping. This prevents the raspberry layer from sinking.
Step 3: Make the Vibrant Raspberry Topping
- Cook the Berries: While the bites are setting, combine the raspberries, ¼ cup sugar, and 1 tablespoon lemon juice in a small saucepan over medium heat. Cook, stirring frequently and gently mashing the berries, until they release their juices and the sugar dissolves, about 5-7 minutes.
- Thicken the Sauce: Reduce heat to low. Give the cornstarch-water slurry a final stir and add it to the raspberry mixture. Cook, stirring constantly, for another 1-2 minutes until the mixture thickens and becomes glossy.
- Cool Completely: Remove the pan from the heat and let the raspberry topping cool to room temperature. You can speed this up by spreading it on a plate. It will continue to thicken as it cools.
Step 4: The Final Assembly and Setting
- Top the Bites: Once the cheesecake layer is firm and the raspberry topping is cool, spoon a small amount (about 1-2 teaspoons) of the topping over each cheesecake bite.
- Final Chill: Return the pan to the refrigerator (not the freezer) and let the bites chill for at least 4 hours, or preferably overnight. This allows all the layers to set perfectly and the flavors to meld.
Useful Tips for Guaranteed Success
- Room Temperature is Key: Softened cream cheese blends smoothly without lumps. Take it out of the fridge 1-2 hours ahead.
- Crust Variations: Use digestive biscuits, vanilla wafers, or even Oreos (without the filling) for a different crust flavor.
- Berry Swaps: Feel free to use strawberries, blackberries, or a mix! The same cooking method applies.
- For a Clean Slice: For super-sharp edges, use a sharp knife dipped in hot water and wiped dry between cuts.
- Storage: Keep bites covered in the refrigerator for up to 5 days. They can be frozen (without fresh garnish) for up to 2 months. Thaw in the fridge overnight.
- Presentation: Garnish with a fresh raspberry, a mint leaf, or a light dusting of powdered sugar just before serving for a professional touch.
Conclusion: Your Dessert Triumph Awaits!
And there you have it the complete guide to creating stunning No-Bake Raspberry Cheesecake Bites. This recipe proves that you don’t need fancy equipment or baking expertise to create a dessert that looks and tastes like it came from a patisserie. The combination of textures and the balance of sweet, creamy, and tart is simply divine.
So, what are you waiting for? Gather those ingredients, clear a spot in your fridge, and treat yourself and your loved ones to these perfect little bites of joy. Don’t forget to share your beautiful creations and tag us! Once you try them, they’re sure to become a requested favorite for every occasion. Happy no-baking


