Easy Vegan Matcha Cake Recipe: A Delicious, Healthy Twist on Traditional Desserts
If you’re a fan of matcha and are on the hunt for a healthy yet indulgent dessert, you’re in the right place! This vegan matcha cake recipe is easy to follow, completely plant-based, and brings that distinct, vibrant matcha flavor we all love. Whether you’re looking to impress friends or satisfy your matcha cravings at home, this vegan matcha cake will definitely hit the spot. Let’s dive into why this cake recipe is a must-try!
What is Vegan Matcha Cake and Why Should You Try It?
This delicious vegan matcha cake is a light, fluffy, and moist dessert infused with the vibrant taste of matcha powder. By eliminating animal products, you’re left with a plant-based cake that is both healthier and kinder to the environment. The earthy bitterness of the matcha flavor beautifully contrasts the sweetness of the cake, offering a unique flavor profile that’s perfect for dessert lovers and matcha enthusiasts alike.
The Benefits of Using Matcha in Vegan Desserts
Why use matcha? Matcha isn’t just trendy; it’s packed with antioxidants, vitamins, and minerals that support a healthy lifestyle. By incorporating matcha powder into your desserts, you’re adding a dose of nutrition, including caffeine, L-theanine for calm energy, and chlorophyll for detoxification. These benefits make vegan matcha cakes a smart and delicious choice.
What Makes this Cake Recipe Unique?
This recipe stands out because it’s both easy to make and 100% plant-based, offering an accessible option for vegans and non-vegans alike. It’s a healthier alternative to traditional cakes, but with no compromise on taste. This cake uses vegan butter and soy milk to maintain that rich, creamy texture, while the matcha powder adds an unmistakable green tea flavor.
How to Choose the Best Matcha for Baking
When it comes to baking, the quality of your matcha matters. Culinary-grade matcha is ideal for cakes because it has a robust flavor and vibrant green color. Be sure to look for high-quality matcha powder, preferably culinary-grade matcha, as it provides the right balance of flavor and affordability. If you’re after a more refined taste, ceremonial-grade matcha can be used but is pricier.
How to Make Vegan Buttermilk for the Cake
Creating a homemade vegan buttermilk is simple and essential for ensuring your cake is moist and fluffy. All you need is soy milk or another plant milk combined with a tablespoon of apple cider vinegar. This milk mixture helps to replicate the richness and tenderness of traditional buttermilk, keeping your cake light and soft.
Easy Vegan Matcha Cake Recipe Overview
This easy vegan matcha cake recipe is straightforward, requiring basic ingredients and minimal preparation time. You’ll need pantry staples like flour, vegan butter, and soy milk, combined with high-quality matcha powder to create this impressive dessert. The result is a soft and flavorful cake that’s both satisfying and healthy.
Vegan Matcha Cake Ingredients List
- 2 cups all-purpose flour
- 1 cup sugar
- 1 tablespoon culinary-grade matcha powder
- 1 teaspoon baking powder
- 1 teaspoon baking soda
- 1 cup soy milk mixed with 1 tablespoon apple cider vinegar (for vegan buttermilk)
- ½ cup vegan butter, melted
- 1 teaspoon vanilla extract
- Pinch of salt
Step-by-Step Guide to Make Vegan Matcha Cake
- Preheat and Prepare: Preheat your oven to 350°F (175°C). Grease your cake tins and line them with parchment paper.
- Make the Vegan Buttermilk: Combine the soy milk with apple cider vinegar and let it sit for 5 minutes to curdle.
- Mix Dry Ingredients: In a large bowl, whisk together flour, sugar, matcha powder, baking powder, baking soda, and salt.
- Combine Wet Ingredients: Stir in the vegan buttermilk, melted vegan butter, and vanilla extract into the dry ingredients until a smooth cake batter forms.
- Bake: Pour the batter into the prepared cake tins and bake for 25-30 minutes, or until a toothpick comes out clean.
- Cool Completely: Let the cake cool in the tins for 10 minutes, then transfer the cakes to a cake stand to cool completely before frosting.
nutritional breakdown for 100g
Here’s an approximate nutritional breakdown for 100g for this vegan cake, based on typical ingredients used in such a recipe (without frosting):
| Nutrient | Amount per 100g |
|---|---|
| Calories | 270 kcal |
| Carbohydrates | 40 g |
| Sugars | 20 g |
| Fiber | 1 g |
| Protein | 3 g |
| Fat | 10 g |
| Saturated Fat | 2 g |
| Unsaturated Fat | 7 g |
| Sodium | 200 mg |
| Calcium | 25 mg |
| Iron | 1.5 mg |
Note:
- The values will vary based on the exact ingredients you use, such as the brand of vegan butter, type of plant milk, and sugar.
- This calculation excludes frosting. If you add a matcha buttercream, expect the calories and fat content to increase.
For a more precise nutrient table, it’s recommended to use a nutrition calculator based on your specific ingredients and quantities.
Tips to Perfect Your Matcha Cake
- Don’t Overmix: Gently fold the ingredients to prevent overmixing, which can result in a dense cake.
- Sift Your Matcha: Sifting the matcha powder will ensure there are no clumps in the cake batter, leading to a smoother texture.
- Use High-Quality Matcha: To achieve that vibrant green color and bold flavor, be sure to use a high-quality matcha powder.
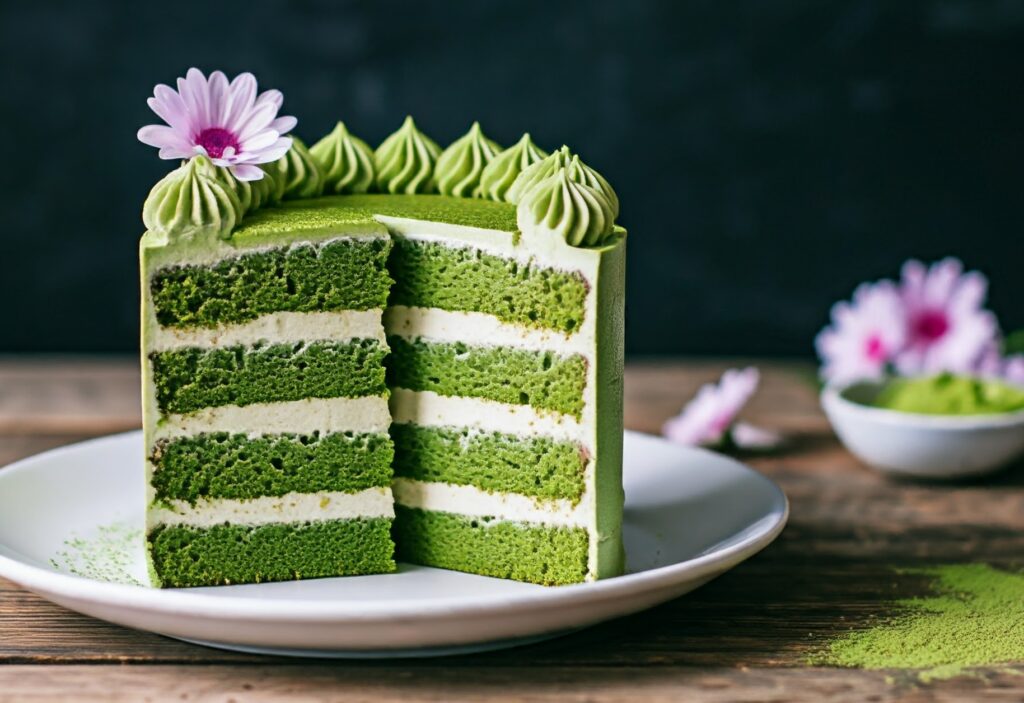
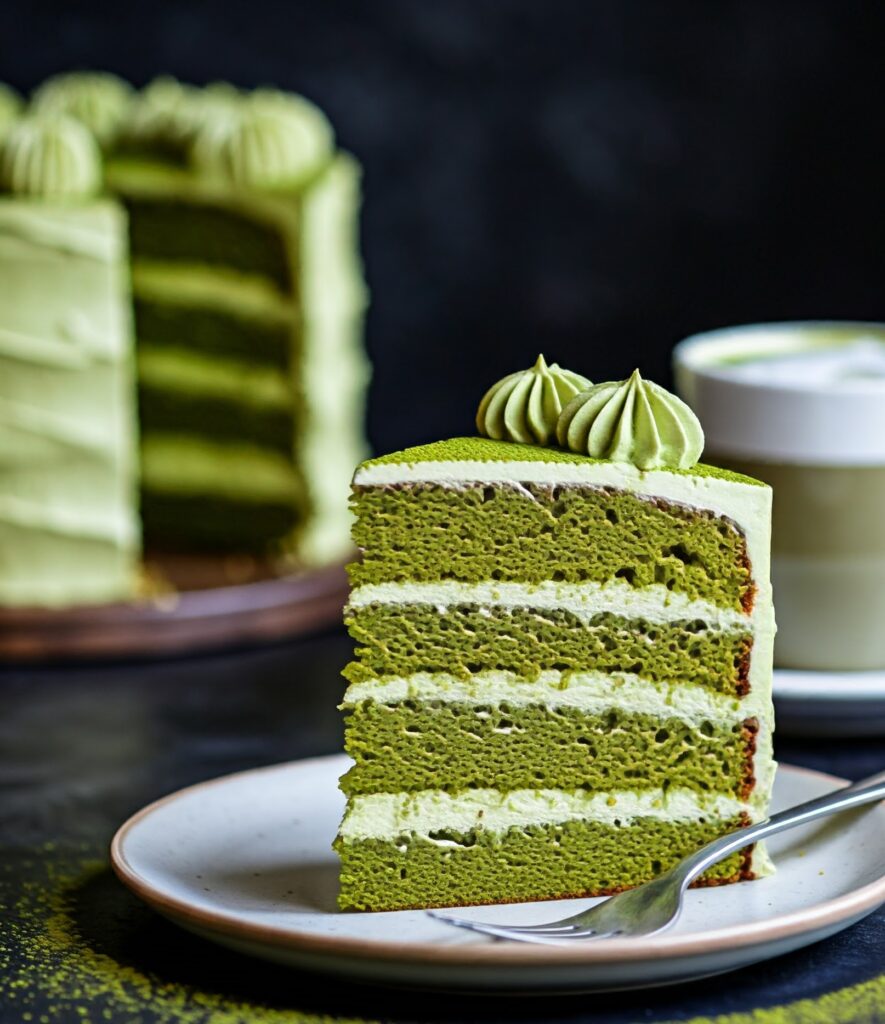
Vegan Matcha Buttercream Frosting
To take your vegan matcha cake to the next level, pair it with a rich matcha buttercream. Here’s how to make it:
Ingredients:
- 1 cup vegan butter, softened
- 3 cups powdered sugar
- 2 teaspoons matcha powder
- 1-2 tablespoons soy milk
Method:
- Cream the Vegan Butter: In a mixing bowl, beat the vegan butter until light and fluffy.
- Add Matcha and Sugar: Gradually add the powdered sugar and matcha powder, beating until fully incorporated.
- Adjust Consistency: Add soy milk as needed to achieve your desired frosting consistency.
- Frost the Cake: Spread a generous layer of matcha buttercream on your cooled cakes and stack them to form an elegant layered dessert.
How to Store and Serve Your Vegan Matcha Cake
This cake stores well! Simply cover it tightly and store it at room temperature for up to 3 days, or refrigerate it for up to 5 days. Before serving, let the cake come to room temperature for the best texture and flavor.
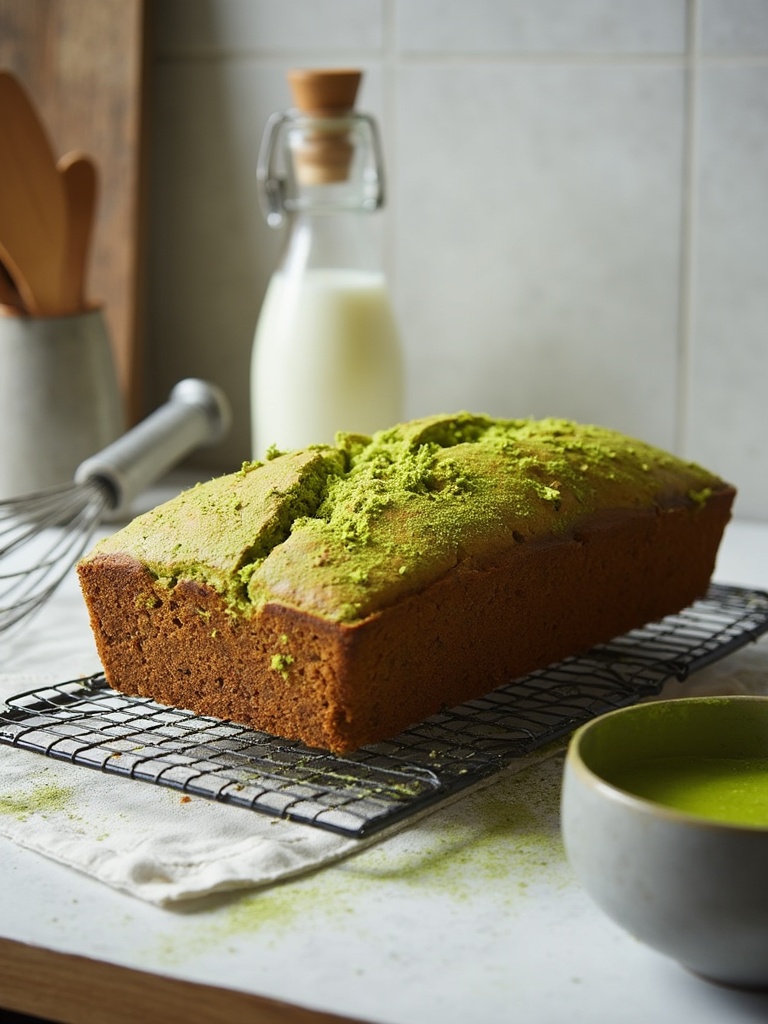
Can You Use This Recipe for a Loaf Cake?
Yes! This recipe can easily be adapted to make a loaf cake. Simply use a loaf pan instead of round cake pans and bake for 40-45 minutes, or until a toothpick comes out clean. A vegan matcha loaf cake makes for a fantastic tea-time treat.
FAQs about Vegan Matcha Cakes
What’s the Best Matcha to Use for This Recipe?
For baking, culinary-grade matcha is perfect. It offers a strong matcha flavor without being overly bitter, making it ideal for cakes.
How Can I Make Vegan Buttermilk?
Simply mix soy milk with apple cider vinegar. This mixture thickens and mimics the texture of traditional buttermilk, ensuring your cake stays soft.
Can I Use Almond Milk Instead of Soy Milk?
Yes, you can substitute soy milk with other plant-based milks like almond or oat milk. However, soy milk tends to give the best results in baking.
Can I Freeze Vegan Matcha Cake?
Absolutely! You can freeze the unfrosted cake layers for up to 3 months. Just make sure to wrap them tightly in plastic wrap before freezing.
Is Sugar Vegan?
Not all sugar is vegan, but many brands offer certified vegan sugar, which is free from bone char processing.
Best Matcha to Use for This Recipe
If you’re wondering what the best matcha is for baking, we recommend using culinary-grade matcha. It’s more affordable than ceremonial grade but still delivers that strong, vibrant green tea flavor that makes matcha cakes so distinctive.
Summary: Key Tips for Making the Perfect Vegan Matcha Cake
- Use high-quality matcha powder for a bold, rich flavor.
- Make sure to sift the matcha and other dry ingredients to avoid lumps.
- Prepare a simple vegan buttermilk to keep the cake moist and fluffy.
- Be gentle with the cake batter to avoid overmixing.
- Let the cake cool completely before frosting with delicious matcha buttercream.
By following these steps, you’ll be well on your way to baking a beautiful and delicious vegan matcha cake that’s sure to impress!


