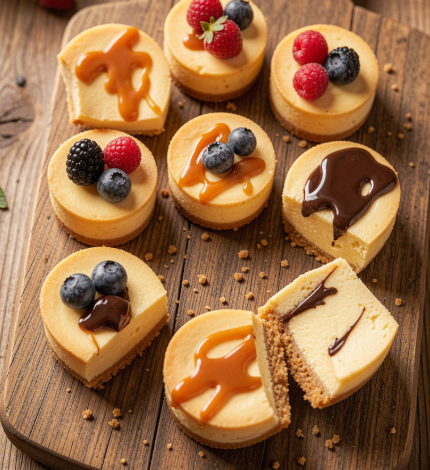
There are moments when you want dessert to feel special, but you don’t want to spend hours in the kitchen or deal with complicated techniques. These Easy Mini Cheesecake Bites are the answer. They’re everything you love about classic cheesecake creamy, tangy, and decadent in a perfectly portioned, no-fuss package. These bite-sized treats are simple to make and irresistibly good. They’re so good, you might just find yourself making them on a random Tuesday just because.
What I love most about this recipe is how approachable it is. No water bath, no springform pan, no cracking worries. Just a buttery graham cracker crust, a silky cream cheese filling, and your choice of toppings all baked in a standard muffin tin. Whether you’re hosting a party, looking for a sweet treat to share, or just want to satisfy a craving, these mini cheesecakes are guaranteed to hit the spot.
Easy Mini Cheesecake Bites: The Perfect No-Fuss Dessert
There are moments when you want dessert to feel special, but you don’t want to spend hours in the kitchen or deal with complicated techniques. These Easy Mini Cheesecake
Table of Contents
Recipe Overview
- Prep Time: 15 minutes
- Cook Time: 15-18 minutes
- Total Time: 2 hours 30 minutes (including chilling)
- Servings: 12 mini cheesecakes
- Cuisine: American
- Course: Dessert
- Calories (Approximate): 210 per cheesecake
Why You’ll Love This Recipe
These mini cheesecake bites are a total game-changer. Here’s why you’ll keep coming back to this recipe:
- Perfectly Portioned: Individual servings mean no slicing, no mess, and easy sharing.
- No Water Bath Required: The smaller size makes them much more forgiving than a full cheesecake.
- Quick to Bake: Ready in under 20 minutes, with minimal prep time.
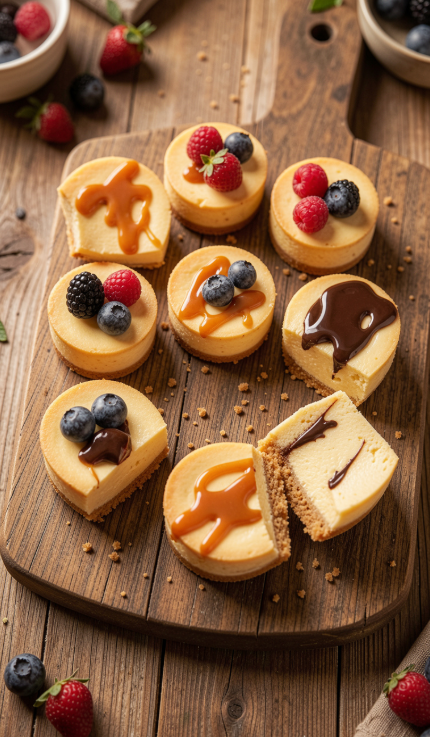
- Endlessly Customizable: Top with your favorite fruits, sauces, or candies.
- Great for Entertaining: They look beautiful on a platter and are easy for guests to grab and enjoy.
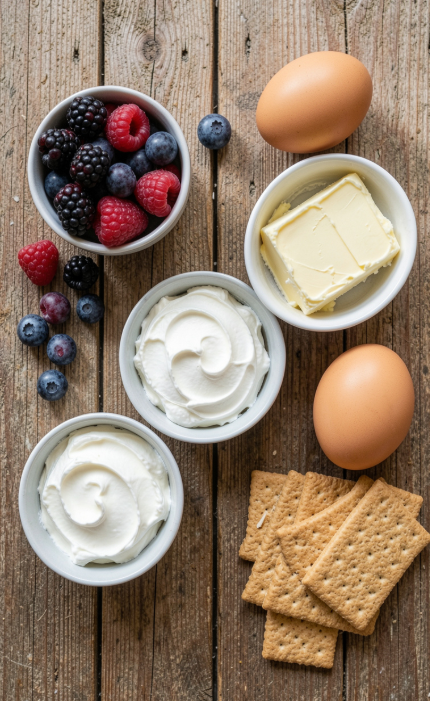
Ingredients
For the Crust:
- 1½ cups graham cracker crumbs
- ¼ cup granulated sugar
- 6 tablespoons unsalted butter, melted
For the Cheesecake Filling:
- 16 ounces cream cheese, softened to room temperature
- ¾ cup granulated sugar
- 2 large eggs, room temperature
- 1 teaspoon vanilla extract
- ½ cup sour cream (or Greek yogurt)
Optional Toppings:
- Fresh berries (strawberries, blueberries, raspberries)
- Cherry pie filling
- Caramel sauce
- Chocolate ganache
- Whipped cream
Ingredient Notes
Cream Cheese: Full-fat cream cheese is essential for achieving a creamy, rich texture. Make sure it’s softened to room temperature before mixing to avoid lumps . Let it sit out for at least an hour before starting.
Graham Cracker Crumbs: You can buy pre-made crumbs or crush your own graham crackers. For the best texture, use a food processor to get fine, even crumbs.
Sour Cream: Adding sour cream (or Greek yogurt) gives the cheesecake a subtle tang and helps keep it moist and creamy . It’s the secret to that classic cheesecake flavor.
Eggs: Room-temperature eggs incorporate more smoothly into the batter. Place them in a bowl of warm water for 10 minutes to bring them to room temperature quickly.
Step-by-Step Instructions
1. Preheat and Prepare
Preheat your oven to 325°F (165°C). Line a 12-cup muffin tin with paper liners. This makes removal easy and keeps the cheesecakes neat.
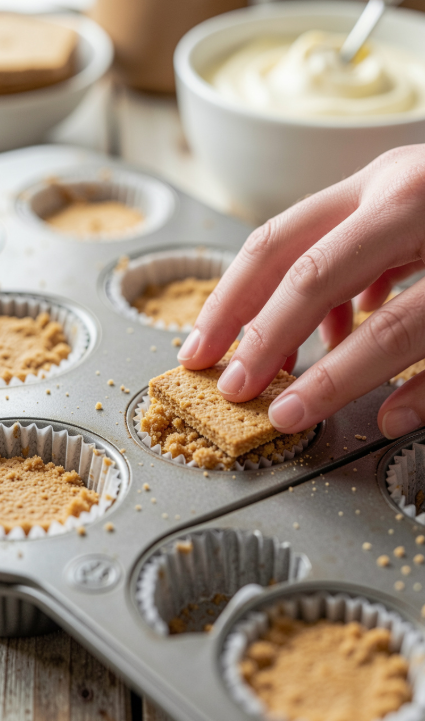
2. Make the Crust
In a small bowl, combine the graham cracker crumbs and sugar. Pour in the melted butter and stir until the mixture resembles wet sand and holds together when pressed . Press about 1½ tablespoons of the mixture firmly into the bottom of each lined muffin cup. Use the bottom of a small measuring cup or your fingers to pack it down tightly . Set aside.
3. Make the Cheesecake Filling
In a large mixing bowl, beat the softened cream cheese with an electric mixer until smooth and creamy, about 2-3 minutes. Scrape down the sides and bottom of the bowl to ensure there are no lumps . Gradually add the sugar and beat until well combined and fluffy. Add the eggs one at a time, beating on low speed after each addition just until incorporated. Be careful not to overmix . Mix in the vanilla extract and sour cream until just combined and smooth.
4. Fill the Muffin Cups
Divide the cheesecake batter evenly among the prepared muffin cups, filling each about ¾ full. The batter will rise slightly as it bakes, so leave a little room.
5. Bake
Bake for 15-18 minutes, or until the edges are set and the centers have a slight jiggle. They will continue to set as they cool. The tops should be pale and smooth not browned.
6. Cool and Chill
Let the cheesecakes cool in the pan on a wire rack for about 15 minutes. Then, transfer them to the refrigerator to chill for at least 2 hours, or ideally overnight. This chilling step is essential for the cheesecakes to set properly and develop their full flavor.
7. Add Toppings and Serve
Once fully chilled, remove the cheesecakes from the muffin tin and peel off the paper liners. Add your desired toppings—fresh berries, caramel sauce, chocolate ganache, or a dollop of whipped cream. Serve and enjoy!
Expert Tips
- Room Temperature Ingredients: Make sure your cream cheese, eggs, and sour cream are at room temperature before you start. This ensures a smooth, lump-free batter .
- Don’t Overmix: Overmixing the batter incorporates too much air, which can cause the cheesecakes to puff up and crack as they cool .
- Don’t Overbake: The centers should still have a slight jiggle when you take them out of the oven. They will set as they cool .
- Use a Muffin Tin with Liners: Paper liners make it easy to remove the cheesecakes without damaging them .
- Chill Thoroughly: The cheesecakes need time to set. Rushing the chilling process can result in a soft, difficult-to-remove texture .
Variations
- Chocolate Mini Cheesecakes: Add ½ cup of melted dark chocolate to the batter for a chocolate twist.
- Lemon Cheesecake Bites: Add the zest of one lemon and 2 tablespoons of lemon juice to the batter for a bright, citrusy flavor.
- Pumpkin Cheesecake Bites: Substitute ½ cup of the cream cheese with pumpkin purée and add pumpkin pie spice for a fall-inspired treat.
- Gluten-Free: Use gluten-free graham crackers or cookie crumbs for the crust.
Storage Instructions
Store mini cheesecake bites in an airtight container in the refrigerator for up to 5 days . Place parchment paper between layers to prevent sticking. They can also be frozen for up to 2 months wrap individually in plastic wrap and place in a freezer-safe bag.
Reheating Tips
These cheesecake bites are best enjoyed chilled. If you prefer them at room temperature, let them sit out for 15-20 minutes before serving. Do not reheat in the microwave, as this can cause the cheesecake to become soft and lose its creamy texture.
Common Mistakes to Avoid
- Overmixing the Batter: Overmixing can cause the cheesecakes to puff up and crack .
- Skipping the Room Temperature Step: Cold ingredients won’t mix smoothly, resulting in a lumpy batter .
- Not Chilling Long Enough: The cheesecakes need at least 2 hours to set properly. Rushing this step will result in a soft texture .
- Overfilling the Muffin Cups: Fill each cup about ¾ full to allow room for the cheesecakes to rise slightly .
What to Serve With
- Fresh Berries: Strawberries, blueberries, or raspberries add a bright, tart contrast to the creamy cheesecake.
- Fruit Compote: Serve with a warm berry or cherry compote for a cozy twist.
- Caramel or Chocolate Sauce: Drizzle over the top for extra indulgence.
- Coffee or Tea: The perfect warm beverage to accompany these bite-sized treats.
Frequently Asked Questions
Q: Can I use a different type of crust?
A: Absolutely! You can use crushed Oreos, digestive biscuits, or even shortbread cookies instead of graham crackers.
Q: How do I prevent my mini cheesecakes from cracking?
A: Cracking can be caused by overmixing, overbaking, or sudden temperature changes. Bake at a lower temperature (325°F) and don’t overmix.
Q: Can I make these vegan?
A: Yes! Use vegan cream cheese, a plant-based sour cream alternative, and flax eggs in place of regular eggs.
Q: Why are my cheesecakes sinking in the middle?
A: This usually happens when they’re underbaked. The centers should be set but still slightly jiggly when you take them out.
Q: Can I freeze these cheesecake bites?
A: Yes, they freeze beautifully for up to 2 months. Wrap them individually in plastic wrap and store in a freezer-safe bag.
Q: What’s the best way to add toppings?
A: Add toppings just before serving to keep them fresh and prevent them from becoming soggy.
Conclusion
These Easy Mini Cheesecake Bites are proof that dessert doesn’t have to be complicated to be impressive. With their creamy texture, buttery crust, and endless topping possibilities, they’re a dessert that everyone will love. Whether you’re making them for a special occasion or just because, they’re guaranteed to bring a smile to your face.
What I love most about this recipe is how versatile it is. You can dress them up with fancy toppings or keep them simple they’re always delicious. So go ahead, grab your muffin tin, and get ready to create a batch of these irresistible little treats.
Have you tried making these Mini Cheesecake Bites? I’d love to hear how they turned out! Share your photos, tips, and favorite toppings in the comments below. Happy baking!