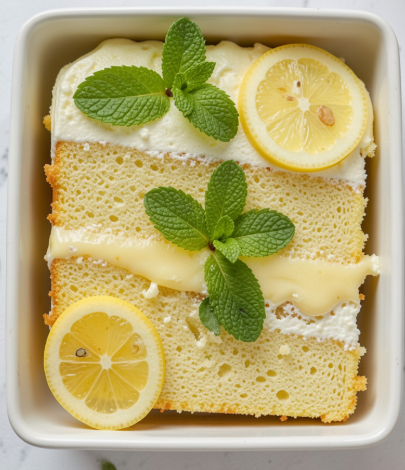
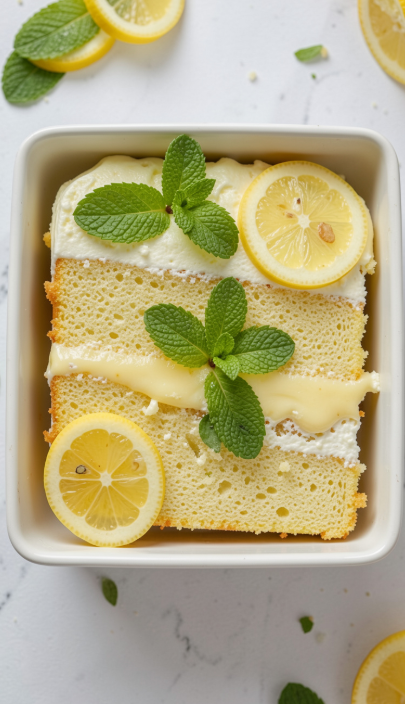
Have you ever wished you could create a show-stopping dessert with three distinct, beautiful layers without any complicated steps or endless mixing bowls? This Magic Lemon Cake is exactly that dessert. It’s one of those recipes that feels like pure wizardry a simple batter transforms in the oven into three separate and delicious layers: a light and fluffy sponge on top, a tangy, creamy lemon custard in the middle, and a dense, rich lemon curd on the bottom.
It’s called “magic” for a reason. This enchanting cake is a classic example of a “self-saucing” dessert, where the science of baking does all the work for you. And it’s surprisingly simple to make, requiring just a few minutes of mixing. It’s a dessert that’s perfect for a cozy weeknight treat and elegant enough to serve for a special occasion.
Magic Lemon Cake: The Enchantingly Easy Dessert That Bakes Into Three Layers
Have you ever wished you could create a show-stopping dessert with three distinct, beautiful layers without any complicated steps or endless mixing bowls? This Magic Lemon Cake is
Table of Contents
Recipe Overview
- Prep Time: 10 minutes
- Cook Time: 45-50 minutes
- Total Time: 1 hour
- Servings: 8-10 servings
- Cuisine: American
- Course: Dessert
- Calories (Approximate): 250-300 per serving
Why You’ll Love This Recipe
- Bakes into Three Distinct Layers: The cake magically separates into a light sponge, a creamy custard, and a rich lemon curd.
- Quick & Easy: Just 10 minutes of prep and one bowl no complicated techniques required.
- Incredibly Flavorful: Bright, tangy lemon flavor balanced with just the right amount of sweetness.
- Perfect for Any Occasion: Elegant enough for a dinner party, simple enough for a weeknight dessert.
- Made with Pantry Staples: Uses simple ingredients you likely already have on hand.
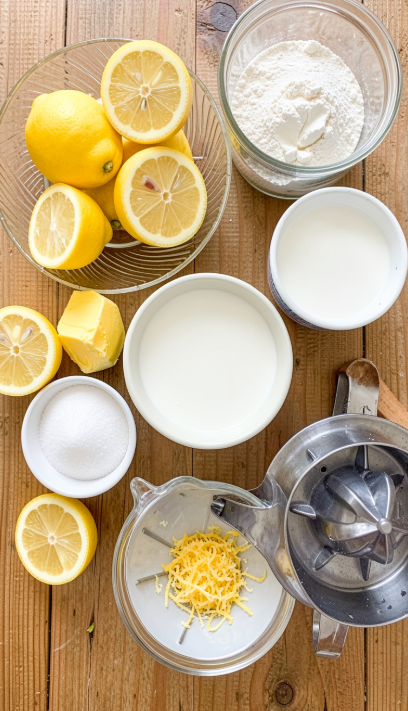
Ingredients
- 4 large eggs, separated
- 1½ cups granulated sugar
- ½ cup unsalted butter, softened
- 2 tablespoons lemon zest (from about 2-3 lemons)
- ½ cup fresh lemon juice (about 3-4 lemons)
- ¾ cup all-purpose flour
- ¼ teaspoon salt
- 1½ cups milk (whole milk or 2% works best)
Ingredient Notes
Lemons: Fresh lemon juice and zest are essential for the bright, tangy flavor that defines this cake. Bottled juice just won’t deliver the same intensity. You’ll need about 3-4 medium lemons for both the zest and juice.
Eggs: This recipe relies on egg whites being beaten to stiff peaks, which gives the cake its light, fluffy top layer. Make sure your eggs are at room temperature for the best volume.
Butter: Use unsalted butter so you can control the salt level. Make sure it’s softened to room temperature for easy mixing.
Milk: Whole milk or 2% milk gives the custard layer the richest texture. Avoid skim milk, which can result in a thinner custard.
Step-by-Step Instructions
1. Preheat and Prepare
Preheat your oven to 325°F (165°C) . Grease an 8×8-inch or 9×9-inch baking dish with butter or non-stick spray.
2. Separate the Eggs
Separate the eggs, placing the yolks in one bowl and the whites in another. Let them come to room temperature.
3. Cream the Butter and Sugar
In a large mixing bowl, beat the softened butter and granulated sugar together until light and fluffy. This should take about 2-3 minutes with an electric mixer.
4. Add the Egg Yolks and Lemon
Add the egg yolks one at a time, beating well after each addition. Stir in the lemon zest and lemon juice until fully incorporated.
5. Mix in the Flour and Milk
Gradually add the flour and salt, alternating with the milk, starting and ending with the flour. Mix just until combined don’t overmix.
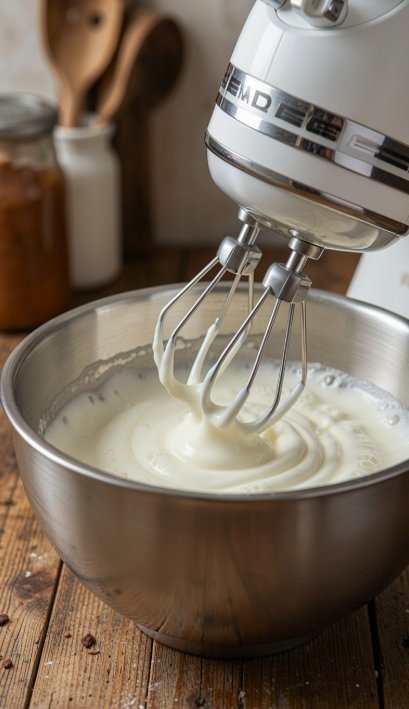
6. Beat the Egg Whites
In a separate clean bowl, beat the egg whites until they form stiff peaks. This is what gives the cake its magical layered effect.
7. Fold the Egg Whites into the Batter
Gently fold the beaten egg whites into the batter in three additions, using a spatula. Be careful not to deflate the mixture some streaks of white are okay.
8. Bake the Cake
Pour the batter into your prepared baking dish. Bake for 45-50 minutes, until the top is golden brown and the center is set.
9. Cool and Serve
Let the cake cool in the pan for at least 15-20 minutes before serving. Dust with powdered sugar if desired.
Expert Tips
- Room Temperature Ingredients: Make sure your eggs and milk are at room temperature for the best texture and rise.
- Don’t Overmix: Mix just until the ingredients come together. Overmixing can deflate the batter and ruin the magic layers.
- Beat Egg Whites to Stiff Peaks: The egg whites should hold their shape when you lift the beater. This gives the cake its light top layer.
- Use Fresh Lemons: Fresh lemon juice and zest provide the best, brightest flavor.
Variations
- Orange Magic Cake: Swap the lemon for orange zest and juice for a citrusy twist.
- Lime Magic Cake: Use lime zest and juice for a slightly tart and tropical version.
- Gluten-Free Version: Substitute a 1:1 gluten-free flour blend for the all-purpose flour.
- Boozy Version: Add 2 tablespoons of limoncello or lemon liqueur to the batter for an adult twist.
Storage Instructions
Store the cake in an airtight container in the refrigerator for up to 4 days. The custard layers are best kept chilled, and the cake is delicious served cold.
Reheating Tips
This cake is best served chilled, but if you prefer it warm, you can reheat individual slices in the microwave for 10-15 seconds. Keep in mind the layers may soften slightly.
Common Mistakes to Avoid
- Not Separating Eggs Properly: Even a small amount of yolk in the whites will prevent them from beating to stiff peaks.
- Overmixing the Batter: Overmixing can deflate the egg whites and prevent the layers from forming.
- Skipping the Lemon Zest: The zest provides essential oils that give the cake its bright lemon flavor.
- Overbaking: The cake is done when the top is golden and set overbaking can dry it out.
What to Serve With
- Fresh Berries: Raspberries, blueberries, or strawberries pair perfectly with lemon.
- Whipped Cream: A dollop of lightly sweetened cream adds a lovely lightness.
- Powdered Sugar: A light dusting makes it look elegant and adds a touch of sweetness.
- Vanilla Ice Cream: The cold creaminess complements the tangy lemon beautifully.
Frequently Asked Questions
Q: Why does this cake separate into layers?
A: The separation happens because the lighter egg white mixture rises to the top during baking, while the heavier custard mixture sinks to the bottom.
Q: Can I use bottled lemon juice?
A: Fresh lemon juice is highly recommended for the best, brightest flavor. Bottled juice often contains preservatives that can affect the taste.
Q: What if my egg whites won’t form stiff peaks?
A: Make sure your bowl and beaters are clean and dry. Even a small amount of oil or yolk can prevent stiff peaks. Room temperature whites also whip better.
Q: Can I use a different pan size?
A: You can use a 9×9-inch or 8×8-inch pan. Baking times may vary slightly depending on the size.
Q: How do I know when the cake is done?
A: The top should be golden brown and the center should be set. A toothpick inserted into the sponge layer should come out clean.
Q: Can I make this gluten-free?
A: Yes! Use a 1:1 gluten-free flour blend in place of the all-purpose flour.
Conclusion
This Magic Lemon Cake is exactly the kind of dessert that makes you feel like a kitchen wizard. With just a few simple ingredients and a little bit of mixing, you get a dessert that looks like it took hours to create. It’s proof that sometimes the most magical things come from the simplest recipes.
Whether you serve it for a special occasion or just because you’re craving something bright and citrusy, this cake is guaranteed to impress. So go ahead preheat that oven, grab some lemons, and get ready to create a little bit of magic.
Have you tried making this Magic Lemon Cake? I’d love to hear how it turned out! Share your photos, tips, and any creative variations in the comments below. Happy baking!