
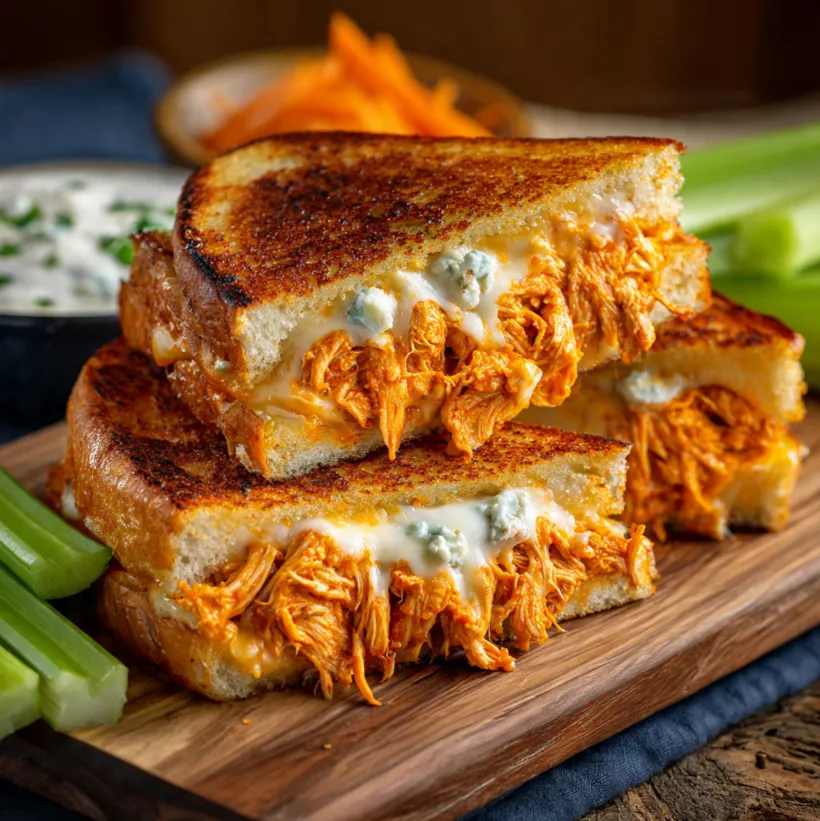
Is there any combination more gloriously satisfying than spicy, tangy Buffalo chicken and molten, gooey cheese? Now, imagine that iconic duo piled high onto crispy, buttery, homemade garlic bread and toasted to golden perfection. Welcome to the Ultimate Buffalo Chicken Melt a sandwich that transcends the ordinary lunch and lands squarely in the realm of legendary meals. This isn’t just a sandwich; it’s an experience. A symphony of bold flavors and contrasting textures that will make your taste buds sing.
Perfect for game day, a hearty family dinner, or when you simply need the most epic comfort food fix, this recipe is surprisingly straightforward. We’ll guide you through each step, from whipping up the quick homemade garlic bread to crafting the juiciest, most flavorful Buffalo chicken filling. Get ready to create a masterpiece that’s guaranteed to garner rave reviews and have everyone asking for the recipe.
Why This Recipe Will Become Your New Favorite
Before we dive into the ingredients, let’s talk about why this melt stands out. First, homemade garlic bread is a game-changer. It’s fresher, more aromatic, and crispier than any store-bought version. Second, we use a simple method for the chicken that ensures it stays incredibly tender and juicy, never dry or stringy. Finally, the balance of flavors is key: the fiery heat of the Buffalo sauce is cooled by the rich, creamy cheese and the tangy bite of a blue cheese dressing. It’s a perfectly engineered bite every single time.
Ingredients for the Ultimate Buffalo Chicken Melt
Gathering your ingredients is the first step to success. Here’s everything you’ll need, divided into logical sections for the garlic bread, the chicken filling, and the assembly.
For the Homemade Garlic Bread:
- 1 large loaf of Italian or French bread (about 12-14 inches long), or 4 large sub rolls
- 1/2 cup (1 stick) unsalted butter, softened
- 4-5 large cloves of garlic, minced
- 2 tablespoons fresh parsley, finely chopped
- 1/4 cup grated Parmesan cheese
- 1/4 teaspoon salt
For the Buffalo Chicken Filling:
- 1 lb (about 450g) boneless, skinless chicken breasts
- 1 cup low-sodium chicken broth or water
- 2/3 cup Frank’s RedHot Original Cayenne Pepper Sauce (or your favorite Buffalo sauce)
- 4 tablespoons unsalted butter
- 1 teaspoon garlic powder
- 1/2 teaspoon onion powder
- 1/4 teaspoon smoked paprika (optional, for depth)
For Assembly:
- 1 1/2 cups shredded cheese (a mix of sharp cheddar and Monterey Jack is ideal)
- 1/2 cup blue cheese dressing or ranch dressing, for serving
- 1/4 cup crumbled blue cheese (optional, for true enthusiasts)
- 2-3 celery stalks, sliced into sticks, for serving

Step-by-Step Instructions
Follow these numbered steps for a foolproof, incredible result.
Part 1: Preparing the Garlic Bread Foundation
- Preheat and Prep: Begin by preheating your oven to 400°F (200°C). Line a large baking sheet with parchment paper or aluminum foil for easy cleanup.
- Make the Garlic Butter: In a small bowl, combine the softened butter, minced garlic, chopped parsley, grated Parmesan, and salt. Mix vigorously with a fork until it forms a uniform, fragrant paste.
- Prepare the Bread: Slice your loaf of bread in half lengthwise, creating a top and bottom “raft.” If using sub rolls, split them open. Place the bread halves cut-side-up on your prepared baking sheet.
- Spread and Bake: Divide the garlic butter mixture evenly between the two bread halves, spreading it all the way to the edges. Bake in the preheated oven for 8-10 minutes, or until the edges are just turning golden and the butter is bubbly. Remove from the oven but leave the oven on.
Part 2: Cooking the Juicy Buffalo Chicken
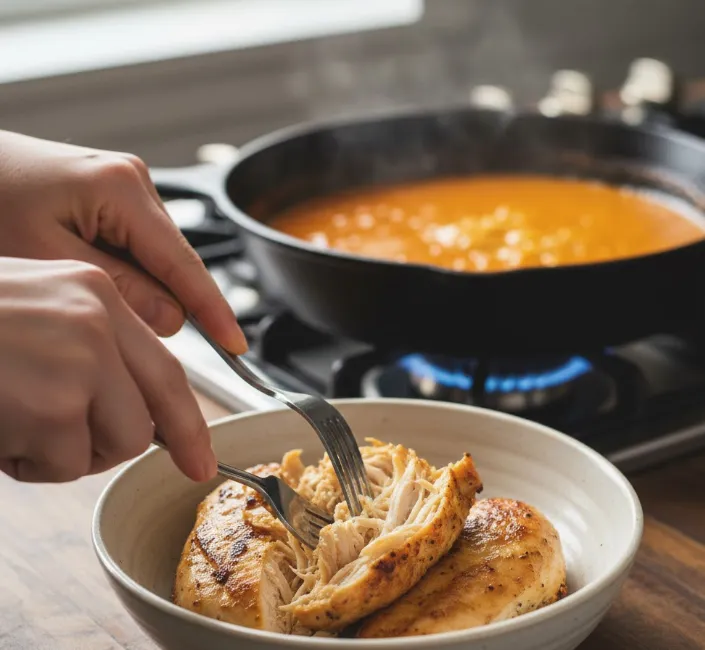
- Poach the Chicken: While the bread bakes, place the chicken breasts in a medium skillet. Add the chicken broth or water it should come about halfway up the sides of the chicken. Bring to a gentle simmer over medium heat, then cover and cook for 12-15 minutes, flipping once halfway through, until the chicken is cooked through (internal temperature of 165°F / 74°C).
- Shred the Chicken: Transfer the cooked chicken to a clean bowl or cutting board. Using two forks, shred the chicken into bite-sized pieces.
- Make the Buffalo Sauce: In the now-empty skillet (you can discard the poaching liquid), melt the 4 tablespoons of butter over low heat. Add the garlic powder, onion powder, and smoked paprika (if using), and whisk for 30 seconds until fragrant. Remove from heat and whisk in the 2/3 cup of Frank’s RedHot sauce until fully combined.
- Combine: Add the shredded chicken back to the skillet with the sauce. Toss and stir over low heat for 1-2 minutes until every piece is thoroughly coated and heated through.
Part 3: Assembling and Melting to Perfection
- Layer the Chicken: Pile the saucy Buffalo chicken mixture evenly onto the bottom half of the baked garlic bread. Spread it out to cover the surface completely.
- Add the Cheese: Sprinkle the shredded cheddar-Monterey Jack blend generously over the entire layer of chicken. For an extra kick, scatter the optional blue cheese crumbles on top.
- Create the “Melt”: Carefully place the top half of the garlic bread over the cheesy chicken. You now have a massive, loaded sandwich.
- Final Bake: Return the entire sandwich to the oven (still at 400°F) for 6-8 minutes. Then, for ultimate meltiness and browning, switch the oven to broil (high) for 1-2 final minutes. Watch closely during broiling! You want the top bread to be deeply golden and the cheese to be bubbling at the edges.
Pro Tips for the Best Buffalo Chicken Melt Ever
- Chicken Shortcut: Use 3 cups of leftover shredded rotisserie chicken or pulled chicken. Skip the poaching step, simply warm the chicken in the prepared Buffalo sauce.
- Control the Heat: For a milder version, use half Buffalo sauce and half mild barbecue sauce. For extra fire, add a pinch of cayenne pepper to the garlic butter or a dash of hot sauce to the cheese.
- Cheese Matters: Freshly grated cheese from a block melts far more smoothly and creamily than pre-shredded cheese (which contains anti-caking agents).
- The Crisp Factor: For an extra crispy exterior, spread a thin layer of the garlic butter on the outside of the bread halves before the final bake/broil.
- Make it a “Wet” Sandwich: Serve with extra Buffalo sauce and blue cheese dressing on the side for dipping each glorious, messy bite.
- Meal Prep: The Buffalo chicken filling can be made up to 3 days in advance and stored in the fridge. Reheat gently before assembling.
Serving and Enjoying Your Culinary Masterpiece
Once out of the oven, let the melt rest for 2-3 minutes. This allows the cheese to set slightly, making it easier to cut. Use a sharp serrated bread knife to slice into individual portions.
Serve immediately with a generous side of cool, creamy blue cheese or ranch dressing and fresh, crisp celery sticks. The cool, refreshing crunch of celery is the perfect traditional companion to the rich, spicy sandwich.
This Buffalo Chicken Melt on Garlic Bread is more than just a recipe it’s a statement. It proves that with a few quality ingredients and simple techniques, you can create restaurant-quality, soul-warming food at home. It’s guaranteed to disappear fast, leaving behind only satisfied smiles and maybe a few napkins covered in delicious evidence.
So, what are you waiting for? Preheat that oven, gather your ingredients, and get ready to feast your eyes (and your stomach) on the ultimate comfort food creation. Don’t forget to share your results and tag your culinary triumphs!