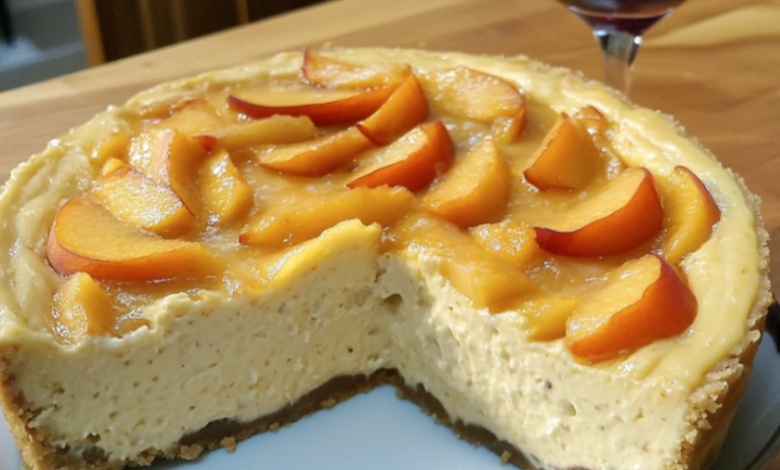
The Juicy Cheesecake with Peaches – Very Creamy and Refreshingly Delicious!

A Symphony of Creamy and Juicy
Imagine the perfect dessert. It’s not just sweet; it’s an experience. It has the rich, decadent comfort of something indulgent, balanced by a bright, fruity freshness that cleanses the palate. This is the magic of the Juicy Cheesecake with Peaches. This isn’t just any cheesecake; it’s a masterpiece of textures and flavors—a velvety, creamy filling nestled in a buttery, crunchy crust, all crowned with a glistening layer of sun-ripened, juicy peaches.
This recipe is designed to be foolproof. We will demystify the art of cheesecake-making, banishing the fears of cracking, sinking, or a soggy crust. By the end of this guide, you will be equipped to create a show-stopping dessert that is as beautiful as it is delicious. Let’s dive into the secrets of creating this creamy and refreshing delight.
The Foundation: Why This Cheesecake Recipe Works
The quest for the perfect cheesecake often ends in a cracked top or a dense, rubbery texture. The key lies in understanding the science. Cheesecake is a custard, and like all custards, it requires gentle cooking and the right ingredients at the right temperature.
Our recipe stands out for three reasons:
- The Water Bath (Bain-Marie): This is the non-negotiable secret to a creamy, crack-free cheesecake. The water bath creates a humid environment that cooks the cheesecake gently and evenly, preventing the proteins in the eggs from over-coagulating and causing cracks.
- Full-Fat, Room Temperature Ingredients: For the creamiest texture, you must use full-fat cream cheese, sour cream, and room-temperature eggs. Cold ingredients do not incorporate well, leading to a lumpy batter that is more prone to cracking.
- The Gradual Cool-Down: Rushing the cooling process is a cardinal sin in cheesecake baking. Letting the cheesecake cool gradually in the turned-off oven with the door ajar prevents sudden temperature changes that cause the center to collapse.
Gathering Your Ingredients: The Cast of Characters
For the best results, use high-quality ingredients. The flavor of your cream cheese and peaches will directly influence the final product.
For the Graham Cracker Crust:
- 1 ½ cups (150g) graham cracker crumbs
- ⅓ cup (75g) granulated sugar
- 6 tablespoons (85g) unsalted butter, melted
- A pinch of salt
For the Creamy Cheesecake Filling:
- 24 ounces (680g) full-fat cream cheese, softened to room temperature
- 1 cup (200g) granulated sugar
- 1 cup (240ml) full-fat sour cream, at room temperature
- 3 large eggs, at room temperature
- 2 teaspoons pure vanilla extract
- ¼ cup (30g) all-purpose flour
- 1 tablespoon fresh lemon juice
- A pinch of salt
For the Juicy Peach Topping:
- 4-5 large ripe peaches, peeled, pitted, and sliced
- ½ cup (100g) granulated sugar
- 1 tablespoon fresh lemon juice
- 1 teaspoon cornstarch mixed with 1 tablespoon of water (slurry)
- ½ teaspoon vanilla extract
The Art of Assembly: A Step-by-Step Cooking Method
Part 1: Preparing the Crust
- Preheat and Prep: Preheat your oven to 325°F (160°C). Take a 9-inch springform pan and wrap the outside bottom and sides tightly with two layers of heavy-duty aluminum foil. This is crucial to prevent water from the bath seeping into the pan.
- Combine Crust Ingredients: In a medium bowl, mix the graham cracker crumbs, sugar, and salt. Pour in the melted butter and stir until the mixture resembles wet sand and holds together when pressed.
- Form the Crust: Press the crumb mixture firmly and evenly into the bottom and about halfway up the sides of the prepared springform pan. Using the bottom of a flat glass or measuring cup helps create a compact, even layer.
- Pre-Bake: Bake the crust for 10 minutes. Remove it from the oven and let it cool slightly while you prepare the filling. Reduce the oven temperature to 300°F (150°C).
Part 2: Creating the Creamy Filling
- Cream the Base: In a large mixing bowl, beat the softened cream cheese on medium-low speed until it is completely smooth and free of lumps. This should take about 2-3 minutes. Scrape down the sides and bottom of the bowl.
- Incorporate Sugar and Flavor: Gradually add the sugar and beat until combined. Mix in the sour cream, vanilla extract, lemon juice, and salt until just incorporated.
- Add Eggs Gently: This is critical. Add the eggs one at a time, mixing on low speed only until the yolk disappears after each addition. Overmixing at this stage incorporates too much air and can cause the cheesecake to puff up and crack later. Finally, sprinkle the flour over the batter and mix on low until just combined.
- Assemble for Baking: Pour the filling over the slightly cooled crust. Tap the pan gently on the counter a few times to release any large air bubbles.
Part 3: The Crucial Water Bath Bake
- Create the Bath: Place the foil-wrapped springform pan into a large roasting pan. Bring a kettle of water to a boil. Carefully pour the hot water into the roasting pan until it comes about halfway up the sides of the springform pan.
- Bake: Carefully transfer the entire setup to the oven. Bake for 60-75 minutes. The cheesecake is done when the edges are set, but the center still has a slight jiggle like Jell-O when you gently shake the pan. It will firm up as it cools.
- The Gradual Cool-Down: Turn off the oven, crack the oven door open with a wooden spoon, and let the cheesecake cool inside the oven for 1 hour. This slow temperature change is the final guard against cracking.
- Final Cooling: Remove the cheesecake from the water bath, take off the foil, and let it cool to room temperature on a wire rack for another hour. Then, refrigerate it for at least 6 hours, but preferably overnight. This patience is essential for the perfect creamy texture and for clean slicing.
Part 4: The Glazed Peach Topping
- Prepare the Peaches: About an hour before serving, make the topping. In a medium saucepan, combine the sliced peaches, sugar, and lemon juice. Cook over medium heat, stirring occasionally, until the peaches release their juices and become tender, about 5-7 minutes.
- Thicken the Glaze: Push the peaches to one side and add the cornstarch slurry to the juicy liquid. Whisk quickly to combine. Bring the mixture to a gentle simmer for one minute until the juice thickens into a shiny glaze.
- Finish and Cool: Remove from heat and stir in the vanilla extract. Let the peach topping cool completely before spreading it over the chilled cheesecake.
Conclusion: Your Masterpiece Awaits
As you slice into your Juicy Cheesecake with Peaches, you’ll witness the payoff of your patience: a firm yet impossibly creamy slice with a glistening, fruity crown. The contrast between the cool, rich filling and the warm, sweet-tart peaches is nothing short of sublime.
This cheesecake is more than a recipe; it’s a testament to the power of technique and quality ingredients. It’s the perfect centerpiece for a summer gathering, a comforting treat for a family dinner, or a proud bake to share with friends. So, preheat your oven, embrace the process, and get ready to create a dessert that is truly, refreshingly delicious. Enjoy every creamy, juicy bite


