Two Irritible Recipes: Carrot Cake Truffles & Perfect Baked Chicken
Have you ever found yourself torn between a craving for something decadently sweet and the need for a wholesome, satisfying savory meal? You don’t have to choose! Today, we’re bridging that delicious gap with two foolproof, show-stopping recipes that are guaranteed to become staples in your kitchen. Whether you’re planning a cozy family dinner, need an impressive potluck dish, or simply want to treat yourself, this duo has you covered. We’ll guide you through creating Perfect Baked Chicken that is consistently juicy, flavorful, and never dry, followed by Carrot Cake Truffles bite-sized balls of spiced carrot cake bliss coated in creamy white chocolate. Both recipes are beginner-friendly, use straightforward techniques, and deliver restaurant-quality results. Let’s get cooking!
The Ultimate Comfort Meal: Perfectly Juicy Baked Chicken
This isn’t your average, boring baked chicken. This recipe is a masterclass in simplicity yielding extraordinary results. We focus on a few key techniques brining (or a quick dry brine) and high-heat roasting to ensure every bite is succulent, tender, and packed with flavor. It’s the versatile protein hero that pairs with almost anything.
Ingredients for Perfect Baked Chicken
You’ll be amazed at how a handful of simple ingredients transform into something spectacular.
- 4 bone-in, skin-on chicken breasts (or 1 whole chicken, 3-4 lbs): The bone and skin are crucial for locking in moisture.
- 2 tablespoons olive oil or melted unsalted butter: For golden, crispy skin.
- 1 ½ teaspoons kosher salt (use 1 tsp if using table salt): For seasoning and drawing out moisture for a better crust.
- 1 teaspoon freshly ground black pepper: Freshly ground makes a world of difference.
- 1 teaspoon garlic powder: Adds a deep, savory base note.
- 1 teaspoon paprika (smoked or sweet): For color and a hint of warmth.
- Optional fresh herbs: A few sprigs of thyme, rosemary, or sage to tuck under the skin or place in the pan.
- Optional vegetables for roasting: 1 lb baby potatoes, carrots, or broccoli, chopped into even pieces.
Step-by-Step Instructions for Perfect Baked Chicken
Follow these numbered steps for fail-proof chicken every single time.
- Prep and Dry the Chicken (The Most Important Step): Pat the chicken breasts completely dry with paper towels. This is non-negotiable! Moisture is the enemy of crispy skin. If you have time, sprinkle the salt all over the chicken and let it sit uncovered in the fridge for 1-4 hours (a dry brine). This seasons the meat deeply and dries the skin further.
- Preheat and Season: Preheat your oven to a high temperature—425°F (220°C). Place the dried chicken on a rimmed baking sheet or in an oven-safe skillet. Drizzle with olive oil or brush with melted butter. In a small bowl, mix the pepper, garlic powder, and paprika. Sprinkle the spice mix evenly over both sides of the chicken, rubbing it in gently. For extra flavor, gently lift the skin and place a small spring of fresh herb underneath.
- Roast to Perfection: Place the chicken in the hot oven, skin-side up. Roast for 25-35 minutes (for breasts) or until the internal temperature reaches 165°F (74°C) when measured at the thickest part, not touching the bone. If using a whole chicken, roasting time will be longer, about 1 to 1.5 hours.
- Rest is Best: Once out of the oven, transfer the chicken to a clean plate or cutting board. Let it rest for at least 5-10 minutes. This allows the juices, which have been driven to the center by the heat, to redistribute throughout the meat. Cutting in too soon releases all those precious juices, leaving you with dry chicken.
[Process Image: A mid-action shot showing hands using a digital meat thermometer to check the internal temperature of a golden-brown chicken breast. The thermometer should read 165°F. The chicken is in a baking dish with roasted vegetables.]
Pro Tips for the Best Baked Chicken
- Temperature is Key: A good meat thermometer is the best investment for perfect proteins. Never guess!
- Even Cooking: For bone-in pieces, ensure they are roughly the same size. If one piece is much thicker, you can pound it gently to an even thickness.
- Pan Sauce Bonus: After removing the chicken, place the baking sheet on the stove over medium heat. Add a splash of chicken broth or white wine to the pan drippings, scrape up the browned bits (fond), and simmer for 2-3 minutes for a quick, flavorful sauce.
- Vegetable Side: Toss your chopped vegetables in a bit of the same oil and seasoning mix. Add them to the pan around the chicken for the last 20-25 minutes of cooking for an easy all-in-one meal.
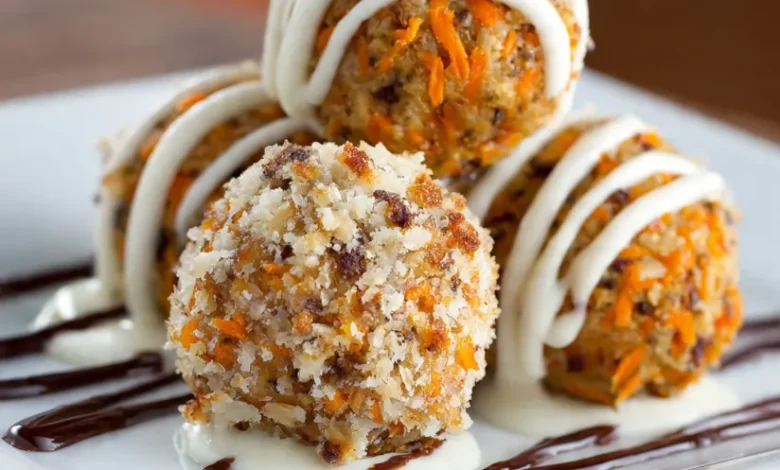
The Irresistible Sweet Treat: Carrot Cake Truffles
Now, for the grand finale a dessert that requires no baking but tastes like you spent hours in the kitchen. These Carrot Cake Truffles capture all the warm spices, moist crumb, and cream cheese frosting goodness of a classic carrot cake, in a delightful, poppable form. They’re perfect for parties, gifts, or a secret treat tucked in the fridge.
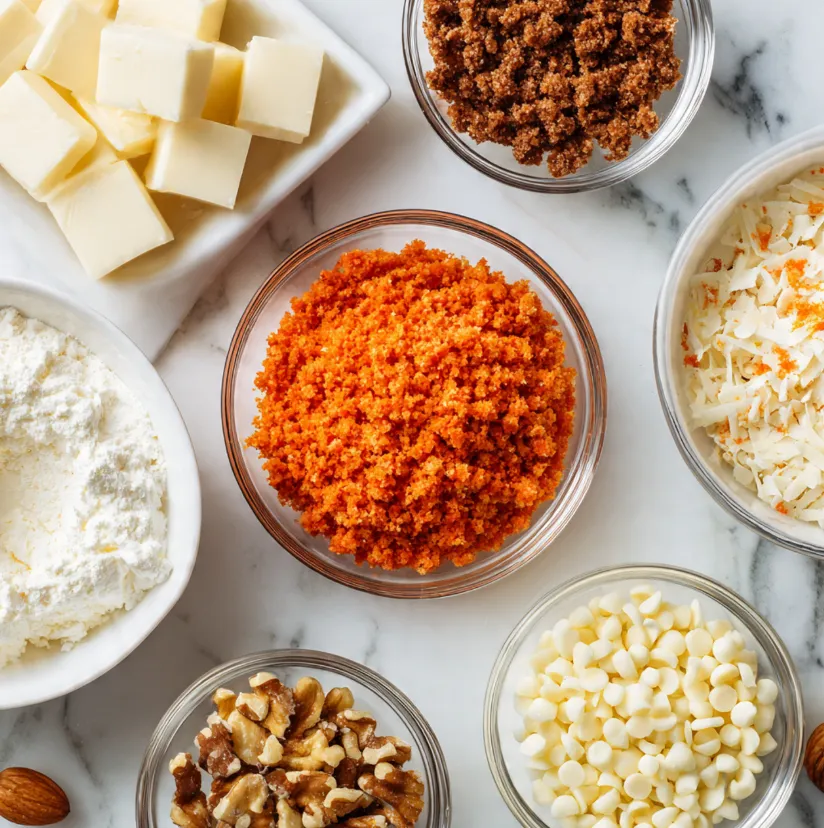
Ingredients for Carrot Cake Truffles
For the Cake & Filling:
- 1 (9×13 inch) pan of baked carrot cake, cooled (homemade or store-bought): This is your shortcut! A simple box mix baked according to directions works perfectly.
- 4 oz (½ cup) cream cheese, softened to room temperature: The binding agent that adds the iconic tangy frosting flavor.
- ½ teaspoon ground cinnamon: To enhance the spice profile.
- A pinch of ground nutmeg (optional): For extra warmth.
For the Coating & Decoration:
- 12 oz high-quality white chocolate chips or bars, finely chopped: A good coating chocolate melts smoothly.
- text**1 teaspoon coconut oil (optional):** Helps thin the chocolate for a smoother dip.
- ½ cup finely chopped pecans or walnuts: For rolling, adding crunch and visual appeal.
- Ground cinnamon, for dusting: A simple, pretty finish.
Step-by-Step Instructions for Carrot Cake Truffles
- Create the Cake “Crumbs”: Take your completely cooled carrot cake and crumble it finely into a large mixing bowl. You can use your fingers or a fork. Ensure there are no large lumps. If you used a cake with nuts or raisins, that’s perfect—they’ll be in the truffles!
- Mix with Cream Cheese: Add the softened cream cheese and cinnamon to the bowl. Using a spatula or your hands (it’s fun!), mix thoroughly until the mixture is completely combined and holds together when pinched. It should resemble a thick, moldable dough.
- Chill and Shape: Cover the bowl and refrigerate the mixture for at least 1-2 hours until firm. This prevents sticking. Using a small cookie scoop or a tablespoon, portion the mixture, rolling between your palms to form smooth, 1-inch balls. Place them on a parchment-lined baking sheet. Once all are rolled, chill again for 30 minutes to firm up before coating.
- Melt the Chocolate: While the balls chill, melt the coating. In a heatproof bowl set over a pot of gently simmering water (double boiler), melt the white chocolate and coconut oil, stirring frequently until completely smooth. Alternatively, melt in 20-second bursts in the microwave, stirring well between each burst. Let the melted chocolate cool slightly.
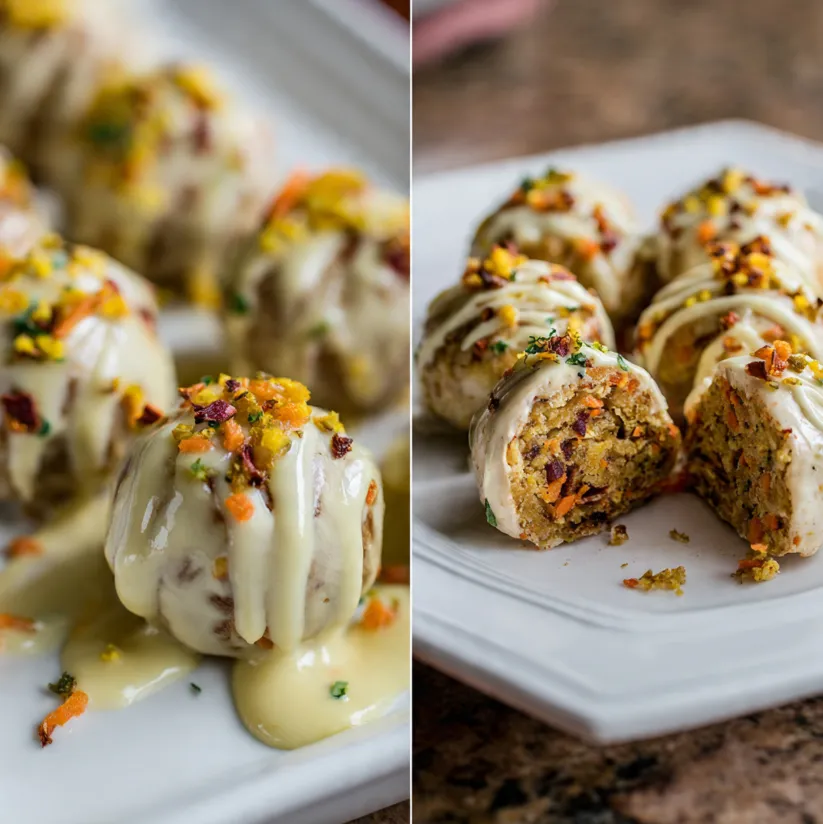
- Coat the Truffles: Using a fork or dipping tools, dip each chilled cake ball into the melted white chocolate, tapping gently on the side of the bowl to let excess chocolate drip off. Place back on the parchment paper. Immediately, before the chocolate sets, sprinkle with chopped nuts or a dusting of cinnamon. If the chocolate thickens, re-warm it gently.
- Set and Serve: Allow the chocolate coating to set completely at room temperature or in the fridge for 15 minutes. Store finished truffles in an airtight container in the refrigerator for up to 1 week.

Pro Tips for the Best Carrot Cake Truffles
- Cake Texture: The cake should be moist but not soggy. If your cake seems too wet, you can add a tablespoon or two of crushed graham crackers or dry breadcrumbs to the mix to help it bind.
- Chilling is Crucial: Don’t skip the chilling steps! Cold cake balls are much easier to dip and won’t fall apart in the warm chocolate.
- Coating Variations: Use dark or milk chocolate instead of white. For decoration, drizzle with a different colored chocolate or use festive sprinkles.
- Make-Ahead Magic: The uncoated cake balls can be frozen for up to 3 months. Thaw in the fridge before coating.
Conclusion: Your Culinary Victory Awaits
There you have it two truly irresistible recipes that prove delicious home cooking doesn’t have to be complicated. You now possess the secrets to the most juicy, flavorful baked chicken and the most adorable, decadent carrot cake truffles. Imagine the compliments you’ll receive when you serve that golden, herb-scented chicken for dinner, followed by these elegant little bites of carrot cake joy for dessert.
The best part? You made it all yourself. So, gather your ingredients, trust the process, and most importantly, have fun in the kitchen. Don’t forget to share your creations snap a photo of your perfect chicken and truffle spread and tag us! Happy cooking (and no-baking)!