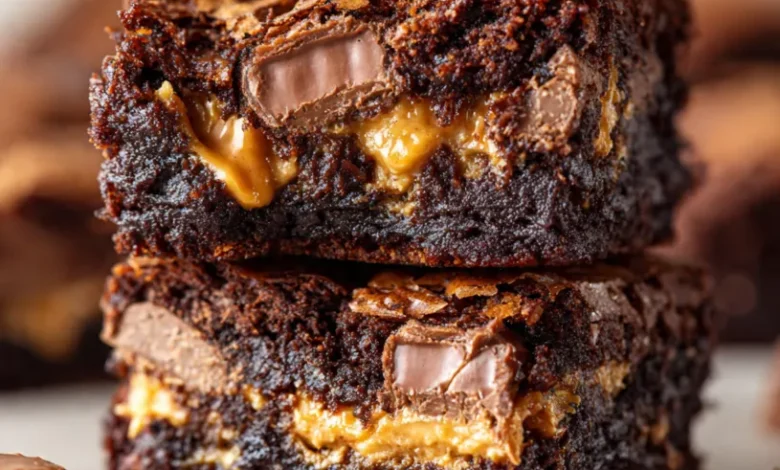
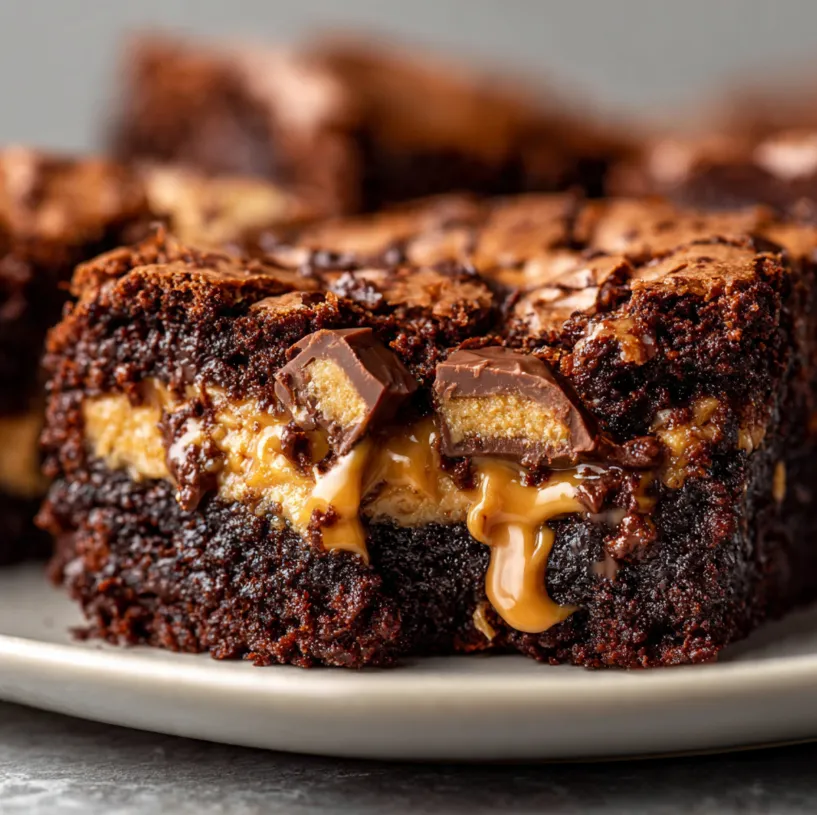
There are brownies, and then there are ULTIMATE Reese’s Stuffed Brownies. Imagine: a rich, fudgy chocolate brownie base, a hidden layer of gooey, creamy peanut butter cups, all topped with more decadent chocolate batter and baked to perfection. This isn’t just a dessert; it’s an experience a celebration of the iconic chocolate-peanut butter pairing that dreams are made of. In this easy-to-follow guide, we’ll walk you through every step to create these show-stopping, crowd-pleasing brownies that are surprisingly simple to make, even for beginner bakers. Get ready to elevate your baking game and become the hero of any potluck, party, or Tuesday night.
Why You’ll Be Obsessed with These Stuffed Brownies
Before we dive into the ingredients, let’s talk about what makes this recipe a must-try. First, the texture is phenomenal crispy edges, a fudgy center, and molten pockets of peanut butter. Second, it uses simple, accessible ingredients you likely already have. Third, the “stuffed” technique is fun and guarantees a surprise in every bite. This recipe is optimized for flavor and ease, ensuring you get perfect results every single time.
Your Ultimate Reese’s Stuffed Brownies Shopping List
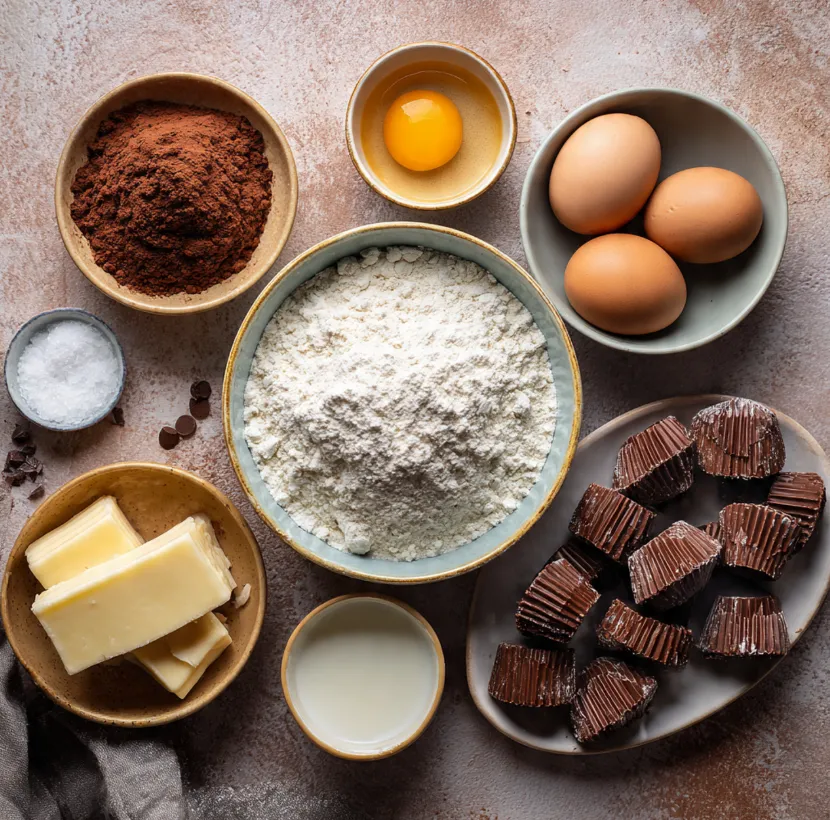
Gather these simple ingredients to create your chocolate-peanut butter masterpiece. For the best results, use room temperature eggs and real butter.
For the Brownie Batter:
- 1 cup (225g) unsalted butter, melted and slightly cooled
- 2 cups (400g) granulated sugar
- 4 large eggs, room temperature
- 2 teaspoons pure vanilla extract
- 1 cup (125g) all-purpose flour
- ¾ cup (75g) unsweetened cocoa powder (high-quality is best!)
- ½ teaspoon salt
- ½ teaspoon baking powder
For the Reese’s Peanut Butter Cup Layer:
- 1 standard bag (about 10.5-12 oz / 300-340g) of Reese’s Peanut Butter Cups, MINI size (unwrapped)
- Optional: ½ cup (130g) of creamy peanut butter for an extra peanut butter swirl.
Step-by-Step Guide to Baking Perfection
Follow these numbered steps carefully for foolproof, decadent brownies.
Step 1: Prepare Your Oven and Pan
Preheat your oven to 350°F (175°C). Line a 9×13 inch baking pan with parchment paper, leaving an overhang on two sides. This “sling” will make removing the brownies incredibly easy. Lightly grease the parchment paper with butter or cooking spray.
Step 2: Create the Wet Mixture
In a large mixing bowl, combine the melted, cooled butter and granulated sugar. Whisk vigorously for about a minute until well combined and slightly glossy. It won’t be fluffy, but it should be smooth. Add the eggs, one at a time, whisking well after each addition. Stir in the vanilla extract.
Step 3: Combine the Dry Ingredients
In a separate, medium-sized bowl, sift together the all-purpose flour, cocoa powder, salt, and baking powder. Sifting is important here to prevent lumps of cocoa in your batter and to aerate the flour for a better texture.
Step 4: Bring the Batter Together
Gradually add the dry ingredient mixture to the wet ingredients. Use a spatula or wooden spoon to fold everything together just until combined. Do NOT overmix! The batter will be thick and glorious.
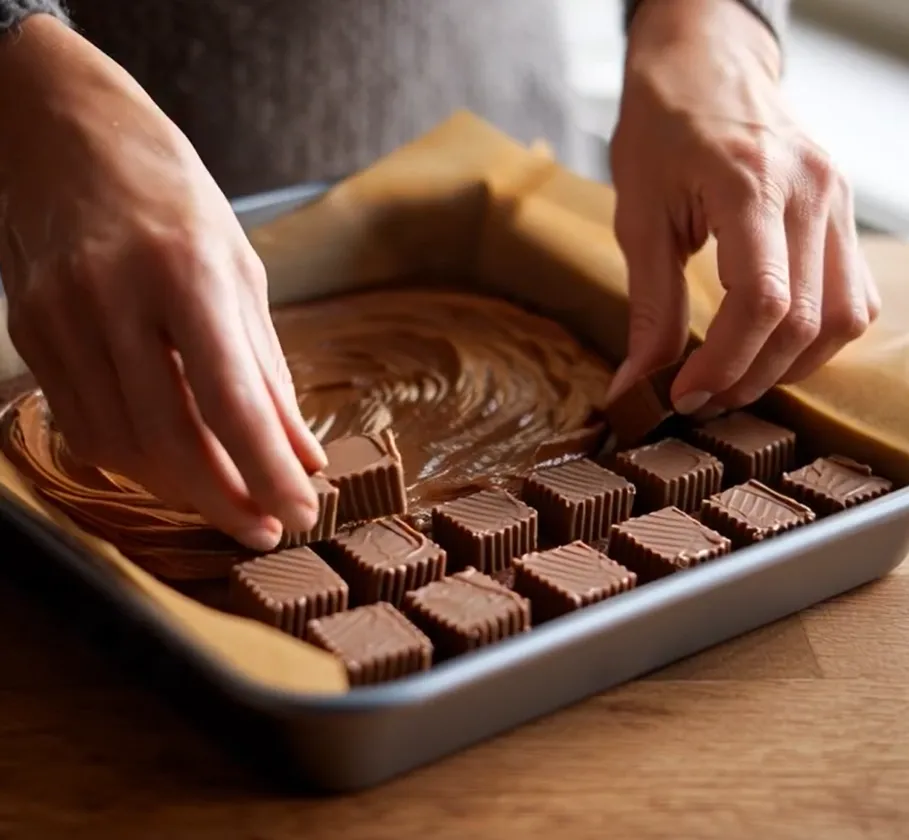
Step 5: The First Brownie Layer & The Big Stuff
Spread just over half of the brownie batter into the bottom of your prepared pan. Use your spatula to smooth it into an even layer. Now, for the magic: evenly distribute the unwrapped mini Reese’s cups over the entire surface of the batter. If you’re using the optional peanut butter, you can drizzle spoonfuls of it over the Reese’s layer here.
Step 6: Top It Off and Bake
Dollop the remaining brownie batter over the peanut butter cup layer. Carefully spread it to cover as much as possible it’s okay if some peanut butter cups peek through! Place the pan in the center of your preheated oven.
Bake for 30-40 minutes. Start checking at the 30-minute mark. The brownies are done when a toothpick inserted into the brownie part (avoid hitting a melted Reese’s) comes out with a few moist crumbs, but not wet batter. The top will have a shiny, paper-like crust.
Step 7: The Crucial Cool Down
This is the hardest step! Let the brownies cool completely in the pan set on a wire rack. If you try to cut them while warm, they will be extremely messy (though delicious). For clean, sharp cuts, cooling is non-negotiable. For best results, you can even refrigerate them for 1-2 hours after they’ve reached room temperature.
Step 8: Slice and Serve
Once completely cool, use the parchment paper sling to lift the entire brownie slab out of the pan. Place it on a cutting board and use a sharp knife to slice into squares. For super clean cuts, wipe the knife with a hot, damp cloth between each slice.
Pro Baker Tips for Flawless Stuffed Brownies
- Quality of Cocoa: This recipe’s deep chocolate flavor relies on your cocoa powder. Choose a Dutch-processed cocoa for a richer, less acidic taste.
- Don’t Overbake: The key to fudgy, not cakey, brownies is slight under-baking. Remember, they continue to cook as they cool in the pan.
- Customize Your Stuffing: Get creative! Swap in different candy try Rolos for a caramel twist, or chopped peanut butter cups and peanut butter chips for maximum peanut butter intensity.
- Storage: Keep brownies in an airtight container at room temperature for up to 4 days. They also freeze beautifully for up to 3 months. Thaw at room temperature or warm slightly in the microwave.
- For Purely Fudgy Brownies: Omit the baking powder. This will give you a denser, ultra-fudgy texture without any cake-like rise.
The Final Word: Your New Signature Dessert Awaits
Congratulations! You now possess the secret formula for the most decadent, conversation-starting dessert: The Ultimate Reese’s Stuffed Brownies. This recipe proves that with a few simple techniques and the legendary combination of chocolate and peanut butter, you can create pure magic in your kitchen. The process is as rewarding as the result there’s nothing quite like the moment you cut into that first brownie and reveal the hidden layer of melted peanut butter cups.
So, what are you waiting for? Preheat that oven, unwrap those Reese’s cups, and get ready to bake a batch of pure joy. Don’t forget to share your creations online and tag them we love to see your baking triumphs! Once you try these, the standard brownie will simply never be enough again. Happy baking