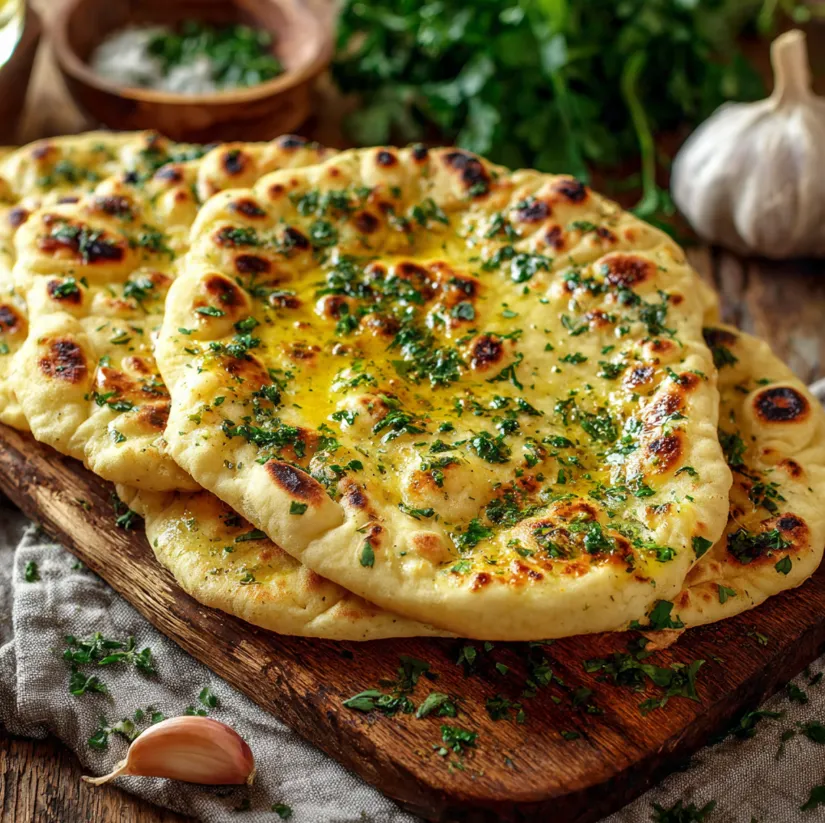
The Ultimate 10-Minute Garlic Flatbread (Roti) Recipe: Soft, Flaky, & Irresistible!

Tired of bland, store-bought flatbreads? Imagine pulling a hot, fragrant, buttery garlic flatbread off your skillet in just 10 minutes from bowl to plate. This isn’t a fantasy; it’s the ultimate homemade garlic roti recipe. Soft and pliable on the inside with beautifully flaky, golden-brown layers on the outside, each bite is infused with the aromatic punch of fresh garlic and herbs. Whether you’re a complete kitchen novice or a seasoned cook in a rush, this foolproof recipe will become your go-to side, snack, or even a quick meal. Let’s transform simple pantry staples into something truly irresistible.
Why This 10-Minute Garlic Flatbread Recipe Works
This recipe is a game-changer because it eliminates all the fuss. We use a simple, no-yeast dough that requires zero resting time. The magic lies in the lamination technique a simple fold-and-roll process that creates those delightful, buttery layers. Combined with a generous amount of fresh garlic, this flatbread cooks in under 2 minutes per piece. It’s faster than ordering takeout and infinitely more satisfying.
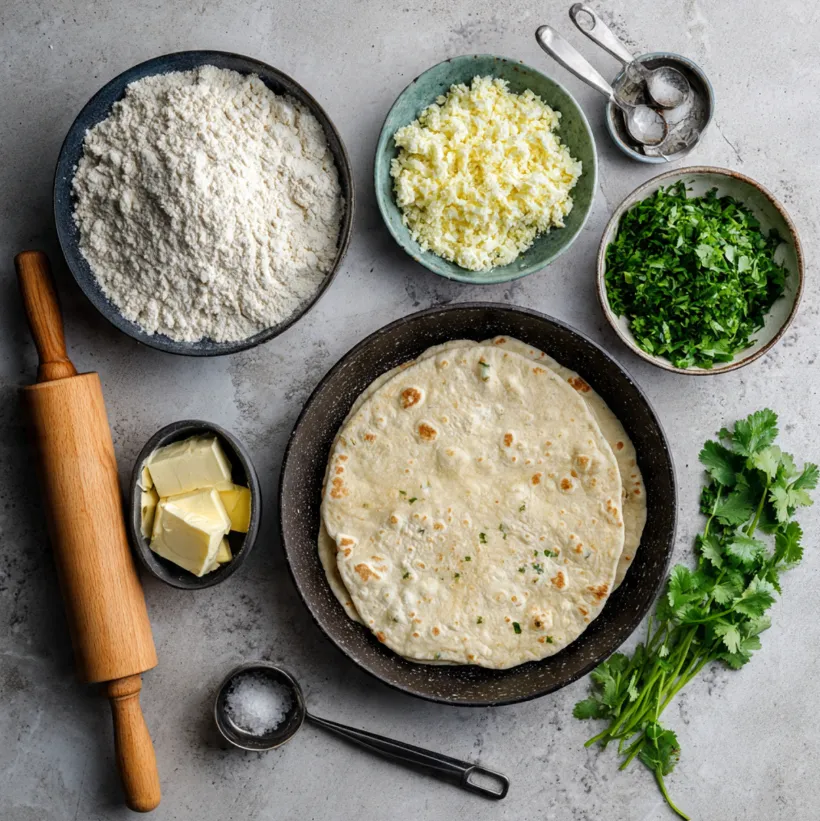
Ingredients for Perfect Garlic Flatbread
Gather these simple ingredients. For the best results, measure accurately.
For the Dough:
- 2 cups (250g) All-Purpose Flour (Maida), plus extra for dusting
- 1 teaspoon Salt
- 3/4 cup (180ml) Warm Water (adjust as needed)
- 2 tablespoons Neutral Oil (like vegetable or canola)
For the Garlic-Herb Filling & Finishing:
- 6-7 large Fresh Garlic Cloves, finely minced or crushed
- 4 tablespoons Unsalted Butter, softened (or ghee for a richer flavor)
- 3 tablespoons Fresh Coriander or Parsley, finely chopped
- 1/2 teaspoon freshly cracked Black Pepper
- Extra melted butter or ghee for brushing
Step-by-Step Instructions: Your Path to Flatbread Bliss
Follow these numbered steps for guaranteed perfect, flaky garlic roti every single time.
Step 1: Make the Dough (2 Minutes)
In a large mixing bowl, combine the all-purpose flour and salt. Make a well in the center. Pour in the warm water and oil. Using a spoon or your hands, mix until a shaggy dough forms. Then, knead directly in the bowl or on a lightly floured surface for just 1-2 minutes until smooth and soft. The dough should be pliable but not sticky. Pro Tip: If it’s sticky, add a sprinkle of flour; if it’s dry, add a teaspoon of water. No resting needed let’s move fast!
Step 2: Prepare the Garlic-Herb Butter (1 Minute)
While your dough comes together, mix the softened butter, finely minced garlic, chopped fresh herbs, and black pepper in a small bowl. Mash it all together until it forms a fragrant, spreadable paste.
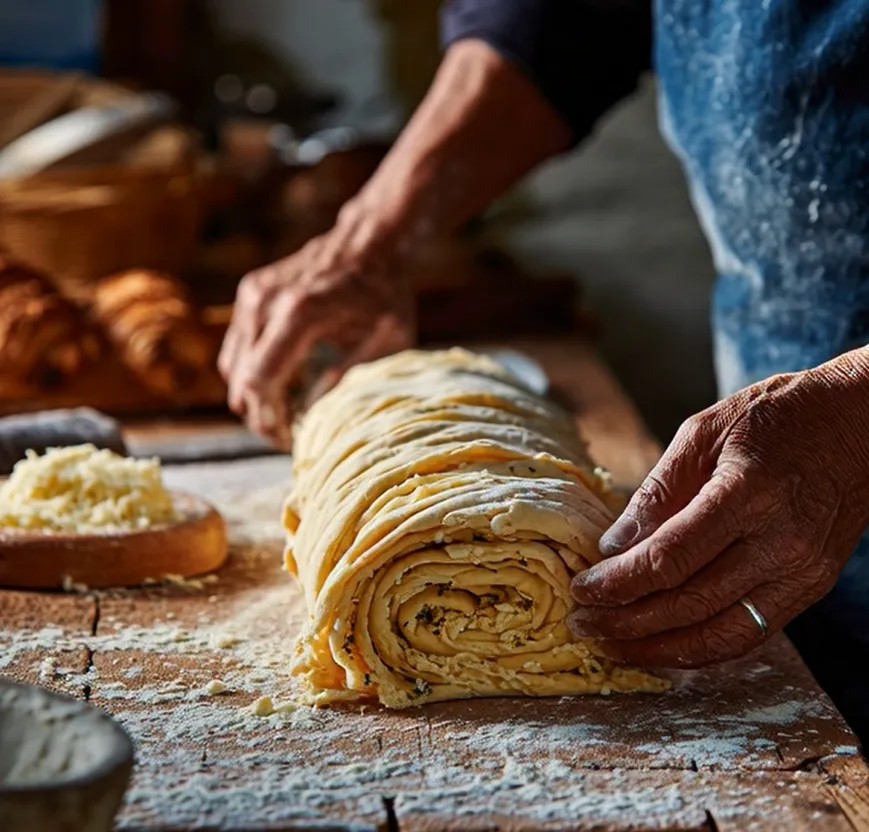
Step 3: Assemble & Create Layers (4 Minutes)
- Divide the dough into 4 equal portions. Roll each into a smooth ball.
- On a lightly floured surface, take one ball and roll it out into a thin circle, about 8-9 inches in diameter. Don’t worry about perfect shapes!
- Spread the filling: Evenly spread about 1 tablespoon of the garlic-herb butter over the entire surface of the rolled-out dough.
- The Rolling Technique (Key for Layers): Starting from one end, gently roll the circle into a tight log (like a Swiss roll).
- The Coiling Technique: Now, take one end of the log and coil it inward to form a spiral (like a snail shell). Tuck the end underneath. Press it down gently with your palm. Repeat for all dough balls.
Step 4: Roll & Cook (3 Minutes)
- Heat a heavy-bottomed skillet, tawa, or non-stick pan over medium-high heat.
- Take one coiled dough spiral, flatten it slightly with your hand, and roll it out again into a circle, about 6-7 inches in diameter and 1/8 inch thick.
- Once the pan is hot, carefully place the rolled flatbread onto it.
- Cook for about 45-60 seconds until you see bubbles forming and the bottom has golden-brown spots.
- Flip and cook the other side for another 30-45 seconds, pressing down gently with a spatula. You can even flip it a couple more times for even browning.
- Optional Finish: For extra richness, brush the hot roti with a little melted butter or ghee immediately after taking it off the pan.
- Transfer to a plate and cover with a clean kitchen towel to keep soft. Repeat for the remaining dough.
Pro Tips for Garlic Flatbread Perfection
- Garlic Intensity: For a stronger, more mellow garlic flavor, roast the garlic cloves first before mincing and mixing into the butter.
- Flavor Variations: Add 1/2 teaspoon of red chili flakes, smoked paprika, or even some grated cheese to the butter filling for a twist.
- Keeping Them Soft: The towel cover is crucial. It traps steam and keeps your rotis soft and pliable until serving.
- Make-Ahead: You can prepare the coiled spirals ahead of time, place them on a plate, cover with cling film, and refrigerate for up to 24 hours. Roll and cook when ready!
- Reheating: Reheat on a hot skillet for 30 seconds per side or in a toaster for the best texture. The microwave can make them rubbery.
How to Serve Your Homemade Garlic Flatbread
This garlic flatbread is incredibly versatile! Serve it:
- As a side with curries, soups, or stews (it’s perfect for scooping!).
- As a standalone snack with a side of yogurt or raita.
- With a creamy dip like hummus or tzatziki.
- As a wrap for kebabs, grilled vegetables, or falafel.
Ready in 10 Minutes What Are You Waiting For?
There you have it the secret to unbelievably soft, flaky, and flavorful garlic flatbread that fits into even the busiest schedule. This 10-minute garlic roti recipe proves that homemade, breathtaking bread doesn’t require hours of effort. The process is therapeutic, the aroma is heavenly, and the result is pure, buttery, garlicky joy. So, don’t just read about it head to your kitchen, grab that flour and garlic, and experience the magic for yourself. Your taste buds will thank you. Don’t forget to share your beautiful creations and tag us! #10MinuteGarlicRoti