Delicious Vegan Red Lentil Wrap with Avocado: A Flavorful and Nutritious Recipe
In this article, we’re diving into an incredibly delicious and healthy recipe— Vegan Red Lentil Wrap with Avocado. This vegan lentil wrap is a flavorful meal packed with protein, fiber, and all the good things your body needs. Whether you’re looking for an easy lunch, a quick dinner, or simply a nutritious meal to keep you energized, this recipe has got you covered. Not only will it satisfy your taste buds, but it’s also super simple to make and comes together in less than 30 minutes! So, if you’re craving something that’s both tasty and nourishing, this recipe is perfect for you.
What Makes Red Lentil Wrap with Avocado So Special?
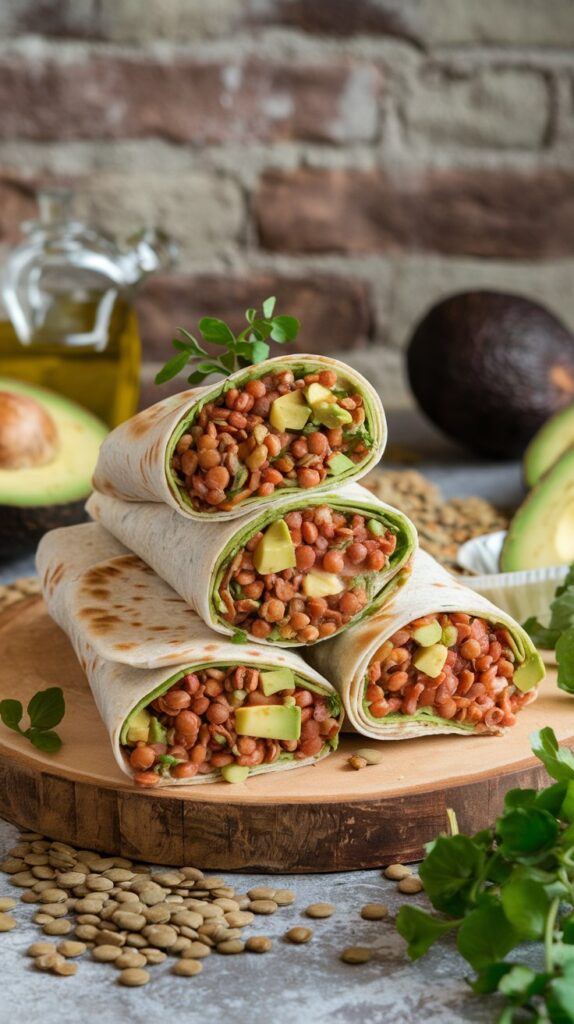
The combination of red lentils and avocado creates a fantastic balance of flavors and nutrients. Lentils bring a rich, earthy flavor and are a great source of plant-based protein, while avocado adds creaminess and healthy fats. Together, they create a wrap that is delicious, nutritious, and satisfying. It’s a meal that feels indulgent yet incredibly healthy!
Why Should You Try a Vegan Lentil Wrap?
If you’re looking to incorporate more plant-based meals into your diet, these vegan lentil wraps are a fantastic option. Not only are they filled with wholesome ingredients, but they’re also quick to cook and versatile. You can enjoy them for a healthy lunch, as part of a burrito-style wrap, or even as a light dinner.
Plus, if you’re new to vegan cooking, lentils are a great ingredient to start with since they’re easy to cook, packed with protein and fiber, and have a subtle flavor that blends well with other ingredients.
What Are Red Lentils and How Do They Benefit Your Health?
Red lentils are a type of legume that cook quickly and have a mild flavor. They’re rich in protein, fiber, and essential nutrients like iron and zinc. These tiny powerhouses are also high in vitamin C, making them a nutritious addition to your diet.
Lentils are a great source of plant-based protein, perfect for vegans or anyone looking to cut down on meat. They also help to nourish your body with essential nutrients that support digestion and overall health.
Key Ingredients for a Perfect Vegan Lentil Wrap
To make this recipe, you’ll need some simple ingredients:
- 1 cup red lentils
- 1 avocado (ripe)
- Tortilla wraps (preferably whole wheat or gluten-free)
- Olive oil (1-2 tbsp)
- Lemon juice (1-2 tbsp)
- Seasoning: Salt, pepper, cumin, and optional cayenne pepper for a spicy kick
- Tahini for a creamy sauce
- Fresh greens like spinach or lettuce for a light salad in the wrap
- Sriracha or another hot sauce (optional)
These ingredients are easy to find, and together they create a wrap that’s both quick and easy to prepare while being nutrient-dense and flavorful.
How to Make Red Lentil Wraps: Step-by-Step Preparation

- Cook the lentils: Rinse 1 cup of red lentils thoroughly under cold water. Place them in a pot with 2 cups of water and a pinch of salt. Bring to a boil, then reduce the heat and let them simmer for about 15 minutes, or until they’re tender and have absorbed the water.
- Season the lentils: Drain any excess water and season the lentils with cumin, salt, pepper, and a squeeze of lemon juice. Stir well and set aside.
- Prepare the avocado: While the lentils cook, mash the avocado in a small bowl with a bit of salt, pepper, and lemon juice. For a smooth consistency, you can mash it using a fork.
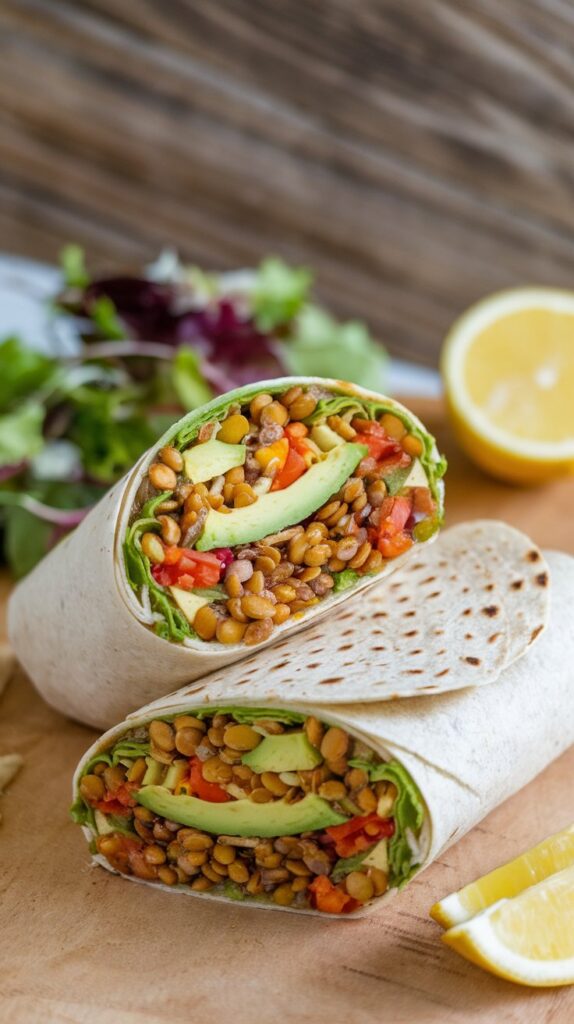
- Assemble the wraps: Lay out your tortilla and spread a generous layer of mashed avocado. Then, add a few spoonfuls of seasoned lentils and top with fresh greens and a drizzle of tahini or hot sauce. Fold the tortilla and enjoy!
How to Prepare Avocado for Your Wraps
The key to a delicious lentil and avocado wrap lies in the creamy avocado layer. Make sure to use a ripe avocado— it should be slightly soft to the touch but not mushy. Mash the avocado with some olive oil and salt to taste, and add a little lemon juice for freshness. This not only enhances the flavor but also helps prevent the avocado from browning.
Best Tips for Assembling the Wraps
When you’re ready to assemble the wraps, make sure your ingredients are all prepped and within reach. Start with a tortilla, layer the mashed avocado, followed by the lentil filling, and finish with your favorite toppings like fresh greens, tahini, or sriracha. It’s important to not overfill the wrap, as this can make it difficult to roll up. For the best results, fold in the sides first, then roll from one end to the other.
Are These Wraps Gluten-Free?
Yes, they can be! If you’re following a gluten-free diet, simply use gluten-free tortillas. Most grocery stores carry a wide variety of gluten-free wraps made from ingredients like rice flour or almond flour. The lentil filling and other components are naturally gluten-free, making this recipe an excellent option for those with gluten sensitivities.
Can I Make These Wraps Spicy?
Absolutely! If you love a little heat in your meals, you can easily transform these into spicy lentil wraps. Add a pinch of cayenne pepper to the lentil mixture for a warm kick, or drizzle some hot sauce or sriracha over the finished wrap. The combination of the creamy avocado and spicy lentils is irresistible!
How to Store and Reheat Leftovers
If you have any leftover lentil filling, store it in an airtight container in the fridge. It will stay fresh for up to three days. You can quickly reheat it in the microwave or on the stove over medium heat. As for the assembled wraps, they’re best enjoyed fresh, but you can store them in the fridge for up to a day if wrapped tightly in parchment paper.
Is This Recipe Suitable for Meal Prep?
Yes! These wraps are perfect for meal prep. You can prepare the lentil filling in advance and store it in the fridge. When you’re ready to eat, simply heat it up and assemble the wraps with fresh avocado and toppings. This makes it a quick and easy lunch or dinner option that you can enjoy throughout the week.
Can I Substitute Red Lentils for Other Types?
While red lentils work best because they cook quickly and have a smooth texture, you can substitute them with green or brown lentils if you prefer a firmer texture. Just keep in mind that they take longer to cook and may not mash as smoothly.
Quick Recipe Variation: Lentil Wrap Burrito
If you want to switch things up, try turning this recipe into a lentil wrap burrito. Simply add more fillings like tofu, pumpkin seeds, and your favorite burrito toppings, such as salsa or shredded lettuce. The lentils provide a hearty base, and the extra fillings make for an even more satisfying meal.
Serving Suggestions: What to Pair with Your Wraps
These wraps are incredibly versatile, but if you want to elevate your meal, pair them with a side of fresh salad or some roasted veggies. You could also serve them alongside a cup of soup for a comforting, well-rounded lunch or dinner.
Why Red Lentil Wraps with Avocado Are a Great Healthy Lunch Option
This recipe is perfect for a quick and healthy lunch because it combines the protein and fiber from lentils with the healthy fats from avocado. It’s a balanced meal that keeps you full and energized throughout the day. Plus, it’s customizable—you can add your favorite toppings or switch up the seasonings to suit your taste.
Key Takeaways
- Red lentils are a nutritious and quick-to-cook protein source.
- The avocado adds creaminess and healthy fats to the wrap.
- This recipe is perfect for meal prep and can be made gluten-free.
- You can easily add a spicy twist with hot sauce or cayenne pepper.
- These wraps are versatile and can be turned into a burrito with additional toppings.
FAQs
- Can I freeze the lentil filling?
Yes, the lentil filling can be frozen and reheated later for convenience. - Can I use a different type of avocado?
Hass avocados work best for their creamy texture, but you can use other varieties if needed. - Are lentil wraps good for kids?
Absolutely! Lentil wraps are nutritious and easy to eat, making them great for kids. - Can I add other veggies to the wrap?
Yes, you can customize the wrap with your favorite vegetables like cucumbers, bell peppers, or tomatoes. - What can I use instead of tahini?
You can substitute tahini with hummus or even a vegan yogurt-based sauce for a creamy alternative.