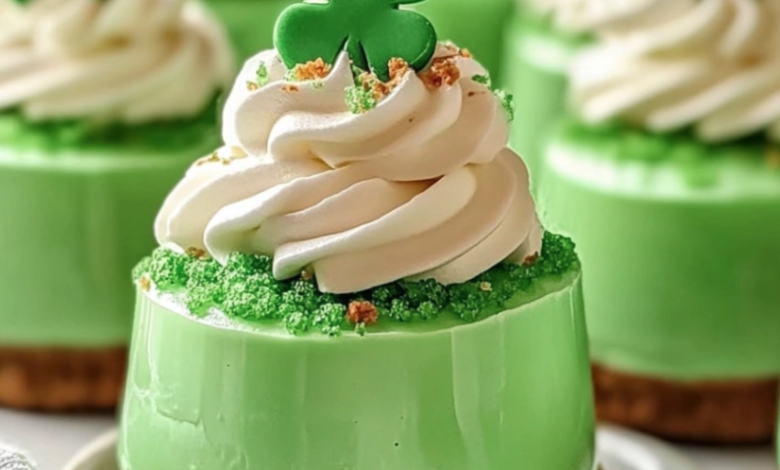
There’s something irresistibly charming about individual desserts. They’re personal, elegant, and promise a perfect portion of sweetness. When St. Patrick’s Day rolls around, these Mini Shamrock Cheesecakes become the star of the show. Combining a rich chocolate crust, a vibrantly green and creamy mint cheesecake filling, and a luxurious white chocolate drizzle, they are as delicious as they are festive.
This recipe is designed to be completely no-bake, making it accessible for bakers of all skill levels. You don’t need to worry about water baths or cracked surfaces just simple, straightforward steps that lead to an impressive dessert. Whether you’re hosting a large party, bringing a treat to a potluck, or simply want to add a little luck o’ the Irish to your week, these mini cheesecakes are the perfect choice. Let’s gather our ingredients and create some magic!
The Allure of the No-Bake Cheesecake
Why choose a no-bake cheesecake? The answer lies in its texture and simplicity. Traditional baked cheesecakes have a dense, rich consistency, which is wonderful. However, no-bake cheesecakes offer a lighter, fluffier, and creamier mouthfeel. They rely on whipped cream and chilled setting time to achieve their structure, resulting in a mousse-like texture that simply melts in your mouth.
For these Mini Shamrock Cheesecakes, the no-bake method is ideal. It allows the refreshing mint flavor to shine brightly without being muted by the baking process. Furthermore, the green color stays vibrant and beautiful. The combination of cool, creamy filling with the crunchy chocolate cookie base is a textural masterpiece that will have everyone asking for the recipe.
Gathering Your Ingredients: A Symphony of Flavors
The magic of this dessert comes from the harmonious blend of its components. Here’s what you’ll need to make approximately 12 mini cheesecakes.
For the Chocolate Crust:
- 1 ½ cups Chocolate Sandwich Cookie Crumbs (like Oreos) – about 18 cookies
- 5 tablespoons Unsalted Butter, melted
- Note: There’s no need to add extra sugar, as the cookie filling provides enough sweetness.
For the Mint Cheesecake Filling:
- 16 oz (450g) full-fat Cream Cheese, softened to room temperature
- 1 cup Powdered Sugar, sifted
- 1 ½ teaspoons Pure Peppermint Extract
- 1 teaspoon Pure Vanilla Extract
- Green Gel Food Coloring (as needed for your desired shade)
- 1 ¼ cups Cold Heavy Whipping Cream
- ½ cup Mini Semi-Sweet Chocolate Chips
For the White Chocolate Drizzle & Garnish:
- ½ cup White Chocolate Chips
- 1 teaspoon Coconut Oil or Shortening
- Optional: Additional mini chocolate chips, gold sugar sprinkles, or shamrock-shaped decorations.
Essential Equipment
- 12-cup Standard Muffin Tin
- Cupcake Liners
- Electric Hand Mixer or Stand Mixer
- Food Processor or zip-top bag and rolling pin for crushing cookies
- Mixing bowls
- Spatula
- Piping bag (optional, but helpful for neat filling)
Crafting Your Mini Masterpieces: A Step-by-Step Guide
Follow these detailed instructions for flawless Mini Shamrock Cheesecakes.
Step 1: Prepare the Crust
- Line the Pan: Begin by placing cupcake liners in every well of your muffin tin.
- Create Cookie Crumbs: If using whole cookies, place them in a food processor and pulse until you have fine, uniform crumbs. If you don’t have a processor, place the cookies in a sturdy zip-top bag and crush them with a rolling pin until finely ground.
- Combine with Butter: In a medium bowl, combine the chocolate cookie crumbs with the melted butter. Stir until the mixture resembles wet sand and every crumb is moistened.
- Form the Base: Spoon about 1 to 1 ½ tablespoons of the crumb mixture into the bottom of each cupcake liner. Use a small glass, measuring spoon, or your fingers to press the crumbs down firmly and evenly. This compact layer is the foundation of your cheesecake.
- Chill: Place the entire muffin tin in the refrigerator to allow the crust to set while you prepare the filling.
Step 2: Whip Up the Creamy Filling
- Cream the Base: In a large mixing bowl, beat the softened cream cheese with an electric mixer on medium speed until it is completely smooth and lump-free. This is a crucial step; any lumps now will remain in the final product.
- Add Sweetness and Flavor: Add the sifted powdered sugar, peppermint extract, and vanilla extract. Beat on low speed initially to incorporate the sugar without creating a cloud of dust, then increase to medium until the mixture is smooth and well-combined.
- Incorporate Color: Add your green gel food coloring, a few drops at a time, until you achieve a vibrant shamrock green. Gel coloring is preferred over liquid as it provides vivid color without altering the consistency of the filling.
- Whip the Cream: In a separate, clean, cold bowl, pour the cold heavy whipping cream. Beat on medium-high speed until stiff peaks form. The cream should be firm and hold its shape when you lift the beaters.
- Fold Gently: Add about one-third of the whipped cream to the green cream cheese mixture. Use a spatula to gently fold it in. This first addition lightens the dense cream cheese. Once incorporated, carefully fold in the remaining whipped cream until no white streaks remain. Be gentle to maintain the airy texture.
- Add Chocolate Chips: Finally, fold in the ½ cup of mini chocolate chips.
Step 3: Assemble and Set
- Fill the Cups: Remove the chilled crusts from the refrigerator. Spoon or pipe the mint cheesecake filling into each cupcake liner, dividing it evenly. Smooth the tops with the back of a spoon or an offset spatula for a professional finish.
- The Final Chill: Cover the muffin tin loosely with plastic wrap and refrigerate for at least 4 hours. For the best results and perfect slice, let them set overnight. This extended chilling time is non-negotiable as it allows the cheesecakes to firm up completely.
Step 4: The Finishing Touches
- Create the Drizzle: Just before serving, melt the white chocolate chips with the coconut oil in a microwave-safe bowl. Heat in 20-second intervals, stirring well each time, until smooth and fluid. The coconut oil helps create a perfect drizzling consistency.
- Decorate: Drizzle the melted white chocolate over the top of each chilled cheesecake. If desired, immediately sprinkle with a few extra mini chocolate chips or gold sprinkles for a festive touch.
- Serve and Enjoy! Carefully remove the cheesecakes from the liners, place on a serving plate, and watch them disappear!
Tips, Tricks, and FAQs for Perfect Cheesecakes
- Room Temperature is Key: Ensuring your cream cheese is truly soft at room temperature is the secret to a silky, lump-free filling.
- Don’t Over-whip: Be careful not to over-whip the heavy cream, or it can turn grainy and eventually become butter.
- Flavor Variations: For an adult version, you can substitute 1-2 tablespoons of Irish Cream liqueur for an equivalent amount of heavy cream in the filling.
- Storage: Keep these cheesecakes stored in an airtight container in the refrigerator for up to 5 days. They can also be frozen for up to 2 months. Thaw in the refrigerator before serving.
These Mini Shamrock Cheesecakes are more than just a dessert; they are a celebration in a bite. Their stunning appearance, refreshing flavor, and delightful texture make them an unforgettable treat. So, channel your inner pastry chef, embrace the spirit of the holiday, and create a batch of these lucky little delights. Sláinte


