Marshmallow Popcorn: The Ultimate Guide to the Perfect Sweet and Salty Treat
Are you ready to embark on a journey to snack heaven? Imagine the irresistible aroma of freshly popped popcorn, now swathed in a luxurious, gooey, sweet marshmallow blanket, with just a hint of salty perfection to balance every bite. This isn’t just a treat; it’s an experience. Marshmallow popcorn, the glorious love child of a campfire s’more and classic movie theater popcorn, has taken the dessert world by storm. It’s the ultimate crowd-pleaser for movie nights, birthday parties, holiday gatherings, or simply when a major sweet-and-salty craving strikes.
The beauty of this recipe lies in its deceptive simplicity. With just a handful of pantry staples, you can create a magical, addictive snack that looks and tastes like it came from a professional confectionery. Whether you’re a kitchen novice or a seasoned baker, this guide will walk you through every step to ensure your marshmallow popcorn is nothing short of perfect crispy, chewy, sweet, salty, and utterly delightful. Let’s turn simple kernels into a legendary treat.
Your Complete Marshmallow Popcorn Ingredients List
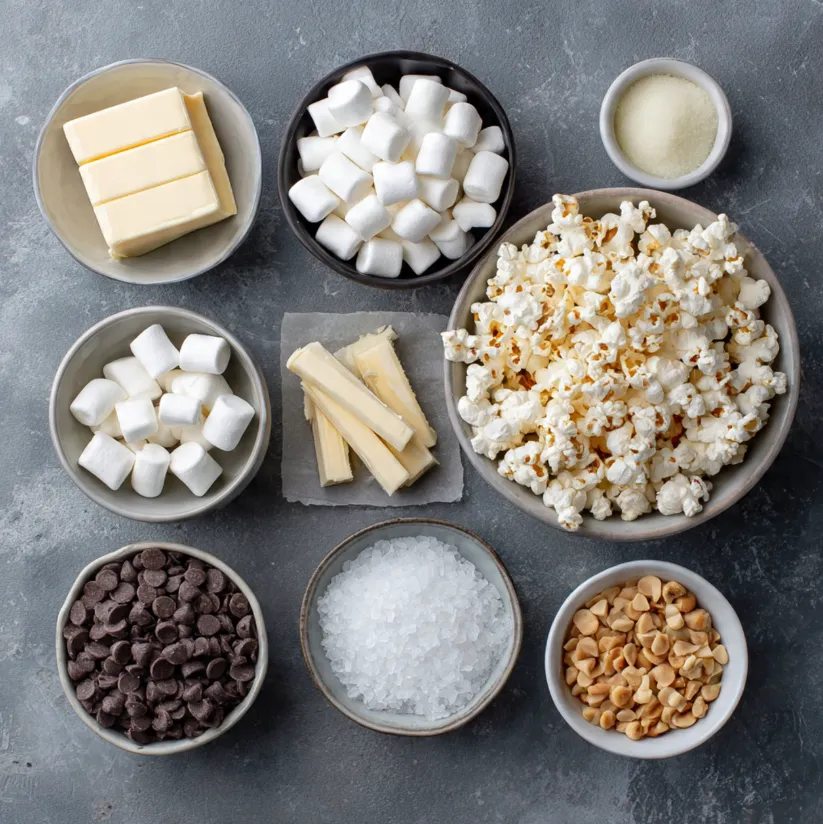
Before we begin, let’s gather everything you need. Part of the joy of this recipe is its flexibility. Here’s the basic lineup, followed by some fantastic optional add-ins.
Main Ingredients:
- 10 cups Plain Popped Popcorn: This is about 1/3 to 1/2 cup of unpopped kernels. We strongly recommend air-popping or using a minimal amount of neutral oil (like coconut or canola) to pop. Avoid pre-buttered or heavily salted varieties, as we’ll be adding our own.
- 4 cups Mini Marshmallows: Using mini marshmallows ensures they melt evenly and quickly. You can also use about 40 regular-sized marshmallows, cut in half.
- 4 tablespoons (1/2 stick) Unsalted Butter: Butter adds rich flavor and helps create a smooth, silky marshmallow coating.
- 1/4 teaspoon Fine Sea Salt: (Plus more for finishing). This is the secret weapon! The salt cuts through the sweetness and amplifies all the flavors.
Optional Add-Ins & Variations:
- For Crunch: 1 cup of roasted peanuts, almonds, pecans, or pretzel pieces.
- For Chocolate Lovers: 1/2 cup of semi-sweet or milk chocolate chips, or a drizzle of melted chocolate over the finished product.
- For Festive Flair: A few drops of food coloring to the marshmallow mixture, or mix in 1/2 cup of holiday-themed sprinkles or M&M’s after coating.
- For Flavor Twists: 1/2 teaspoon of vanilla extract or a pinch of cinnamon added to the melted marshmallow mixture.
Equipment You’ll Need:
- Large pot with a heavy bottom (for melting marshmallows)
- Large mixing bowl (heatproof if possible)
- Wooden spoon or silicone spatula
- Measuring cups and spoons
- Two large baking sheets
- Parchment paper or silicone baking mats
- Airtight container for storage
Step-by-Step Instructions for Perfect Marshmallow Popcorn
Follow these numbered steps closely for foolproof results every single time.
Preparation is Key
- Pop the Corn: Pop your kernels using your preferred method. If you get a few unpopped kernels in the batch, take a minute to pick them out no one wants a surprise tooth cracker!
- Prepare the Pans: Line two large baking sheets with parchment paper or silicone mats. Lightly grease them with a tiny bit of butter or non-stick spray. This prevents sticking and makes cleanup a breeze.
- Pre-Measure: Have all your ingredients measured and ready to go. The marshmallow melting process goes quickly, so being prepared is crucial.
Creating the Magical Marshmallow Coating
- Melt Butter with Salt: In your large, heavy-bottomed pot, melt the 4 tablespoons of butter over low heat. Once melted, stir in the 1/4 teaspoon of fine sea salt until dissolved.
- Incorporate the Marshmallows: Add all 4 cups of mini marshmallows to the melted butter. Keep the heat on low.
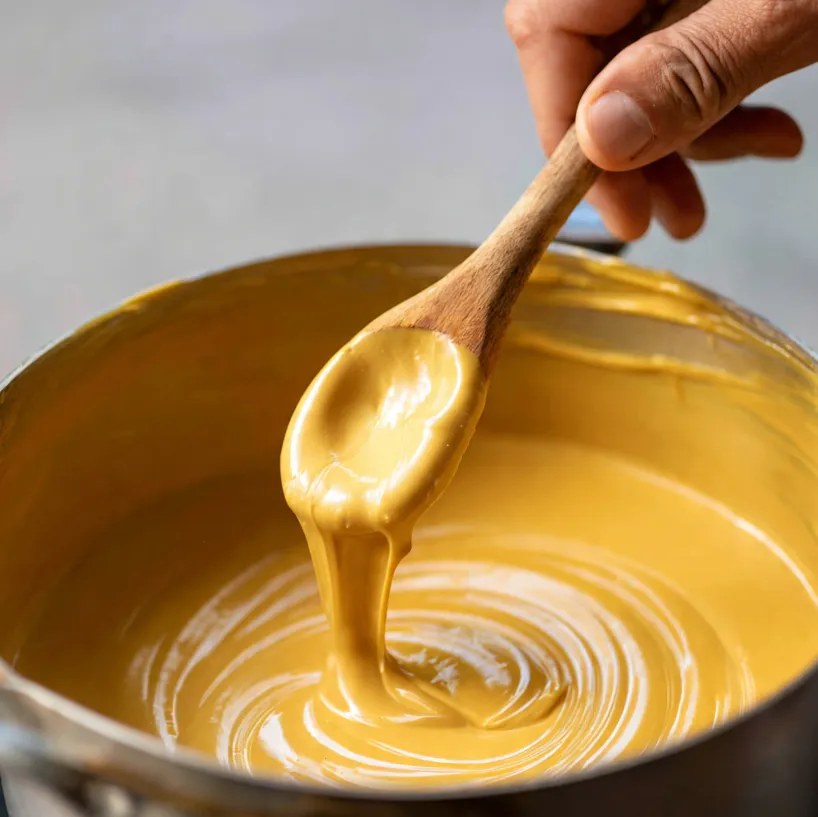
- The Gentle Melt: Stir constantly and patiently with your wooden spoon or spatula. The key here is low and slow. High heat will scorch the marshmallows and butter, creating a grainy, caramelized texture we don’t want. We aim for a completely smooth, glossy, liquid mixture.
- Achieve Smooth Perfection: Continue stirring until every last marshmallow has melted and the mixture is velvety smooth with no lumps. This should take about 5-7 minutes. Once smooth, immediately remove the pot from the heat.
Combining and Forming the Clusters
- Combine Quickly: Immediately pour the hot, smooth marshmallow mixture over the 10 cups of prepared popcorn (and any optional nuts or pretzels at this stage) in your large mixing bowl.
- Gentle Folding: Using a greased spatula or spoon, gently but quickly fold the mixture. Use a lifting and turning motion to coat every piece of popcorn evenly. Be careful not to crush the popcorn.
- Spread and Separate: As soon as the popcorn is mostly coated (it will be very sticky!), turn it out onto your prepared baking sheets. Use your tools or lightly greased hands to spread the mixture into a somewhat even layer, allowing space for clusters to form as it cools.
- Season and Customize: While still warm and tacky, you can sprinkle an extra pinch of flaky sea salt over the top for that professional sweet-salty finish. If adding chocolate chips or sprinkles, scatter them over now so they adhere.
The Finale: Setting and Serving
- Let It Set: Allow the marshmallow popcorn to cool completely at room temperature. Do not cover it while it sets, as this can trap steam and make it soggy. The cooling process will take about 30-60 minutes, during which the marshmallow will set and create those wonderful, crunchy-chewy clusters.
- Break into Clusters: Once completely cool and set, break the large sheet of popcorn into bite-sized clusters with your hands.
- Serve and Enjoy! Transfer to a serving bowl and watch it disappear.
Pro Tips for Marshmallow Popcorn Mastery
- Avoid Common Pitfalls: The number one mistake is overheating the marshmallow. If it starts to bubble vigorously or turns brown, it’s too hot. Low heat is non-negotiable. If your mixture becomes stringy or hard too quickly, it’s likely been overcooked.
- Make-Ahead & Storage: Store completely cooled marshmallow popcorn in a single layer or with parchment between layers in an airtight container at room temperature for up to 3 days. Do not refrigerate, as moisture will make it soft and stale.
- For Perfect Clusters: If you want more distinct, tighter clusters, you can lightly press the warm, coated popcorn together on the baking sheet before it cools. For a more free-form, “chunky” style, just spread it out and let it be.
- Customization is King: This recipe is a canvas!
- Adult Version: Add a pinch of cayenne pepper to the marshmallow mix for a sweet-heat sensation.
- Birthday Version: Use festive sprinkles and mix in handfuls of chopped candy bars.
- Fall Version: Add a teaspoon of pumpkin pie spice to the marshmallow and mix in toasted pecans.
Congratulations! You’ve just mastered the art of the perfect sweet and salty snack. This marshmallow popcorn isn’t just delicious; it’s a testament to how simple ingredients can transform into something truly special and shareable. The contrast of textures and flavors the crisp pop, the chewy sweetness, the sharp hint of salt—creates a symphony in every handful.
So, what are you waiting for? Your next movie night, game day, or potluck just found its star attraction. Gather your ingredients, embrace the sticky, fun process, and prepare to receive rave reviews. Don’t forget to snap a photo of your glorious creation before it vanishes! Once you try this homemade version, you’ll never look at store-bought caramel corn the same way again. Happy snacking