Irresistible Salted Caramel Apple Tarts Recipe Perfect for Fall Desserts and Sweet Treats
The Ultimate Fall Indulgence
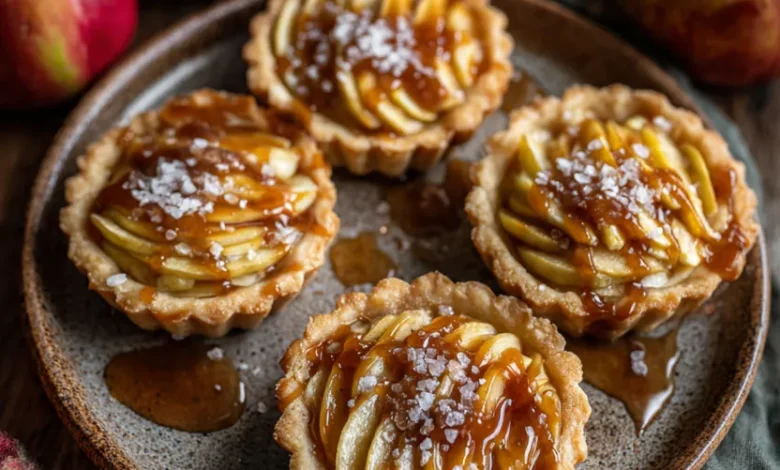
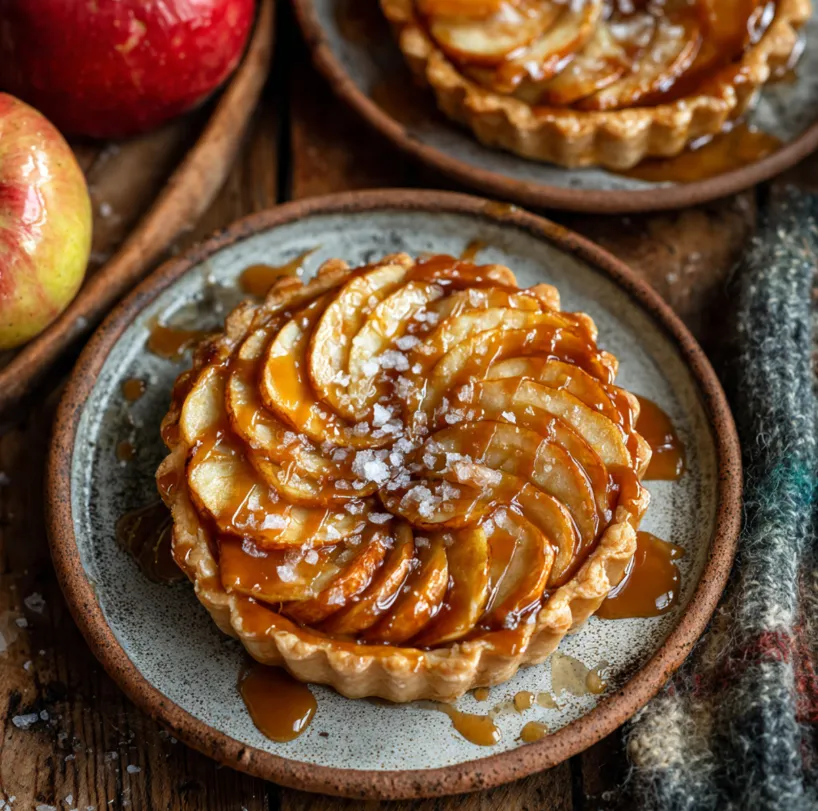
Imagine the aroma of cinnamon and baked apples wafting through your kitchen, the crisp autumn air outside, and a warm, gooey dessert fresh from the oven. That’s the magic of these Salted Caramel Apple Tarts. More than just a recipe, this is an experience a celebration of fall’s finest flavors in an elegant, individually portioned package.
This recipe is designed for bakers of all levels. Whether you’re a seasoned pro looking for a stunning seasonal showstopper or a complete beginner wanting to bake something special, these tarts are for you. We’ll use smart shortcuts without compromising on that unforgettable homemade taste. The combination of flaky, buttery pastry, tender cinnamon-spiced apples, and a rich, salty-sweet caramel drizzle is truly irresistible. Let’s create a dessert that will have everyone asking for seconds and the recipe!
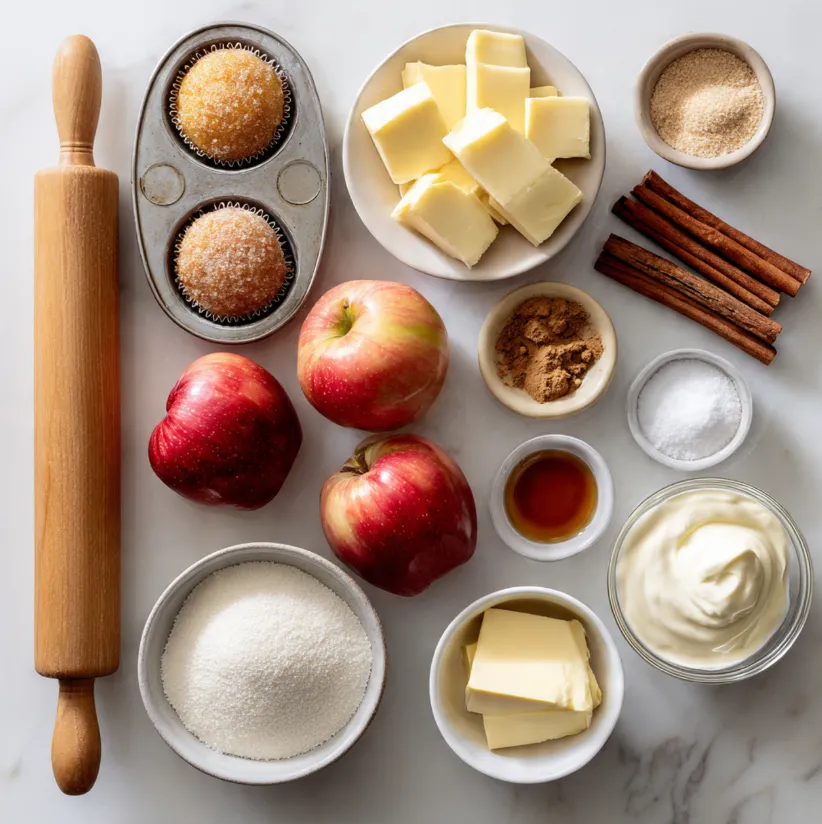
Everything You Need: Your Shopping List
Gathering your ingredients is the first step to success. For the best flavor, use crisp, tart baking apples like Granny Smith or Honeycrisp. Their texture holds up beautifully during baking.
For the Tart Shells:
- 1 package (14 oz or 397g) of ready-rolled puff pastry or pie crust, thawed (or homemade if you’re feeling ambitious!)
- 1 large egg, beaten (for egg wash)
- 1 tablespoon coarse sugar (like turbinado), for sprinkling
For the Apple Filling:
- 3 medium-sized tart baking apples (about 1.5 lbs / 680g), peeled, cored, and thinly sliced
- 3 tablespoons unsalted butter
- ¼ cup (50g) light brown sugar, packed
- 1 teaspoon ground cinnamon
- ¼ teaspoon ground nutmeg
- 1 tablespoon all-purpose flour
- 1 teaspoon vanilla extract
- A pinch of salt
For the Salted Caramel Sauce:
- 1 cup (200g) granulated sugar
- 6 tablespoons (85g) unsalted butter, cubed
- ½ cup (120ml) heavy cream, at room temperature
- 1 teaspoon flaky sea salt (like Maldon), plus extra for garnish
Equipment: A standard 12-cup muffin tin, rolling pin, pastry brush, and a medium saucepan.
Step-by-Step Baking Guide: From Pastry to Perfection
Follow these numbered steps for foolproof, delicious results.
Preparing the Tart Shells
- Prep: Preheat your oven to 400°F (200°C). Lightly grease your muffin tin.
- Roll & Cut: On a lightly floured surface, gently roll out the puff pastry sheet just enough to smooth any seams. Using a bowl or cutter, cut out 4-5 inch circles. You should get about 12 circles. Gently press each circle into a muffin cup, letting the edges fold naturally—they don’t need to be perfect!
- Chill: Place the entire muffin tin in the refrigerator while you prepare the filling. This keeps the pastry cold and ensures flaky layers.
Cooking the Apple Filling
- Cook Apples: In a large skillet over medium heat, melt the 3 tablespoons of butter. Add the sliced apples, brown sugar, cinnamon, nutmeg, and a pinch of salt. Cook for 8-10 minutes, stirring occasionally, until the apples are just starting to soften but still hold their shape.
- Thicken: Sprinkle the flour over the apples and stir for 1 minute until incorporated. Remove from heat and stir in the vanilla extract. Let the mixture cool for 10 minutes.
Assembling and Baking
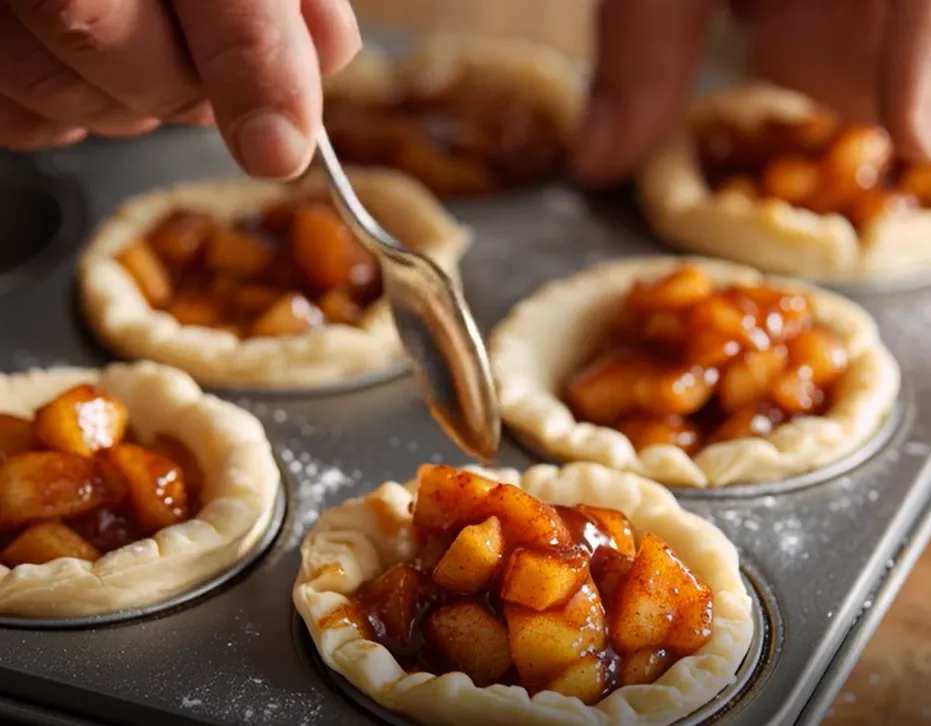
- Fill: Remove the pastry-lined muffin tin from the fridge. Spoon the slightly cooled apple mixture evenly into each pastry shell.
- Egg Wash & Sugar: Brush the exposed edges of the pastry with the beaten egg. Sprinkle the edges with the coarse sugar for a beautiful, sparkling crunch.
- Bake: Bake for 18-22 minutes, or until the pastry is deeply golden brown and puffed, and the apples are bubbling.
- Cool: Let the tarts cool in the tin for 5 minutes, then carefully transfer them to a wire rack using a small offset spatula or spoon. This prevents soggy bottoms.
Making the Salted Caramel Sauce
Caution: Caramel gets very hot. Be careful and use a long-handled whisk.
10. Melt Sugar: In a medium, heavy-bottomed saucepan over medium heat, evenly sprinkle the granulated sugar. Let it melt without stirring. You can gently swirl the pan if needed to ensure even melting.
11. Add Butter: Once the sugar is completely melted and amber-colored, carefully add the cubed butter. It will bubble vigorously! Whisk constantly until the butter is fully melted and combined.
12. Finish with Cream: Remove the pan from heat. Slowly pour in the room temperature heavy cream while whisking continuously. The mixture will bubble again. Whisk until smooth and shiny.
13. Season: Stir in the teaspoon of flaky sea salt. Let the caramel cool and thicken slightly for 10-15 minutes before drizzling over the warm tarts.
Pro Tips for Perfect Salted Caramel Apple Tarts Every Time
- Apple Consistency: For even cooking, try to slice your apples to a uniform thickness, about ¼-inch thick.
- Pastry Shortcut: Using pre-rolled puff pastry is a huge time-saver and works wonderfully. For a more shortbread-like crust, use pre-made pie crusts.
- Caramel Confidence: Don’t stir the sugar as it melts! This can cause it to crystallize into a grainy texture. Just let it do its thing. Using a light-colored saucepan helps you see the color change clearly.
- Make-Ahead Magic: You can prepare the apple filling and caramel sauce up to 2 days ahead. Store them separately in the fridge and reheat gently before assembling and baking. You can also assemble the unbaked tarts and freeze them on a sheet pan, then transfer to a bag. Bake from frozen, adding 5-7 extra minutes.
- Serving Suggestions: Serve these tarts warm. They are sublime with a scoop of vanilla ice cream or a dollop of freshly whipped cream. The contrast of hot and cold is heavenly.
Conclusion: Your New Go-To Fall Dessert Awaits
There you have it the complete guide to creating stunning, professional-looking Salted Caramel Apple Tarts that taste even better than they look. This recipe captures the very essence of autumn in every bite: the comforting spice, the tender fruit, the rich caramel, and the flaky, buttery pastry.
Don’t be intimidated by the caramel or the pastry; our detailed steps and tips are here to guide you to success. This is more than just a dessert; it’s a moment of warmth and joy to share with loved ones.
So, preheat that oven, peel those apples, and get ready to fill your home with the most incredible aromas. We promise, the first bite of your homemade creation will make every minute spent in the kitchen absolutely worth it. Happy baking, and enjoy the sweet taste of fall!
Ready to bake? Pin this recipe to your favorite dessert board and share your beautiful creations with us using #FallAppleTartMagic!