A Vibrant Introduction to the Internet’s Favorite Salad
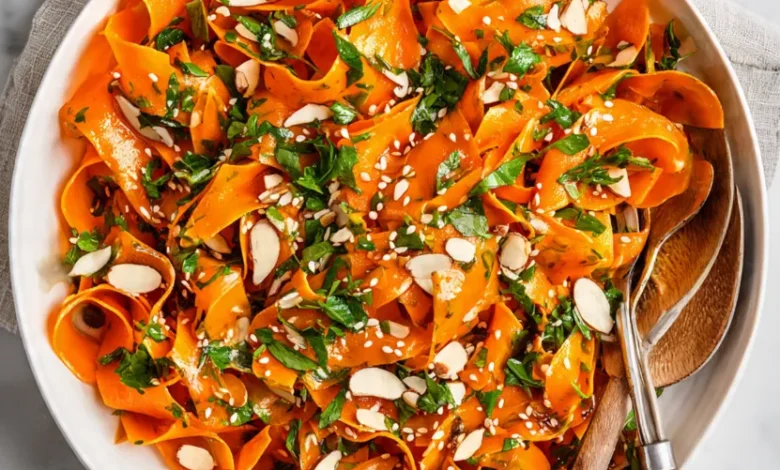
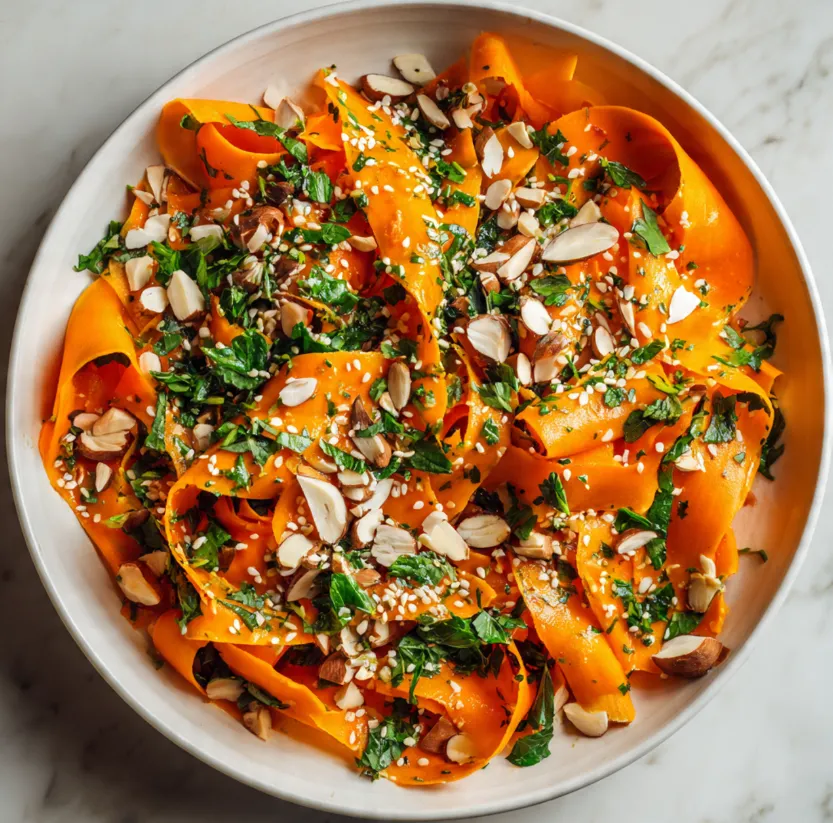
In the ever-evolving world of food trends, a simple, colorful, and incredibly satisfying dish has taken over social media feeds and kitchen tables alike: the Carrot Ribbon Salad. This isn’t your ordinary shredded carrot salad. It’s a stunning, textural masterpiece that transforms humble carrots into delicate, noodle-like ribbons, tossed in a bright, zesty dressing and loaded with complementary crunchy elements. The visual appeal is undeniable a vibrant tangle of orange, green, and white that promises a fresh and healthy eating experience. But beyond its good looks, this viral crunchy salad delivers a symphony of textures and a powerhouse of nutrients. Whether you’re a seasoned home cook or an absolute beginner, this recipe is your ticket to creating a dish that is as delicious to eat as it is beautiful to photograph. Let’s dive into why everyone is making this sensational salad and how you can easily recreate the magic in your own kitchen.
Everything You’ll Need: The Salad Components
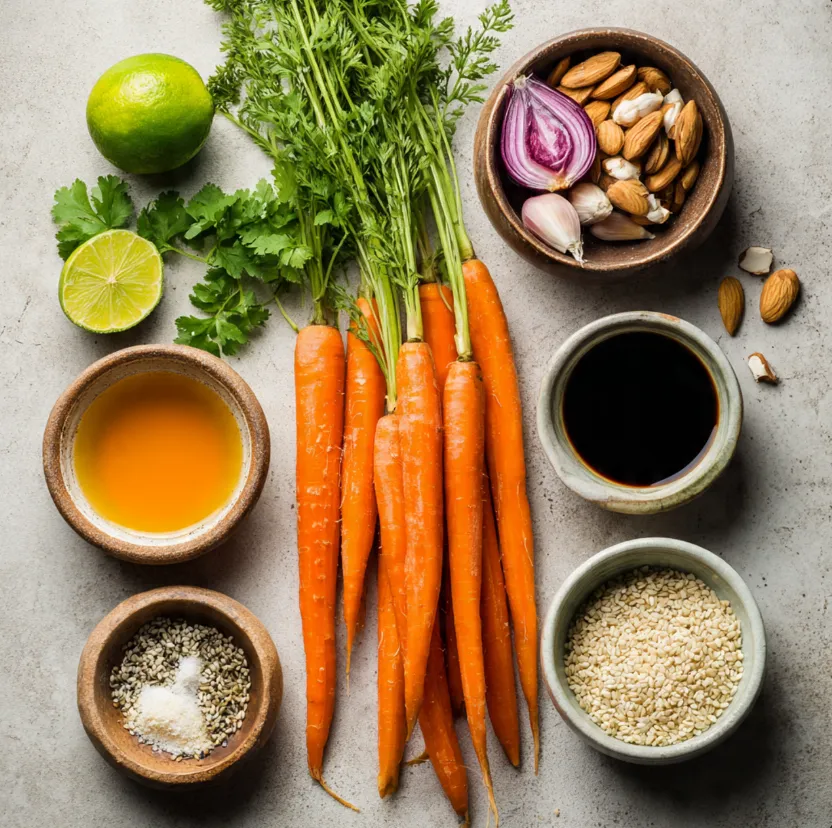
The beauty of this carrot ribbon salad lies in its simplicity and flexibility. The core ingredients are easy to find, and the add-ins can be customized based on what you have on hand. Here’s your complete shopping list to create the classic viral version.
For the Carrot Ribbon Salad Base:
- 4-5 large carrots (preferably with fresh, green tops for garnish): Choose firm, straight carrots for the easiest ribbon-making.
- 1 small red onion: For a sharp, colorful bite.
- 1/2 cup fresh cilantro, roughly chopped: Adds a bright, herbal freshness.
- 1/4 cup fresh mint leaves, roughly chopped (optional but recommended): Introduces a lovely, aromatic layer.
- 1/3 cup roasted almonds, sliced or slivered: For essential crunch and nutty flavor.
- 2 tablespoons white or black sesame seeds: Adds a subtle toastiness and visual contrast.
For the Zesty Lime Dressing:
- 3 tablespoons fresh lime juice (about 1-2 limes): The key to the salad’s bright acidity.
- 2 tablespoons extra virgin olive oil: Provides a smooth, fruity base.
- 1 tablespoon honey or maple syrup: Balances the acidity with a touch of sweetness.
- 1 tablespoon soy sauce or tamari: Adds umami depth and saltiness.
- 1 small clove garlic, finely minced: For a gentle kick of flavor.
- 1/2 teaspoon freshly grated ginger (optional): Adds a warm, spicy note.
- Salt and freshly ground black pepper to taste.
Step-by-Step Guide to Perfect Carrot Ribbons
Follow these detailed, beginner-friendly steps to create a salad that’s both impressive and effortless.
Preparing the Ingredients
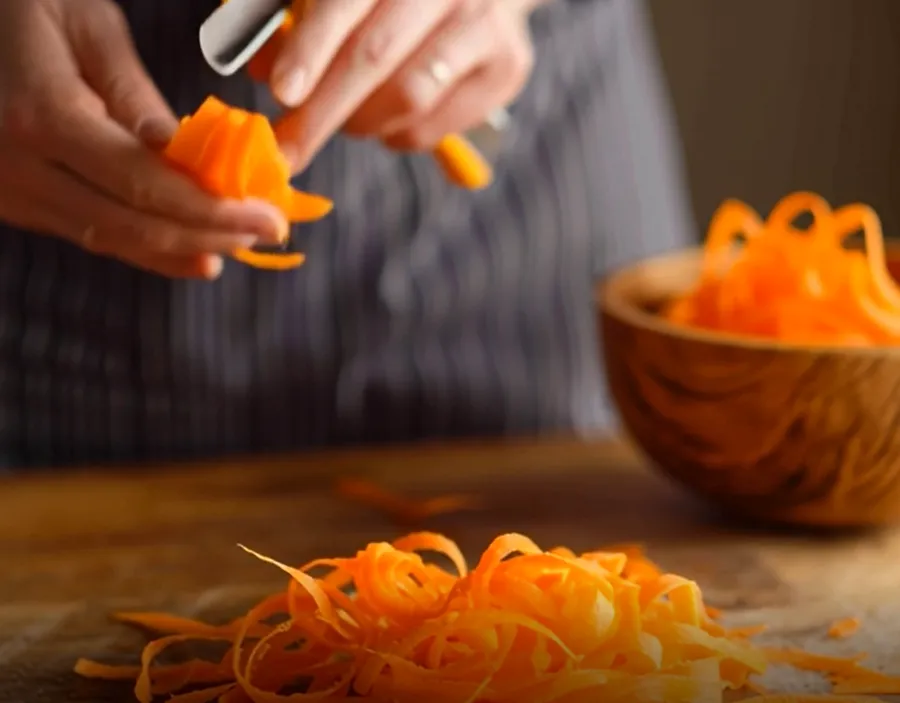
1. Create the Carrot Ribbons
This is the signature technique! Wash and peel your carrots. Using a standard vegetable peeler, start at the top of the carrot and apply steady pressure, pulling the peeler down the length of the carrot to create long, wide ribbons. Rotate the carrot after each peel. As you get to the thinner core, you can continue making smaller ribbons or save the core for snacking or a soup. Place all beautiful ribbons in a large mixing bowl.
Prepare the Remaining Components
- Thinly slice the red onion into half-moons. For a milder flavor, you can soak the slices in cold water for 10 minutes, then drain and pat dry.
- Roughly chop the cilantro and mint.
- If your almonds aren’t already toasted, place them in a dry skillet over medium heat for 3-5 minutes, shaking occasionally, until fragrant and lightly golden. Let them cool.
3. Whisk the Dressing
In a small bowl or jar, combine all the dressing ingredients: fresh lime juice, olive oil, honey, soy sauce, minced garlic, and grated ginger. Whisk vigorously or shake the jar until the mixture is well emulsified meaning the oil and acid are combined. Taste and adjust seasoning with a pinch of salt or pepper if needed. Remember, the soy sauce is already salty.
Assembling the Viral Salad
4. Combine and Toss
To the large bowl containing the carrot ribbons, add the sliced red onion, chopped cilantro, mint, and most of the toasted almonds and sesame seeds (reserve some for garnish). Pour the zesty lime dressing over the top.
5. The Gentle Toss
Using a pair of tongs or clean hands, gently toss the salad. Be thorough but careful to ensure every carrot ribbon gets lightly coated in the dressing without breaking.
6. Serve Immediately
Transfer the tossed carrot ribbon salad to a serving platter or bowl. Garnish with the reserved almonds and sesame seeds. For an extra touch, you can add a few whole herb leaves. This salad is best enjoyed fresh but will keep in the fridge for a few hours.
Pro Tips for the Best Viral Carrot Salad
- Tool Tip: A Y-shaped vegetable peeler often works better than a swivel peeler for creating wider, more consistent ribbons.
- Texture is Key: Don’t skip the toasting step for the almonds. It unlocks their full flavor and maximizes the crunchy contrast that makes this salad so famous.
- Dressing Dynamics: Let the dressed salad sit for 5-10 minutes before serving. This allows the carrots to soften slightly and absorb the flavors, enhancing the overall taste.
- Customize It: This recipe is a perfect canvas. Add crumbled feta or goat cheese for creaminess, toss in some cooked quinoa or chickpeas to make it a full meal, or sprinkle with chili flakes for heat.
- Make it Ahead: You can prep the components ahead of time store the carrot ribbons, chopped herbs, and dressing separately in the fridge. Combine just before serving to maintain the perfect crunch.
Conclusion: Your Turn to Make the Trend
The viral Carrot Ribbon Salad is more than just a passing trend; it’s a testament to how simple ingredients, treated with a little creativity, can result in something extraordinary. It’s a side dish that steals the show, a healthy lunch that feels indulgent, and a guaranteed conversation starter at any potluck or dinner party.
Its combination of vibrant color, addictive crunch, and tangy-sweet dressing is why it has captivated so many home cooks worldwide. Now that you have the complete, SEO-optimized guide from the detailed ingredient list to the step-by-step instructions and expert tips you have everything you need to succeed.
So, grab your peeler and those colorful carrots. Whip up this stunning salad, share your creation, and discover for yourself why this is the crunchy carrot ribbon salad that everyone is making. Don’t forget to tag your photos #CarrotRibbonSalad!
For the best results, prep the ingredients ahead of time and control the heat gradually while cooking. This helps improve texture, flavor balance, and overall consistency.
You can also customize the recipe based on what you have on hand while keeping the seasoning balanced. Serve it with a light side dish and store leftovers in an airtight container for easy reheating.
FAQ
Can I make Carrot Ribbon Salad: The Viral Crunchy Salad Everyone Is Mak ahead of time?
Yes. Prep components in advance and store them separately if possible. Reheat gently and add a splash of liquid (broth, water, or milk) to restore the texture before serving.
How do I store leftover Carrot Ribbon Salad: The Viral Crunchy Salad Everyone Is Mak?
Let it cool, then store in an airtight container in the fridge. It typically keeps well for 3–4 days. Reheat slowly to avoid drying out or splitting sauces.
Can I freeze Carrot Ribbon Salad: The Viral Crunchy Salad Everyone Is Mak?
Often yes. Cool completely, freeze in freezer-safe containers, then thaw overnight in the fridge. Some creamy sauces may change texture slightly—stir well while reheating.
What are the best substitutions for Carrot Ribbon Salad: The Viral Crunchy Salad Everyone Is Mak?
Swap proteins, use a dairy-free alternative, or change the pasta/rice depending on your needs. Taste and adjust seasoning after substitutions to keep flavors balanced.
What should I serve with Carrot Ribbon Salad: The Viral Crunchy Salad Everyone Is Mak?
Pair it with a fresh salad, garlic bread, roasted vegetables, or a light soup. A crunchy or acidic side helps balance rich flavors.
Useful Resources
Wikipedia | USDA FoodData Central | FDA Nutrition
Recipe Card
| Recipe | Carrot Ribbon Salad: The Viral Crunchy |
|---|---|
| Nutrition | For the best results, prep the ingredients ahead of time and control the heat gr |
For the best results, prep the ingredients ahead of time and control the heat gradually while cooking. This helps improve texture, flavor balance, and overall consistency.
You can also customize the recipe based on what you have on hand while keeping the seasoning balanced. Serve it with a light side dish and store leftovers in an airtight container for easy reheating.
FAQ
Can I make Carrot Ribbon Salad: The Viral Crunchy ahead of time?
Yes. Prep components in advance and store them separately if possible. Reheat gently and add a splash of liquid (broth, water, or milk) to restore the texture before serving.
How do I store leftover Carrot Ribbon Salad: The Viral Crunchy?
Let it cool, then store in an airtight container in the fridge. It typically keeps well for 3–4 days. Reheat slowly to avoid drying out or splitting sauces.
Can I freeze Carrot Ribbon Salad: The Viral Crunchy?
Often yes. Cool completely, freeze in freezer-safe containers, then thaw overnight in the fridge. Some creamy sauces may change texture slightly—stir well while reheating.
What are the best substitutions for Carrot Ribbon Salad: The Viral Crunchy?
Swap proteins, use a dairy-free alternative, or change the pasta/rice depending on your needs. Taste and adjust seasoning after substitutions to keep flavors balanced.
What should I serve with Carrot Ribbon Salad: The Viral Crunchy?
Pair it with a fresh salad, garlic bread, roasted vegetables, or a light soup. A crunchy or acidic side helps balance rich flavors.