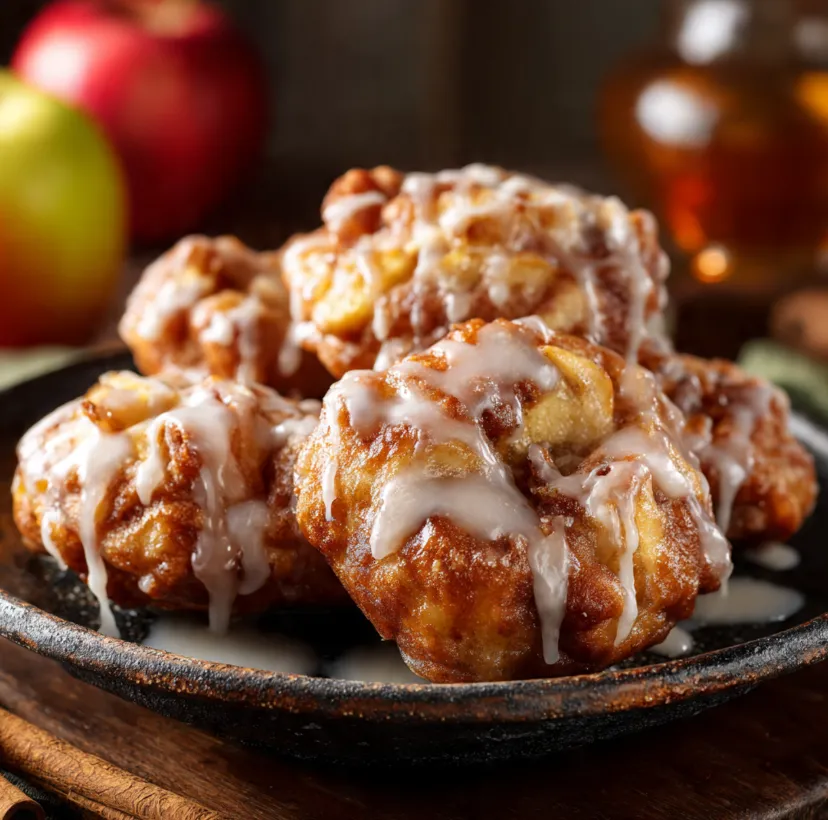
Craving the warm, cinnamon-spiced joy of a classic apple fritter but want to skip the deep-fryer and heavy guilt? You’ve come to the right place. These Easy Baked Apple Fritters are about to become your new favorite fall (or anytime!) treat. Imagine tender pieces of sweet apple, enveloped in a soft, cake-like batter, perfumed with cozy cinnamon and nutmeg, and finished with a simple, dreamy glaze all achieved with just a bowl, a spoon, and your oven.
This recipe is a game-changer. It delivers all the comforting flavor and satisfying texture of the traditional version but in a healthier, baked format that’s incredibly simple to make. Perfect for a quick breakfast, a delightful afternoon snack with coffee, or a wholesome dessert, these fritters are beginner-friendly and guaranteed to make your kitchen smell incredible. Let’s turn those crisp apples into a batch of golden, glazed happiness.
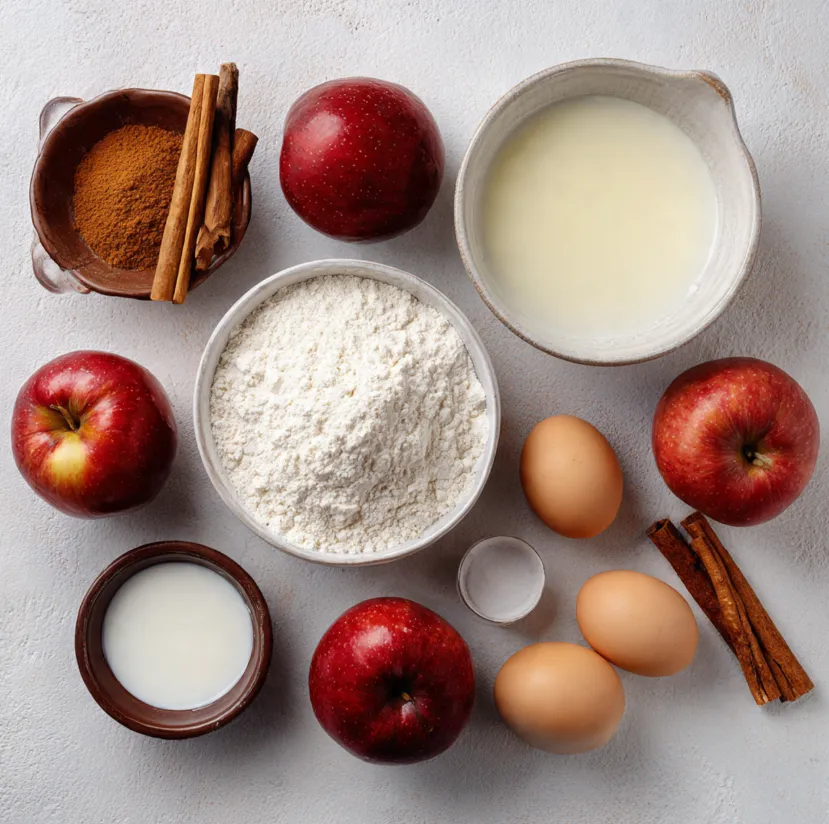
Everything You’ll Need: Simple Ingredients
The beauty of this recipe lies in its simplicity. You likely have most of these pantry staples on hand already. Using fresh, crisp apples is key for the best texture and flavor.
For the Baked Apple Fritters:
- 2 medium-sized apples (about 2 cups diced) – Granny Smith for tartness or Honeycrisp/Gala for sweetness.
- 1 ½ cups (190g) all-purpose flour
- ⅓ cup (65g) granulated sugar
- 2 teaspoons baking powder
- 1 ½ teaspoons ground cinnamon
- ½ teaspoon ground nutmeg
- ¼ teaspoon salt
- 1 large egg, at room temperature
- ½ cup (120ml) milk (any kind: dairy, almond, oat)
- 2 tablespoons (28g) unsalted butter, melted and slightly cooled
- 1 teaspoon pure vanilla extract
For the Simple Glaze:
- 1 cup (120g) powdered sugar (confectioners’ sugar)
- 2-3 tablespoons milk or cream
- ½ teaspoon pure vanilla extract
Kitchen Tools: A large mixing bowl, a medium bowl, a baking sheet, parchment paper or a silicone baking mat, and a cooling rack.
Step-by-Step Instructions for Perfect Fritters
Follow these simple, numbered steps for foolproof baked apple fritters every single time.
Step 1: Prepare Your Oven and Pan
Preheat your oven to 350°F (175°C). This ensures it’s perfectly heated for even baking. Line a large baking sheet with parchment paper or a silicone baking mat. This prevents sticking and makes cleanup a breeze. Set it aside.
Step 2: Prepare the Apples
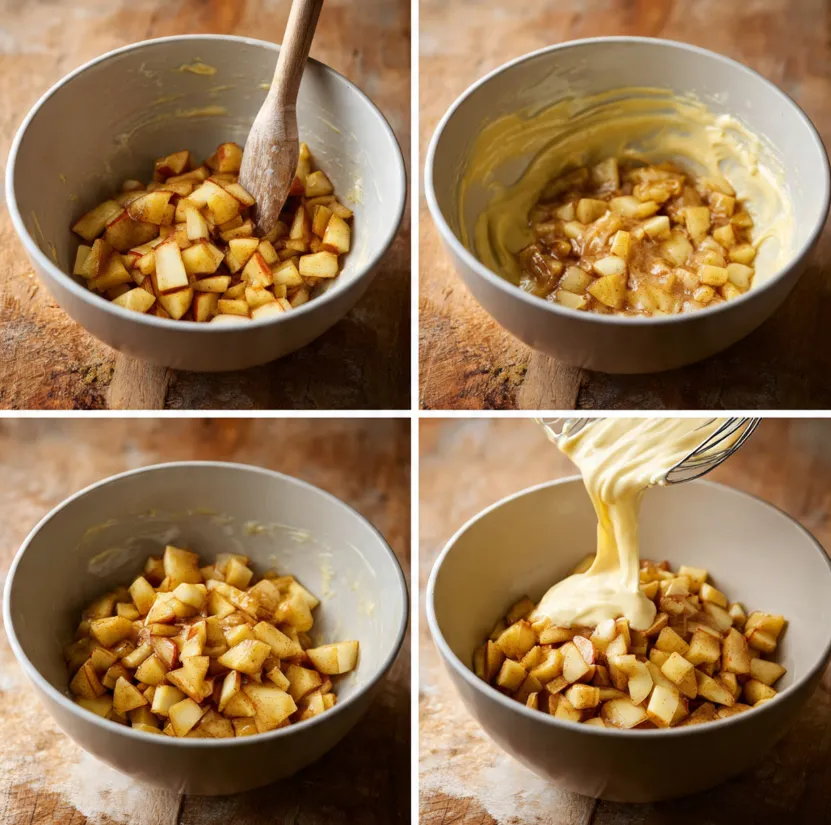
Wash, core, and peel your apples. Dice them into small, bite-sized pieces (about ½-inch cubes). Place the diced apples in a small bowl and set them aside for now.
Step 3: Mix the Dry Ingredients
In your large mixing bowl, whisk together the all-purpose flour, granulated sugar, baking powder, cinnamon, nutmeg, and salt. Whisking well ensures the leavening agent and spices are evenly distributed throughout the flour, which is crucial for a uniform rise and flavor.
Step 4: Combine the Wet Ingredients
In a separate medium bowl, whisk the egg lightly. Then, add in the milk, melted (and slightly cooled) butter, and vanilla extract. Whisk until the mixture is smooth and well-combined.
Step 5: Bring the Batter Together
Create a well in the center of your dry ingredients. Pour the wet mixture into the well. Using a wooden spoon or spatula, gently stir just until the ingredients are combined and no large dry pockets of flour remain. The batter will be thick and shaggy—this is perfect! Do not overmix, as this will lead to dense, tough fritters.
Step 6: Fold in the Apples
Add the reserved diced apples to the batter. Gently fold them in until they are evenly distributed.
Step 7: Shape and Bake
Using two spoons or a large cookie scoop, drop mounds of batter (about ¼ cup each) onto your prepared baking sheet. You can shape them roughly, but they don’t need to be perfect—the rustic look is part of their charm. Leave about 1-2 inches of space between each fritter as they will spread slightly.
Bake for 15-18 minutes, or until the edges are golden brown and a toothpick inserted into the center of a fritter comes out clean or with just a few moist crumbs.
Step 8: Cool the Fritters
Remove the baking sheet from the oven and let the fritters cool on the pan for 5 minutes. Then, carefully transfer them to a wire cooling rack to cool completely before glazing. This step is important; if you glaze them while they’re too warm, the glaze will just melt and slide off.
Step 9: Make the Glaze and Finish
While the fritters cool, make the simple glaze. In a small bowl, whisk together the powdered sugar, 2 tablespoons of milk/cream, and vanilla extract. Whisk until completely smooth. If the glaze is too thick, add more liquid, one teaspoon at a time, until it reaches a thick but pourable consistency.
Once the fritters are completely cool, drizzle the glaze generously over the top using a spoon. Let the glaze set for about 10 minutes before serving.
Pro Tips for the Best Baked Apple Fritters
- Apple Variety: For balanced flavor, use one tart apple (like Granny Smith) and one sweet apple (like Honeycrisp). This creates a more complex and delicious taste.
- Batter Consistency: If your batter seems too dry (this can depend on flour absorption or apple juiciness), add an extra tablespoon of milk. It should be thick enough to scoop.
- Uniform Baking: For evenly sized fritters that bake at the same rate, use a standard ice cream scoop or a ¼-cup measuring cup to portion the batter.
- Spice It Up: Feel free to add a pinch of ginger or allspice to the dry ingredients for an extra warm spice kick.
- Storage: Store unglazed fritters in an airtight container at room temperature for 1-2 days, or freeze them for up to 2 months. Glaze them just before serving for the best texture.
- Make it Dairy-Free/Vegan: Use plant-based milk, vegan butter, and a flax egg (1 tbsp ground flaxseed + 2.5 tbsp water) for a vegan-friendly version.
Enjoy Your Homemade, Healthier Treat!
There you have it incredibly Easy Baked Apple Fritters that are tender, flavorful, and utterly satisfying without the mess of frying. This recipe proves that you can enjoy classic comfort food in a simpler, healthier way. The smell of apples and cinnamon baking is therapy in itself, and the result is a plate of warm, glazed goodness that everyone will love.
So, what are you waiting for? Grab those apples and preheat your oven. Your journey to a perfect, guilt-free baked treat starts now. Don’t forget to share your beautiful creations online and tag them with #BakedAppleFritters we love seeing your kitchen wins! Happy baking