Deep-Fried Deviled Eggs: The Crispy, Creamy Appetizer That Steals Every Show

Picture this: you bring a platter to the party, and a hush falls over the room. All eyes are on your creation. They look like delicate, golden-brown orbs, dusted with a hint of spice. One brave guest takes a bite. The exterior gives way with a satisfying, audible crunch, revealing a cloud of velvety, tangy, perfectly seasoned filling. The conversation stops. “What ARE these?” someone asks, already reaching for another. You smile. You’ve just unveiled the ultimate party appetizer: Deep-Fried Deviled Eggs.
This isn’t just another deviled egg recipe. This is a transformation. We’re taking the beloved, classic potluck staple and elevating it into a show-stopping culinary experience. By enveloping the creamy egg white in a light, crispy coating, we create a magical contrast of textures that is utterly addictive. It’s a fun, impressive twist that looks like it came from a gourmet restaurant but is deceptively simple to make at home. Whether you’re hosting a game day gathering, a holiday cocktail party, or just want to treat yourself, these crispy, creamy delights are guaranteed to be the first thing to disappear from the table.

Everything You Need: Your Deep-Fried Deviled Eggs Shopping List
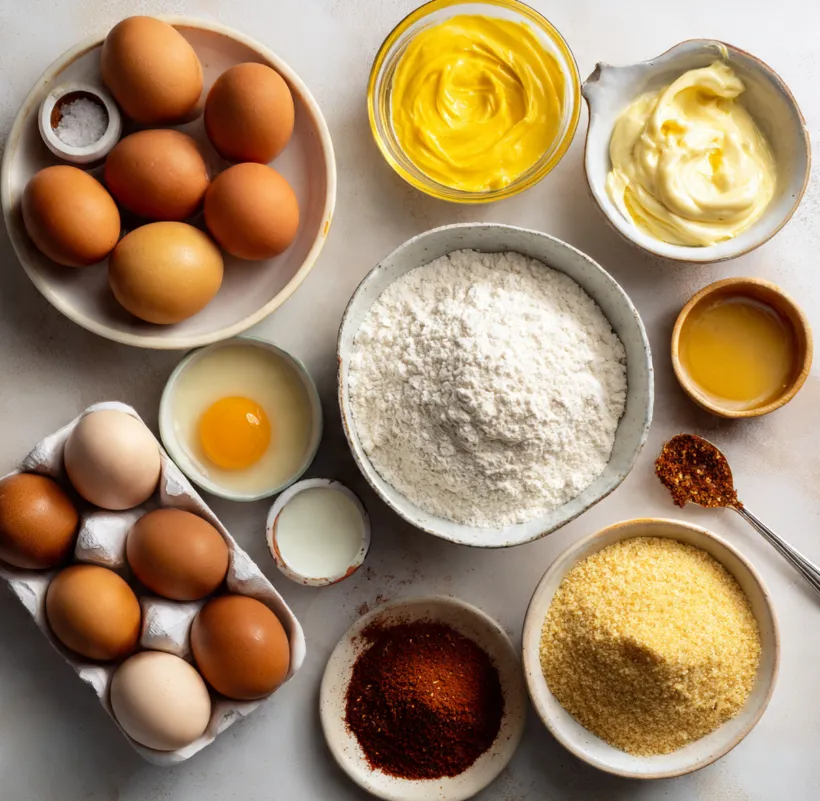
Before we dive into the fryer, let’s get organized. One of the secrets to stress-free cooking is mise en place having everything in its place. Here’s your complete list of ingredients, broken down for clarity.
For the Hard-Boiled Eggs & Filling:
- 12 large eggs: Older eggs (about 7-10 days old) peel more easily!
- 1/3 cup (80g) mayonnaise: Full-fat is best for richness and stability.
- 2 tablespoons Dijon mustard: Adds a tangy, complex flavor.
- 1 teaspoon white vinegar or apple cider vinegar: For that essential bright, “deviled” kick.
- 1/4 teaspoon salt, or to taste.
- 1/4 teaspoon freshly ground black pepper.
- Optional Flavor Boosters: A dash of hot sauce (like Tabasco), a pinch of smoked paprika, or 1 tablespoon sweet pickle relish.
For the Breading Station (The Triple Dip):
- 1/2 cup (60g) all-purpose flour
- 2 large eggs, beaten
- 1 cup (100g) fine plain breadcrumbs or panko breadcrumbs (Panko gives an extra-crispy, flakier crust).
- 1/2 teaspoon garlic powder
- 1/2 teaspoon onion powder
- Optional for breadcrumbs: 1/4 teaspoon smoked paprika or cayenne pepper for color and heat.
For Frying & Garnish:
- Vegetable, canola, or peanut oil for frying (enough for 2-3 inches in your pot)
- Paprika, chopped fresh chives, or a drizzle of sriracha for garnish.
Your Step-by-Step Guide to Perfect Deep-Fried Deviled Eggs
Don’t be intimidated by the steps. We’re breaking it down into clear, manageable phases: cooking & peeling, filling, breading, and frying. Follow this sequence, and you’ll be a pro in no time.
Phase 1: Mastering the Hard-Boiled Egg
- Cook the Eggs: Place your 12 eggs in a single layer in a large saucepan. Cover with cold water by about an inch. Bring to a rolling boil over high heat.
- Steep, Don’t Boil: As soon as it boils, remove the pan from the heat, cover it with a lid, and let it sit for 10-12 minutes. This method prevents rubbery whites and those dreaded green rings around the yolk.
- The Ice Bath Shock: While the eggs sit, prepare a large bowl of ice water. After the 10-12 minutes, use a slotted spoon to immediately transfer the hot eggs to the ice bath. Let them cool completely for at least 15 minutes. This stops the cooking and contracts the egg inside the shell, making peeling infinitely easier.
- The Peel: Gently tap each egg on the counter to crackle the shell all over. Start peeling from the wider end (where there’s usually an air pocket) under a thin stream of running water—the water helps loosen the membrane.
Phase 2: Creating the Creamy Deviled Filling
- Slice and Scoop: Carefully slice each peeled egg in half lengthwise. Gently pop out the yolks into a medium bowl. Arrange the empty egg white halves on a paper towel-lined plate to dry—this is crucial for the breading to stick later.
- Mix the Filling: To the yolks, add the mayonnaise, Dijon mustard, vinegar, salt, and pepper (and any optional boosters like hot sauce). Mash and mix with a fork until completely smooth and creamy. Taste and adjust seasoning this is your chance to make it perfect.
- Fill and Reassemble: Using a spoon, a piping bag, or a zip-top bag with the corner snipped off, generously fill each egg white half with the yolk mixture. Now, here’s the key trick for frying: gently press two filled halves together to re-form a whole egg shape. The filling acts as the “glue.” Handle them with care. You should have 6 reassembled whole eggs.
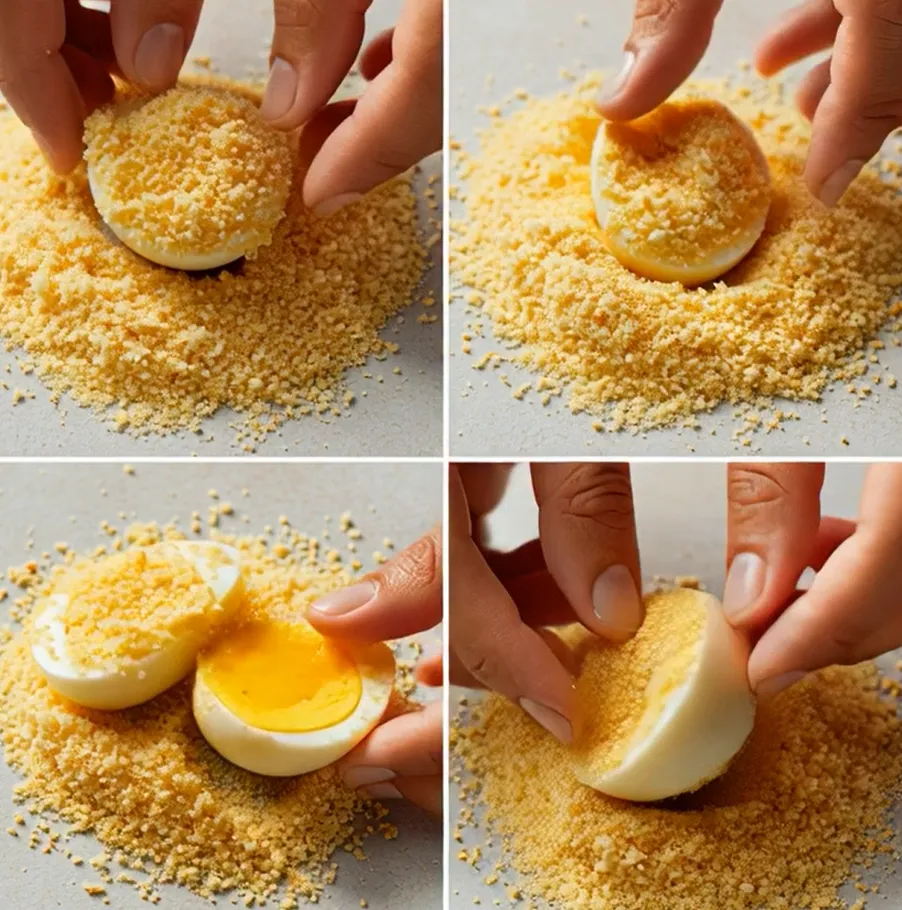
Phase 3: The Breading Assembly Line
- Set Up Your Station: Get three shallow bowls or plates. In the first, place the flour. In the second, beat the 2 eggs until uniform. In the third, mix the breadcrumbs with garlic powder, onion powder, and any additional spices.
- The Triple-Dip Method: This is where the magic coating happens. One hand for wet, one hand for dry is a good rule to keep things clean.
- Dredge: Roll a reassembled egg gently in the flour, shaking off any excess. This dry layer helps the egg wash adhere.
- Coat: Dip the floured egg into the beaten egg, turning to coat it completely. Let any excess drip off.
- Bread: Finally, roll the egg in the seasoned breadcrumbs, pressing gently to ensure an even, complete coating. Place the breaded egg on a clean plate or baking sheet.
- Chill (The Secret Step!): Once all eggs are breaded, place the plate in the refrigerator for at least 15-20 minutes. This firms up the coating and helps it stay on during frying.
Phase 4: Frying to Golden Perfection
- Heat the Oil: In a heavy-bottomed pot, Dutch oven, or deep fryer, heat 2-3 inches of oil to 350°F (175°C). Use a deep-fry or candy thermometer for accuracy. The right temperature is essential—too hot, and they brown before heating through; too cool, and they get greasy.
- Fry in Batches: Carefully lower 2-3 breaded eggs into the hot oil using a slotted spoon or spider strainer. Do not overcrowd the pot, as this will drop the oil temperature.
- Monitor and Turn: Fry for about 2-3 minutes, turning occasionally, until the coating is a deep, uniform golden brown and crispy.
- Drain: Use the slotted spoon to transfer the fried eggs to a wire rack set over a paper-towel-lined baking sheet. This allows excess oil to drip off while keeping the bottom crispy (unlike draining directly on paper towels, which can steam the crust).
Pro Tips for Flawless Fried Deviled Eggs Every Time
- Peeling Peace: The ice bath is non-negotiable. For super easy peeling, some cooks add a tablespoon of baking soda or vinegar to the boiling water, which can help loosen the shells.
- Filling Consistency: Your filling should be thick, not runny. If it seems loose, add a touch more mayonnaise or a few more breadcrumbs to help it bind. It needs to be sturdy enough to hold the egg halves together.
- The Glue Holds: If you’re worried about the eggs staying together during breading, you can place them on the plate seam-side down and be extra gentle during the first dredge in flour.
- Oil Temperature is King: If you don’t have a thermometer, test the oil by dropping in a small breadcrumb. It should sizzle vigorously and float to the top immediately.
- Make-Ahead Magic: You can hard-boil, fill, and reassemble the eggs a day ahead. Keep them covered in the fridge. Bread and fry them just before serving for the ultimate crispiness.
- Serving Style: Serve them warm, within 30 minutes of frying for the best texture. A final sprinkle of paprika and chives makes them look irresistible.
The Verdict: Your New Secret Weapon Awaits
Deep-fried deviled eggs are more than just an appetizer; they are a conversation starter, a testament to your kitchen creativity, and an unforgettable bite. The journey from a simple boiled egg to this crispy, creamy masterpiece is part of the fun. Yes, it involves a few more steps than the classic version, but the stunned looks and empty platter at the end of the night are worth every single one.
So, are you ready to steal the show? Gather your ingredients, set up your breading station, and heat that oil. Embrace the process, and get ready to present a dish that blends comforting familiarity with exciting innovation. Your friends and family won’t believe you made these at home and they’ll be begging you to make them again. Happy frying