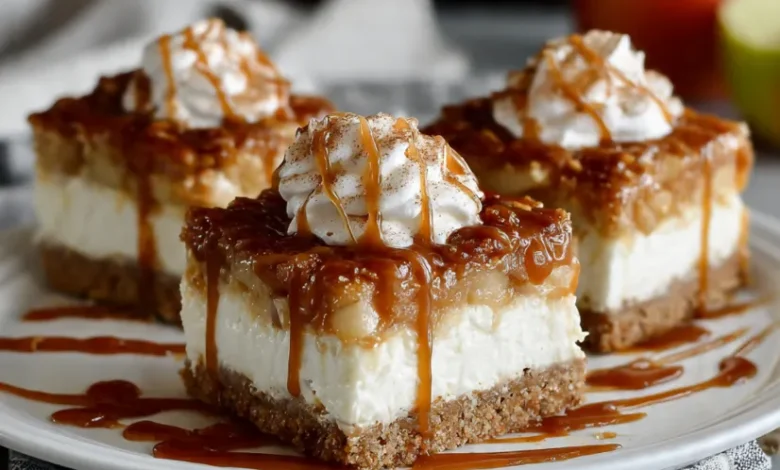
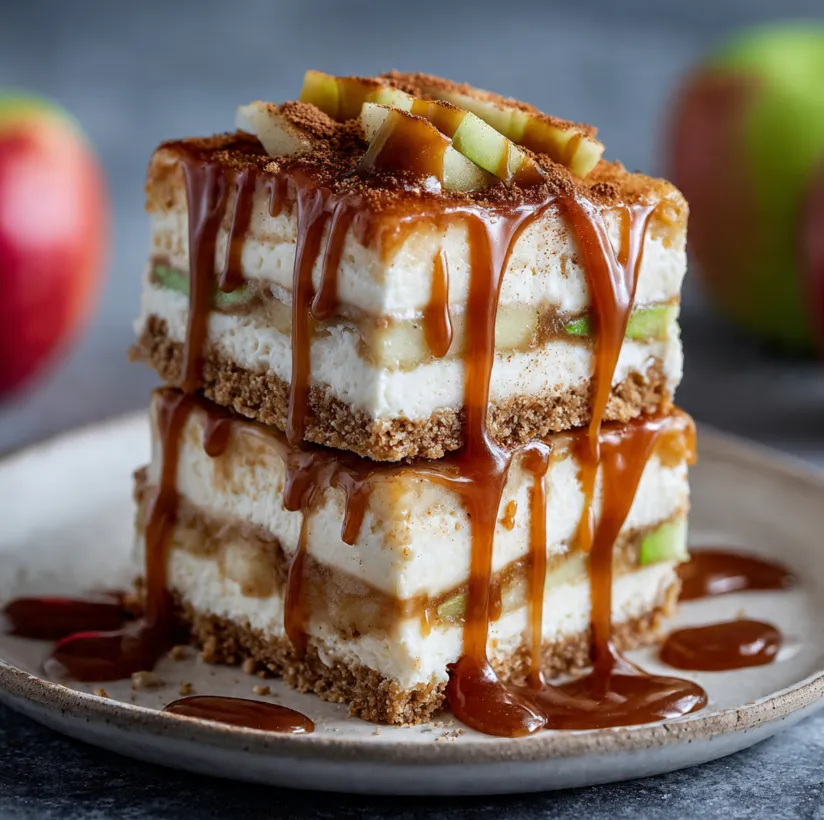
Is there any combination more iconic and comforting than caramel and apple? Now, imagine that classic duo baked into a creamy, decadent cheesecake, all resting on a buttery shortbread crust and conveniently portioned into easy-to-serve bars. These Caramel Apple Cheesecake Bars are the dessert of your autumn dreams. They bring together the nostalgic flavor of a caramel apple with the rich luxury of cheesecake, creating a treat that’s perfect for Thanksgiving, Halloween parties, potlucks, or simply satisfying a seasonal sweet craving.
This recipe is designed to be approachable, even for beginner bakers. We’ll walk you through each step with clear instructions, ensuring you achieve a perfect, impressive dessert every time. Let’s create some magic in the kitchen!
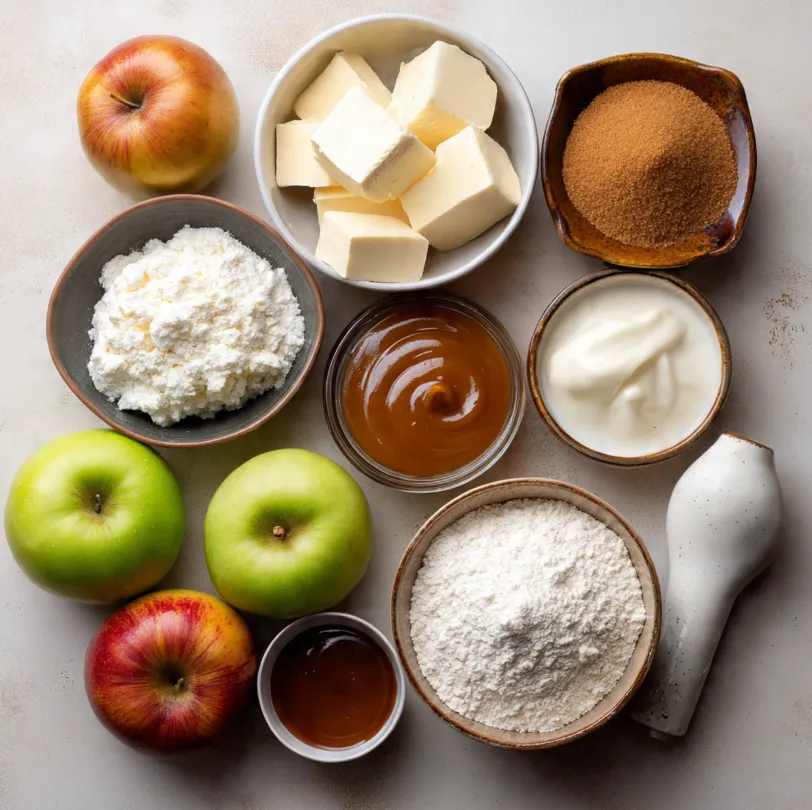
Ingredients You’ll Need
Before you begin, gather all your ingredients. Having everything measured and ready (a technique called mise en place) makes the baking process smooth and enjoyable.
For the Shortbread Crust:
- 1 ½ cups (about 180g) all-purpose flour
- ½ cup (100g) granulated sugar
- ½ teaspoon salt
- ¾ cup (1 ½ sticks / 170g) unsalted butter, cold and cubed
For the Cheesecake Filling:
- 2 packages (16 oz / 450g total) full-fat cream cheese, softened to room temperature
- ½ cup (100g) granulated sugar
- 2 large eggs, at room temperature
- 1 teaspoon pure vanilla extract
For the Apple Layer:
- 2 medium apples (like Granny Smith, Honeycrisp, or Braeburn), peeled, cored, and finely chopped
- 2 tablespoons granulated sugar
- ½ teaspoon ground cinnamon
- ¼ teaspoon ground nutmeg
- 1 tablespoon all-purpose flour
For the Topping & Garnish:
- ½ cup (about 50g) chopped pecans or walnuts (optional)
- ⅓ cup (40g) oat streusel (mix 40g flour, 25g brown sugar, 25g cold butter with fingers until crumbly)
- ⅔ cup caramel sauce, store-bought or homemade
Step-by-Step Instructions
Follow these numbered steps for foolproof Caramel Apple Cheesecake Bars.
1. Prepare the Crust
- Preheat your oven to 350°F (175°C). Line an 8×8 or 9×9 inch baking pan with parchment paper, leaving an overhang on two sides for easy removal.
- In a medium bowl, whisk together the flour, sugar, and salt for the crust.
- Add the cold, cubed butter. Using a pastry cutter, a fork, or your fingertips, work the butter into the flour mixture until it resembles coarse sand and starts to clump together.
- Press this mixture firmly and evenly into the bottom of your prepared pan. Use the bottom of a measuring cup to get a compact, level layer.
- Bake the crust for 15-18 minutes, or until the edges are just beginning to turn a light golden brown. Remove from the oven and let it cool slightly while you prepare the filling. Leave the oven on.
2. Make the Cheesecake Filling
- In a large mixing bowl, beat the softened cream cheese with an electric mixer on medium speed until it is completely smooth and creamy, about 2 minutes. Scrape down the sides of the bowl.
- Add the ½ cup of sugar and beat again until fully combined.
- Add the eggs one at a time, beating well after each addition. Finally, beat in the vanilla extract. Mix just until the batter is uniform and smooth—avoid overmixing.
3. Prepare the Spiced Apples
- In a separate bowl, toss the finely chopped apples with the 2 tablespoons of sugar, cinnamon, nutmeg, and 1 tablespoon of flour. The flour will help absorb excess juice from the apples during baking.
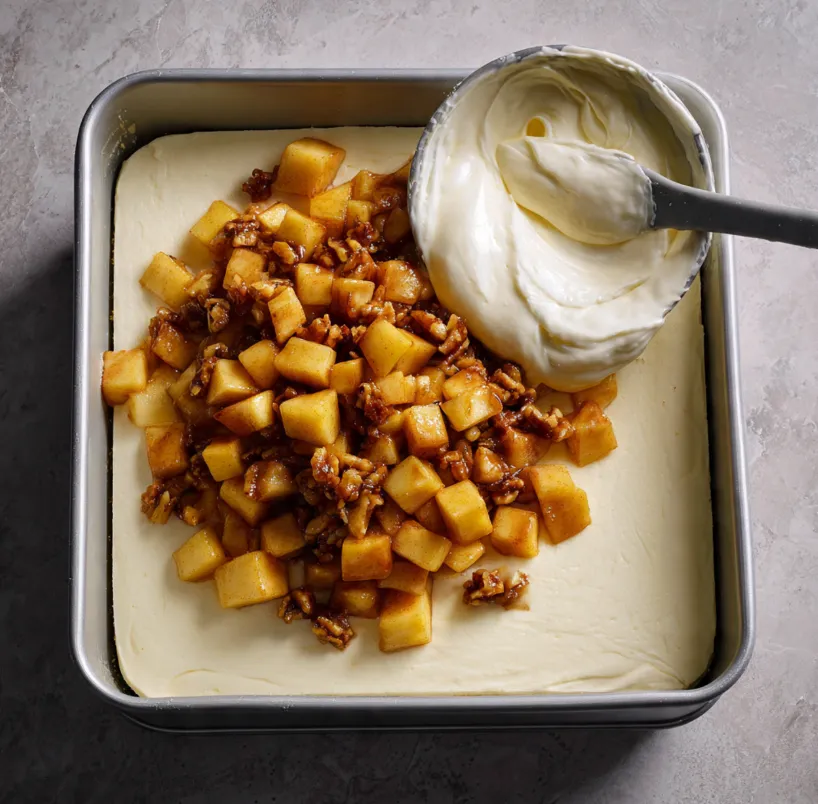
4. Assemble the Bars
- Pour the creamy cheesecake batter over the warm, pre-baked crust. Spread it into an even layer.
- Evenly scatter the spiced apple pieces over the cheesecake layer.
- Sprinkle the optional chopped nuts and/or the oat streusel topping over the apples.
5. Bake and Cool
- Place the pan in the preheated oven and bake for 35-45 minutes. The bars are done when the edges are set, and the center only has a slight, gentle jiggle when you shake the pan. The apples should be tender.
- Remove the pan from the oven and place it on a wire rack. Run a thin knife around the edges not covered by parchment to loosen it.
- Let the bars cool completely at room temperature for about 1 hour, then transfer the pan to the refrigerator to chill for at least 4 hours, preferably overnight. This crucial step allows the cheesecake to set fully for clean slices.
6. Slice and Serve
- Once completely chilled, use the parchment paper overhang to lift the entire dessert out of the pan and onto a cutting board.
- Drizzle generously with caramel sauce.
- Using a sharp knife, slice into 12 or 16 squares. For the cleanest cuts, wipe the knife clean with a warm, damp cloth between each slice.
Useful Tips for Perfect Bars
- Room Temperature is Key: Ensure your cream cheese and eggs are truly at room temperature. This prevents a lumpy filling and ensures a smooth, creamy texture.
- Apple Choices: Use firm, tart apples like Granny Smith for a nice flavor contrast, or sweeter apples like Honeycrisp for a more mellow taste. Avoid very soft apples that will turn mushy.
- Preventing a Soggy Crust: Pre-baking (or “blind baking”) the crust is essential. It creates a barrier and ensures a crisp, buttery base.
- Don’t Overbake: The center of the cheesecake should still wobble slightly when you take it out. It will continue to set as it cools.
- Caramel Drizzle Timing: Always add the final caramel drizzle after chilling and right before serving. If added before chilling, it will soak in and not be as visually striking.
- Storage: Keep bars covered in the refrigerator for up to 5 days. They can also be frozen (without final caramel drizzle) for up to 2 months. Thaw overnight in the fridge before serving.
Conclusion: Your New Favorite Dessert Awaits
These Caramel Apple Cheesecake Bars are more than just a dessert; they’re a celebration of fall in every bite. The contrast of the buttery crust, tangy cream cheese, spiced apples, and sweet caramel is simply irresistible. While they look and taste like they came from a professional bakery, this recipe proves they are wonderfully achievable in your own kitchen.
So, roll up your sleeves, put on some cozy music, and get ready to fill your home with the incredible aroma of baking apples and cinnamon. Don’t forget to share your creation! Tag your photos online we love to see your baking triumphs. Now, go preheat that oven and get ready for the applause that’s sure to follow when you serve these incredible bars. Happy baking


