Beyond the Cafeteria: Your Guide to Making Authentic School Lunch Pizza at Home
Remember that distinct, beloved square of pizza from the school cafeteria? The one with its perfectly soft, chewy crust, tangy-sweet sauce, and melt-in-your-mouth cheese that never quite stretched? For many of us, that humble slice is a powerful flavor of nostalgia, a taste of simpler times. While gourmet pizza has its place, sometimes the soul craves that specific, comforting taste of a classic school lunch pie. Recreating it at home might seem like a mystery, but the secret lies in a few key techniques and simple ingredients. This isn’t about fancy artisan baking; it’s about capturing a beloved memory in your own kitchen. In this detailed, step-by-step guide, we’ll unlock the secrets to making authentic school lunch pizza that tastes just like or even better than the original. Get ready to take a delicious trip down memory lane
What Makes School Lunch Pizza So Special?
Before we dive into the recipe, let’s break down what sets this pizza apart. It’s not Neapolitan, New York-style, or Chicago deep-dish. Authentic school lunch pizza has a unique profile:
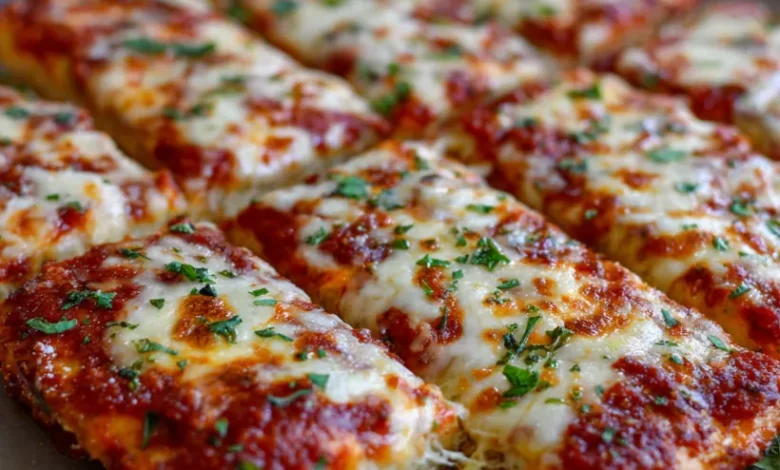
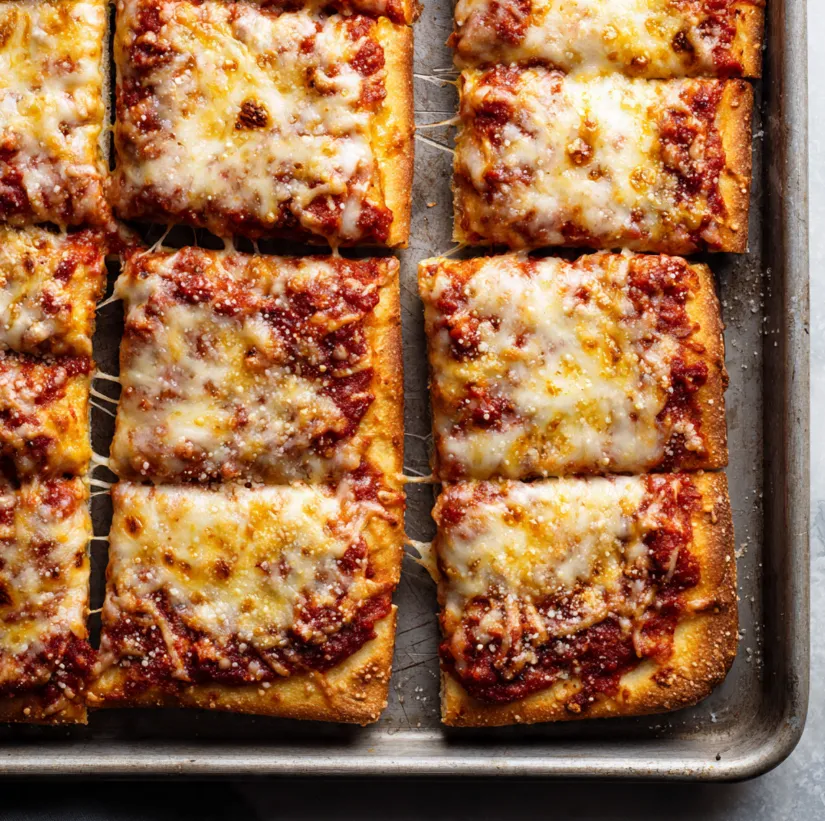
- The Crust: Soft, airy, and slightly chewy more like a focaccia or thick bread than a crispy thin crust. It’s baked in a sheet pan, giving it those iconic straight edges.
- The Sauce: It’s smoother, slightly sweeter, and herb-forward, without chunks of tomato.
- The Cheese: A consistent, creamy melt is key. We’re talking about a specific type of low-moisture, full-fat mozzarella that browns beautifully without becoming oily.
- The Form: It’s almost always rectangular, cut into perfect squares or rectangles for easy serving.
Ingredients for Nostalgic School Lunch Pizza
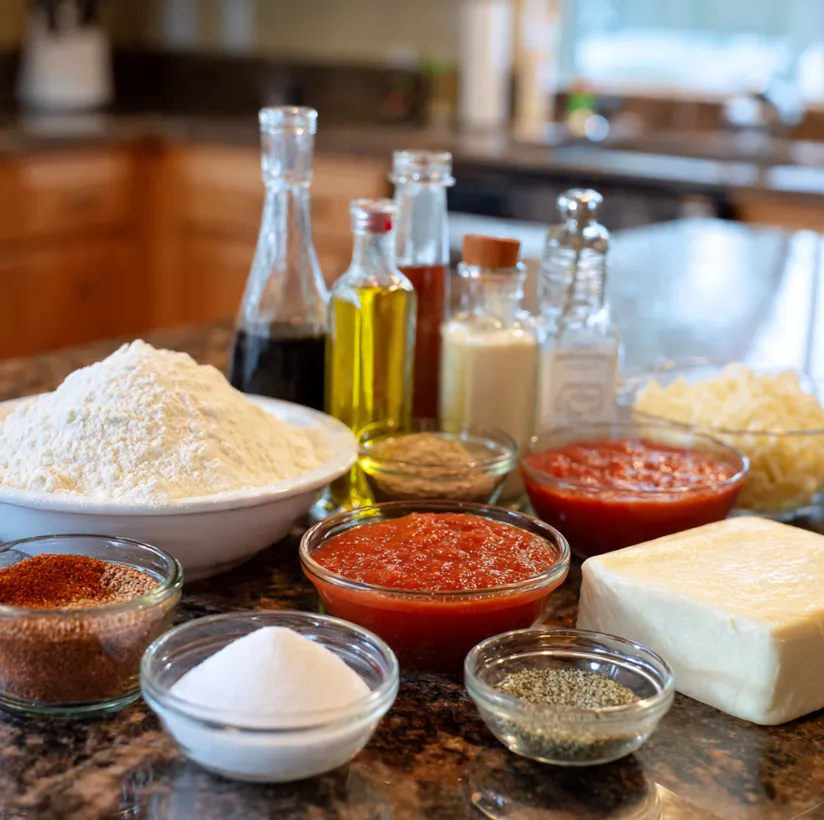
Gathering the right ingredients is the first step to success. This recipe is designed for a standard half-sheet pan (18″x13″).
For the Dough (Makes one large sheet pan pizza):
- 4 cups (500g) all-purpose flour (bread flour also works great for extra chew)
- 1 ½ cups (360ml) warm water (about 105-110°F / 40-43°C)
- 2 ¼ teaspoons (one 7g packet) instant yeast
- 2 tablespoons (25g) granulated sugar
- 2 tablespoons (30ml) olive oil, plus more for coating
- 1 ½ teaspoons salt
For the Signature Pizza Sauce:
- 1 can (15 oz / 425g) tomato sauce (plain, no seasonings)
- 1 can (6 oz / 170g) tomato paste
- 2 teaspoons dried oregano
- 1 ½ teaspoons garlic powder (not garlic salt)
- 1 ½ teaspoons onion powder
- 1 teaspoon dried basil
- 2 tablespoons granulated sugar (adjust to taste)
- 1 teaspoon salt
- ½ teaspoon black pepper
- ⅓ cup (80ml) water
For the Topping:
- 1 lb (450g) full-fat, low-moisture mozzarella cheese, grated from a block (Pre-shredded cheese contains anti-caking agents that prevent a smooth melt!)
Optional “Cafeteria Style” Garnish:
- A light sprinkle of dried oregano or parsley over the baked cheese.
Step-by-Step Instructions for Perfect Homemade School Pizza
Step 1: Make the Dough (The Foundation)
- In the bowl of a stand mixer fitted with a dough hook, combine the warm water, sugar, and yeast. Let it sit for 5 minutes until foamy.
- Add the olive oil, flour, and salt to the bowl.
- Mix on low speed until the dough comes together, then increase to medium speed and knead for 5-7 minutes. The dough should be smooth, slightly tacky, but not sticky. (You can also mix and knead by hand for 10 minutes).
- Form the dough into a ball. Lightly coat a large bowl with olive oil, place the dough inside, and turn to coat. Cover with plastic wrap or a damp kitchen towel.
- Let the dough rise in a warm, draft-free place for 1-1.5 hours, or until doubled in size.
Step 2: Prepare the Iconic Sauce
While the dough rises, make the sauce. This is where the magic happens!
- In a medium saucepan, combine the tomato sauce, tomato paste, and all spices (oregano, garlic powder, onion powder, basil, salt, pepper).
- Add the sugar and water. Whisk until completely smooth.
- Simmer over low heat for 15-20 minutes, stirring occasionally. This allows the flavors to meld and the sauce to thicken slightly. Remove from heat and let it cool. The sauce can be made a day ahead.
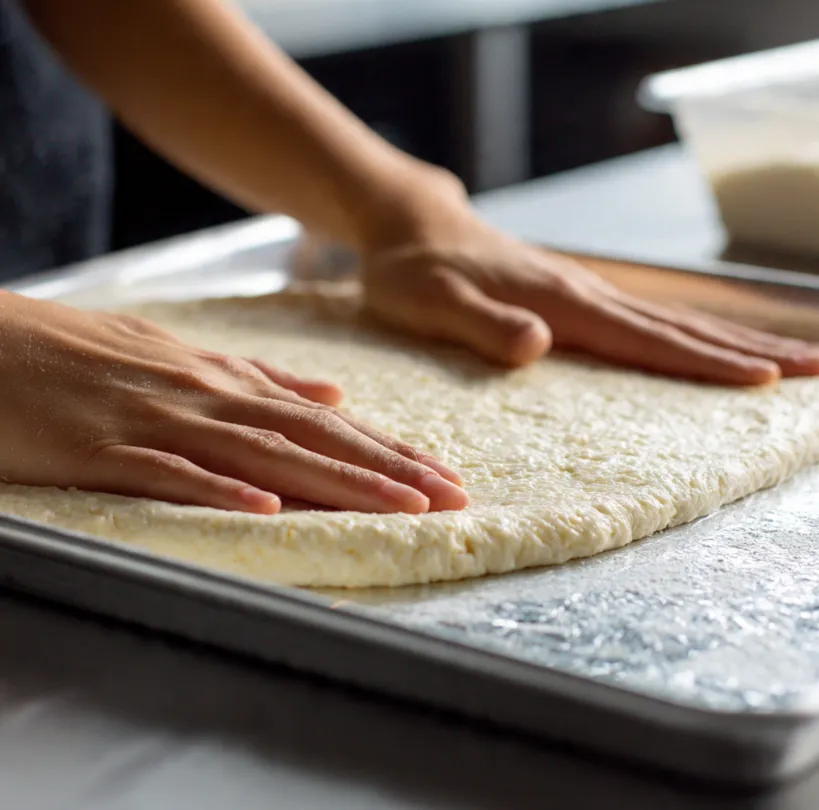
Step 3: Assemble the Pizza
- Preheat your oven to 425°F (220°C). Grease a half-sheet pan (18″x13″) generously with olive oil or non-stick spray.
- Punch down the risen dough and place it on the prepared pan. Using your fingertips, gently press and stretch the dough to fit the entire pan, going all the way to the edges. If the dough springs back, let it rest for 5 minutes and continue. Don’t worry if it’s not perfect!
- Par-bake the crust: Use a fork to dock the dough (prick it all over) to prevent large bubbles. Bake the bare crust for 6-8 minutes, just until it’s set and barely starting to look dry. This step is crucial for the authentic texture!
- Remove the crust from the oven. Spread the cooled sauce evenly over the crust, leaving a tiny border at the edges.
- Sprinkle the freshly grated mozzarella cheese evenly over the sauce, covering it completely.
Step 4: Bake to Golden-Brown Perfection
- Place the assembled pizza back in the oven.
- Bake at 425°F (220°C) for 15-20 minutes, or until the cheese is fully melted, bubbly, and has golden-brown spots. The edges of the crust should be lightly golden.
- Remove from the oven and let it cool in the pan for 5 minutes. This allows the cheese to set slightly for cleaner cutting.
- Using a pizza cutter or large knife, cut into rectangles or squares. Sprinkle with a tiny bit of dried oregano for that final cafeteria touch.
Pro Tips for the Ultimate School Pizza Experience
- The Cheese is Key: Grating your own cheese from a block is non-negotiable for that classic, smooth melt. Pre-shredded cheese won’t give you the right texture.
- Sauce Consistency: The sauce should be spreadable, not runny. Letting it cool and thicken prevents a soggy crust.
- Don’t Skip the Par-Bake: This ensures the crust bakes through without becoming soggy under the sauce and gives it that distinct soft-yet-cooked structure.
- The Right Pan: A light-colored aluminum sheet pan is ideal and most authentic. Dark pans may cause the bottom to brown too quickly.
- Make it a Meal: Serve with a side salad, carrot sticks, or even a small carton of milk to complete the experience!
- Make-Ahead Magic: You can prepare the dough and sauce up to 24 hours in advance. Store the dough, covered, in the fridge for a slow second rise, and let it come to room temperature before stretching. The sauce can be refrigerated in a jar.
Conclusion: Relive the Memory, One Perfect Slice at a Time
Creating authentic school lunch pizza at home is more than just cooking; it’s an edible time machine. The process is surprisingly simple, rewarding, and fills your kitchen with an unbeatably comforting aroma. With this guide, you have the blueprint to bypass the lunch line and bring that iconic flavor straight to your dinner table. It’s a fun project to share with family, a surefire hit with kids, and a delicious wave of nostalgia for adults. So, preheat your oven, grate that cheese, and get ready to take a bite of pure, unadulterated comfort. Your homemade cafeteria pizza awaits