Italian Cream Stuffed Cannoncini: A Crispy, Creamy Symphony of Taste

An Italian Pastry Dream
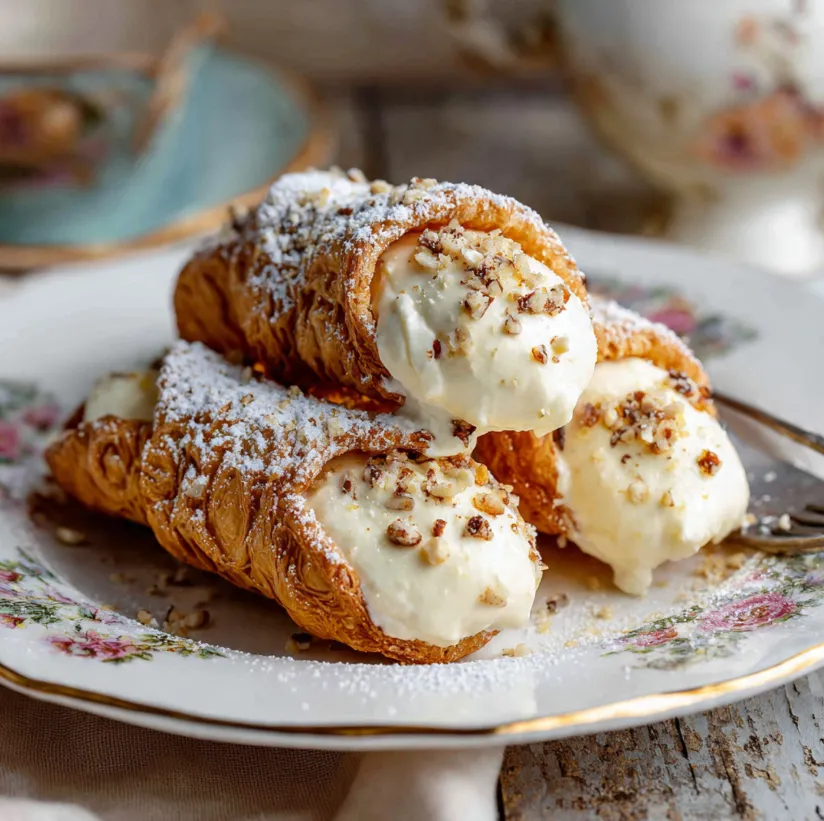
Imagine biting into a delicate, golden-brown pastry horn that shatters with a satisfying crunch, giving way to a luxuriously smooth, sweet, and impossibly creamy filling. This is the magic of Italian Cream Stuffed Cannoncini a classic pastry that transforms simple ingredients into an elegant dessert worthy of a Roman café. Cannoncini, meaning “little cannons” in Italian, are flaky puff pastry cones traditionally filled with crema pasticcera (Italian pastry cream).
While they may look like a professional patisserie creation, this recipe is designed for bakers of all levels. With our step-by-step guide, you’ll learn how to master both the crisp, buttery shells and the velvety, rich filling. Whether you’re planning a special brunch, a festive holiday table, or simply want to treat yourself, these cream-stuffed cannoncini promise a symphony of textures and tastes that will transport you straight to Italy.
Italian cannoncini recipe, cream stuffed pastry horns, homemade Italian pastries, easy cannoncini, crispy cream horns, crema pasticcera filling.
Your Shopping List: Simple Ingredients for an Elegant Result
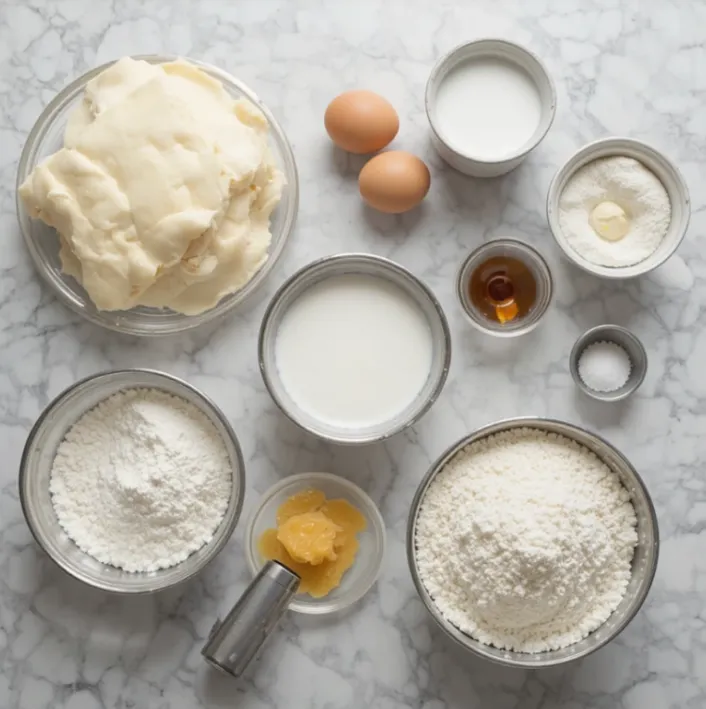
The beauty of this Italian Cream Stuffed Cannoncini recipe lies in its short, accessible ingredient list. Most items are pantry staples, allowing the technique and love you put in to shine.
For the Puff Pastry Cannoncini:
- 1 package (about 17.3 oz or 490g) frozen puff pastry sheets, thawed according to package instructions (or homemade puff pastry for the ambitious!)
- 1 large egg (for egg wash)
- 1 tablespoon water or milk
- Granulated sugar (for sprinkling)
- Special Equipment: 12-15 metal cannoncini cones (or you can shape foil into sturdy cone molds)
For the Italian Pastry Cream (Crema Pasticcera):
- 2 cups (500ml) whole milk
- 4 large egg yolks
- 2/3 cup (135g) granulated sugar
- 1/3 cup (40g) all-purpose flour
- 2 tablespoons cornstarch
- 1 teaspoon pure vanilla extract (or 1/2 a vanilla bean, seeds scraped)
- A pinch of fine sea salt
- 2 tablespoons unsalted butter, at room temperature
Optional for Garnish:
- Powdered sugar for dusting
- Melted dark chocolate for drizzling
- Chopped pistachios or toasted almonds
cannoncini ingredients, crema pasticcera ingredients, puff pastry dessert recipe.
The Step-by-Step Symphony: Crafting Your Cannoncini
Follow these numbered steps carefully for foolproof, delicious results. Read through all instructions once before you begin.
H2: Part 1: Preparing the Italian Pastry Cream (Crema Pasticcera)
H3: Why Make the Filling First?
The pastry cream needs ample time to cool and thicken completely before piping. Starting here ensures it’s ready when your pastry shells are.
- Heat the Milk: In a medium saucepan, heat the 2 cups of milk over medium heat until it just begins to simmer (small bubbles form around the edges). If using a vanilla bean, add the pod and seeds to the milk now. Remove from heat and set aside.
- Whisk Yolks and Sugar: In a separate, medium heat-proof bowl, vigorously whisk the 4 egg yolks and 2/3 cup sugar together until the mixture becomes pale yellow and slightly thickened, about 2-3 minutes.
- Incorporate Dry Ingredients: Sift the 1/3 cup flour and 2 tablespoons cornstarch directly into the yolk mixture. Add the pinch of salt. Whisk until you have a very smooth, thick paste with no dry lumps.
- Temper the Eggs: This is the crucial step to avoid scrambled eggs! While whisking the yolk mixture constantly, slowly drizzle in about 1/2 cup of the hot milk. Once incorporated, slowly pour the now-warmed yolk mixture back into the saucepan with the remaining hot milk, whisking constantly.
- Cook to Perfection: Place the saucepan back over medium heat. Cook, whisking constantly and scraping the bottom and corners, until the mixture thickens dramatically and comes to a low boil. Let it bubble gently for 1 full minute, still whisking. The cream should be very thick and smooth.
- Finish the Cream: Remove from heat. Whisk in the vanilla extract (if not using a bean) and the 2 tablespoons of butter until fully melted and incorporated.
- Chill: Immediately pour the hot pastry cream through a fine-mesh sieve into a clean bowl (this catches any possible cooked egg bits). Press plastic wrap directly onto the surface of the cream to prevent a skin from forming. Refrigerate for at least 3-4 hours, or until completely cold and set.
H2: Part 2: Shaping and Baking the Pastry Shells
- Prep: Preheat your oven to 400°F (200°C). Line two large baking sheets with parchment paper. Lightly beat the egg with 1 tablespoon of water or milk to make an egg wash.
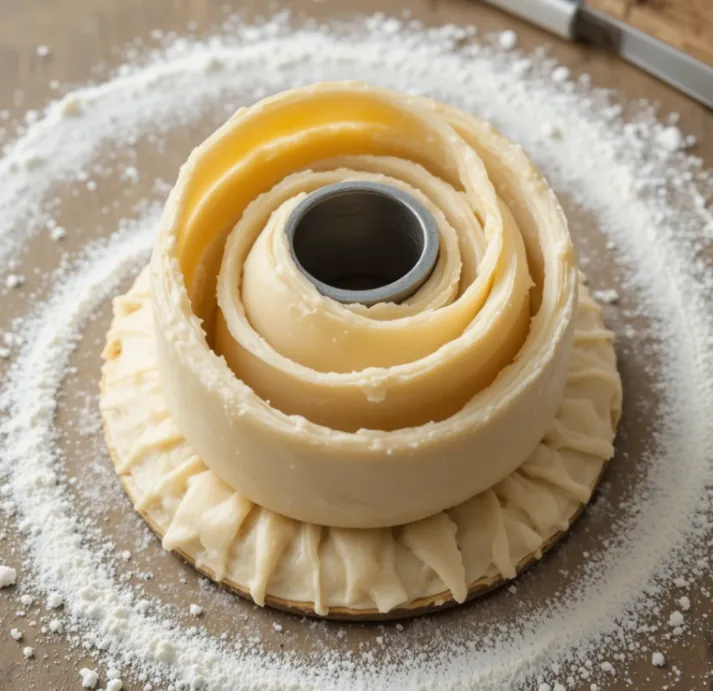
- Roll and Cut: On a lightly floured surface, unfold one puff pastry sheet. Roll it out slightly to smooth any seams. Using a sharp knife or pizza cutter, cut the sheet into long, 3/4-inch to 1-inch wide strips.
- Shape the Cones: Starting at the pointed tip of a metal cone, wind one pastry strip around it in a spiral, overlapping the edges slightly. Make sure the entire cone is covered, leaving no gaps. Brush the very end of the pastry strip with a little egg wash to seal it. Place the wrapped cone seam-side down on the prepared baking sheet. Repeat with remaining strips and cones.
- Egg Wash and Sugar: Lightly brush the outside of all the wrapped cones with the egg wash. Generously sprinkle with granulated sugar.
- Bake: Bake for 15-18 minutes, or until the pastry is puffed, deeply golden brown, and crisp. Rotate the pans halfway through for even baking.
- Cool Carefully: Remove from the oven and let the cannoncini cool on the pans for 5 minutes. Then, very gently twist and remove the metal cones while the pastry is still warm (if they cool completely, they may stick). Let the empty pastry shells cool completely on a wire rack.
how to shape cannoncini, baking puff pastry horns, making crema pasticcera step by step.
Pro Baker Tips for Perfect Cannoncini Every Time
- Thaw Puff Pastry Correctly: The best method is to transfer it from the freezer to the refrigerator the night before. This slow thaw prevents it from becoming sticky or tearing.
- Keep it Cold: Work with one sheet of puff pastry at a time, keeping the other in the fridge. Warm dough is difficult to handle.
- Seal the Seal: Ensure the end of the pastry strip is firmly sealed with egg wash to prevent it from unraveling in the oven.
- Cream Consistency: If your chilled pastry cream seems too thick or has small lumps after chilling, simply whisk it vigorously or beat it with an electric mixer for 30 seconds until smooth and pipeable. You can also push it through a sieve again.
- Get Creative with Fillings: While classic crema pasticcera is divine, you can also fill cannoncini with sweetened whipped cream, chocolate custard, or even a mix of pastry cream and ricotta.
- Make-Ahead Magic: You can bake the empty pastry shells a day ahead. Store them in an airtight container at room temperature. Fill them just a few hours before serving to maintain maximum crispness.
Conclusion: Your Italian Pastry Masterpiece Awaits
Congratulations! You’ve just completed a journey into the heart of Italian pastry craftsmanship. These Italian Cream Stuffed Cannoncini are more than just a dessert; they’re a statement a beautiful, delicious testament to your skills in the kitchen.
Don’t be intimidated by their elegant appearance. As you’ve seen, the process is a series of simple, manageable steps. The reward the awe on your guests’ faces, the sublime contrast of the shattering crisp shell and the cool, lush cream is absolutely worth it.
So, gather your ingredients, roll up your sleeves, and put on some Italian music. It’s time to create your own crispy, creamy symphony of taste. Buon appetito!
Did you make this recipe? Share your beautiful #HomemadeCannoncini creations with us online! We’d love to see your pastry masterpieces. For more classic Italian dessert recipes, explore our blog.