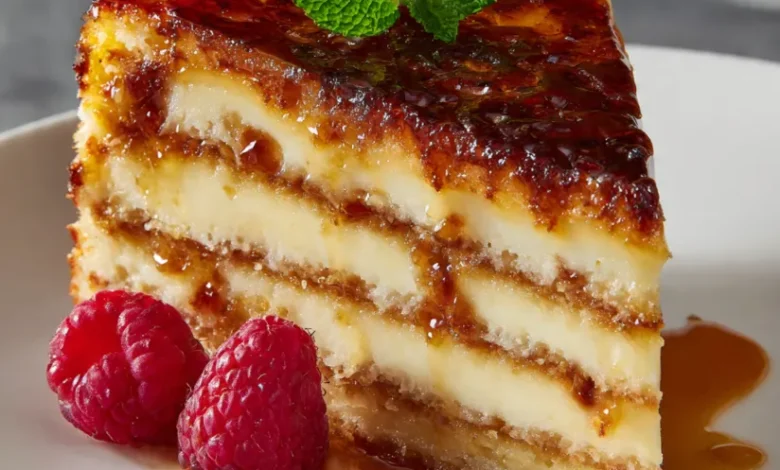
There’s something undeniably magical about cracking through the crisp, caramelized sugar topping of a classic crème brûlée. Now, imagine that iconic experience fused with the soft, comforting layers of a vanilla cake. Welcome to the Crème Brûlée Cake a stunning dessert that brings the sophisticated flavor of the beloved French custard into an easy-to-serve, show-stopping cake format. This recipe is designed for bakers of all levels, using a clever shortcut with a vanilla cake mix to ensure perfect results every time. Whether it’s for a special celebration or a weekend baking project, this cake promises to deliver that unforgettable “crack” and creamy richness in every slice. Let’s create a dessert that will have everyone asking for your secret.
What You’ll Need: Crème Brûlée Cake Ingredients
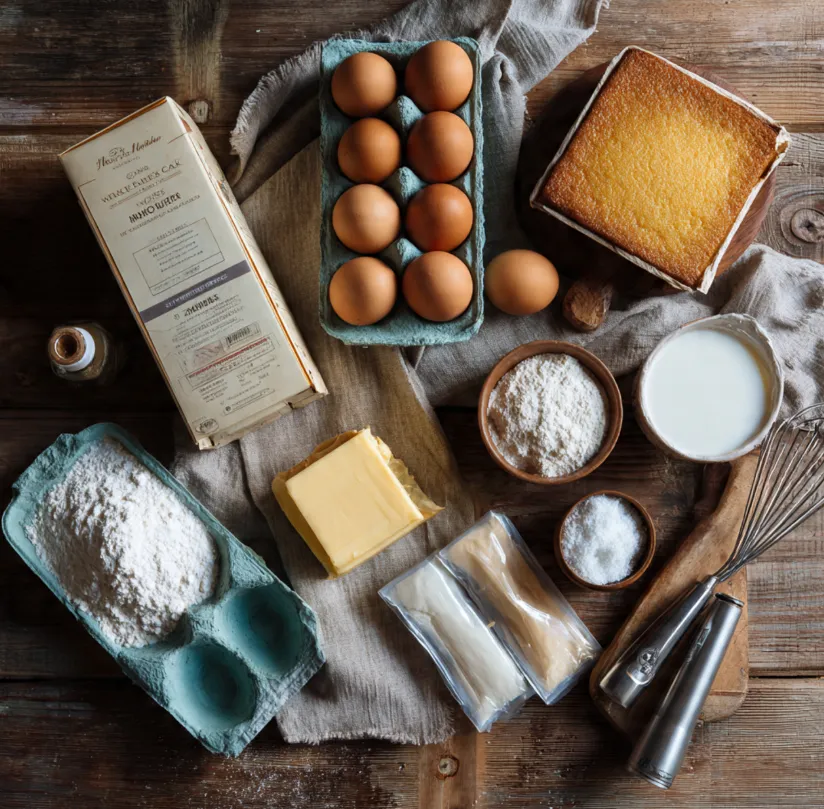
Before we begin, let’s gather everything. Using a quality vanilla cake mix as the base makes this recipe accessible and reliable, allowing us to focus on creating the spectacular crème brûlée elements.
For the Vanilla Cake Layer:
- 1 box (approx. 15.25 oz) vanilla cake mix (plus the ingredients listed on the box, typically eggs, oil, and water)
- Baking spray or extra butter & flour for pans
For the Crème Brûlée Custard Filling:
- 6 large egg yolks
- 1/2 cup (100g) granulated sugar
- 2 cups (480ml) heavy cream (whipping cream)
- 1 teaspoon pure vanilla extract or paste
- A pinch of fine sea salt
For the Assembly & Torched Topping:
- 1 1/2 cups (180g) confectioners’ sugar (for stabilizing)
- 1 cup (240ml) heavy cream, cold (for whipped cream)
- 1/2 cup (100g) granulated sugar or turbinado sugar (for the final caramelized top)
Equipment:
- Two 8-inch round cake pans
- Parchment paper
- Mixing bowls (various sizes)
- Whisk
- Saucepan
- Fine-mesh sieve
- Hand mixer or stand mixer
- Cake turntable or serving plate
- Offset spatula
- Kitchen torch (crucial for the authentic brûlée finish)
Step-by-Step Instructions for the Perfect Crème Brûlée Cake
Follow these numbered steps carefully for a seamless baking experience.
Part 1: Baking the Perfect Vanilla Cake Base
- Prep and Preheat: Start by preheating your oven to the temperature specified on your cake mix box (usually 350°F/175°C). Grease two 8-inch round cake pans thoroughly with baking spray or butter, then line the bottoms with parchment paper circles. This guarantees easy release.
- Mix the Batter: In a large mixing bowl, prepare the vanilla cake batter according to the package directions. Pro tip: For a richer flavor and texture, substitute the water called for with whole milk, and use melted butter instead of oil if possible. Mix until just combined and smooth; do not overmix.
- Bake and Cool: Divide the batter evenly between the prepared pans. Bake in the center of the preheated oven for the time indicated on the box, or until a toothpick inserted into the center comes out clean. The cakes should be golden and spring back when lightly touched. Let the cakes cool in the pans for 10 minutes, then carefully turn them out onto a wire rack to cool completely. It is vital that the cakes are completely cool before assembly.
Part 2: Mastering the Crème Brûlée Custard
This cooked custard is the heart of the dessert.
- Temper the Yolks: In a medium bowl, whisk together the 6 egg yolks and 1/2 cup of granulated sugar until the mixture is pale, thick, and falls from the whisk in a ribbon. This takes about 2-3 minutes of vigorous whisking.
- Heat the Cream: In a saucepan over medium heat, warm the 2 cups of heavy cream along with the vanilla and pinch of salt. Heat it until it just begins to simmer—small bubbles will form around the edges. Do not let it boil vigorously.
- Combine and Cook: Slowly, and while whisking constantly, pour about half of the hot cream into the egg yolk mixture. This step, called tempering, prevents the eggs from scrambling. Then, pour the entire yolk-cream mixture back into the saucepan with the remaining hot cream.
- Thicken the Custard: Return the saucepan to low heat. Cook, stirring constantly with a wooden spoon or spatula, until the custard thickens enough to coat the back of the spoon. When you run your finger across it, it should leave a clear path. This should take about 5-7 minutes. Do not let it boil.
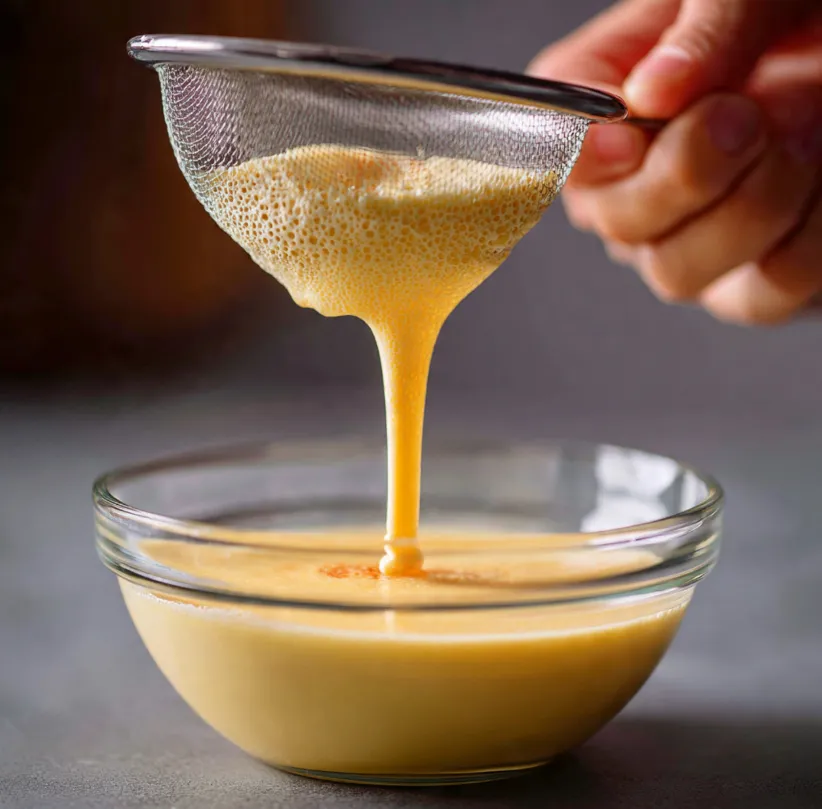
- Strain and Chill: Immediately pour the hot custard through a fine-mesh sieve into a clean bowl. This removes any bits of cooked egg for a perfectly smooth texture. Press plastic wrap directly onto the surface of the custard to prevent a skin from forming. Refrigerate for at least 4 hours, or until completely cold and set.
Part 3: Assembling and Torching Your Masterpiece
- Prepare the Stabilizing Layer: Once the cakes are cool and the custard is set, prepare the whipped cream layer. In a chilled bowl, whip 1 cup of cold heavy cream with 1 1/2 cups of confectioners’ sugar until it forms stiff peaks. This sweet, stable cream will help hold the custard in place.
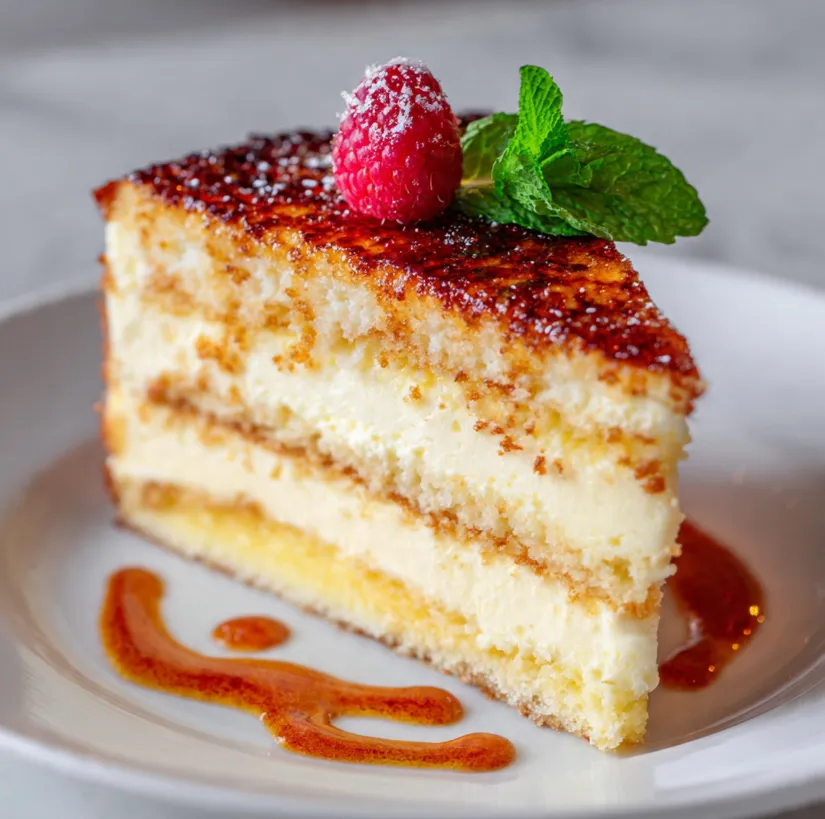
- Assemble the Cake: Place one cooled cake layer on your serving plate or turntable. Spread a thin, even layer of the sweetened whipped cream over the top. Next, carefully spread all of the chilled crème brûlée custard over the whipped cream layer, leaving a small border to prevent squeezing out. Gently place the second cake layer on top, pressing down lightly.
- Create the Iconic Brûlée Top: This is the fun part! Evenly sprinkle 1/2 cup of granulated or turbinado sugar over the entire top surface of the cake. Using a kitchen torch, slowly melt and caramelize the sugar by moving the flame in small circles. Keep the torch moving to avoid burning. The sugar will melt, bubble, and then turn into a beautiful, hard, amber-colored crust. Let it sit for 1-2 minutes to harden completely.
- No Torch? You can carefully place the sugar-sprinkled cake under a preheated broiler for 1-3 minutes, watching it every second to prevent burning.
Pro Tips for Crème Brûlée Cake Success
- Cake Consistency: For a denser cake that better supports the custard, look for a “butter recipe” or “pudding in the mix” vanilla cake mix.
- Custard is Key: Patience with the custard is non-negotiable. Ensure it is fully chilled and thick. If it seems too soft, you can add a teaspoon of cornstarch to the egg yolk mixture for extra stability.
- The Torch Technique: Hold the torch at least 4-6 inches away from the sugar. It’s better to go slowly in multiple passes than to scorch it in one spot. Turbinado sugar gives a deeper, more rustic caramel flavor.
- Make-Ahead Strategy: You can bake the cakes and make the custard a day in advance. Store cakes wrapped at room temperature and custard in the fridge. Assemble and torch the cake the day you plan to serve it for the best texture.
- Serving: Use a sharp knife to slice, and gently crack through the caramelized top. Wipe the knife clean between slices for beautiful presentations.
- Variations: Add a teaspoon of orange zest or a tablespoon of Grand Marnier to the custard for a citrus twist. You can also sprinkle a thin layer of crushed toffee bits between the custard and the top cake layer for extra crunch.
Conclusion: Your Turn to Create Magic
The Crème Brûlée Cake is more than just a dessert; it’s an experience. It combines the joy of baking a simple cake with the artistry of a French pastry technique, resulting in a breathtaking centerpiece that tastes even better than it looks. By following this detailed guide, you’ve learned not just a recipe, but the skills to temper a custard and craft a perfect caramelized sugar crust. Don’t be intimidated the shortcut of the cake mix is your best friend here. So, preheat your oven, fire up that torch, and get ready to impress. The sound of that first crack into the glossy sugar top will be your sweetest reward. Share your creation, and enjoy every decadent bite of your homemade Crème Brûlée Cake!