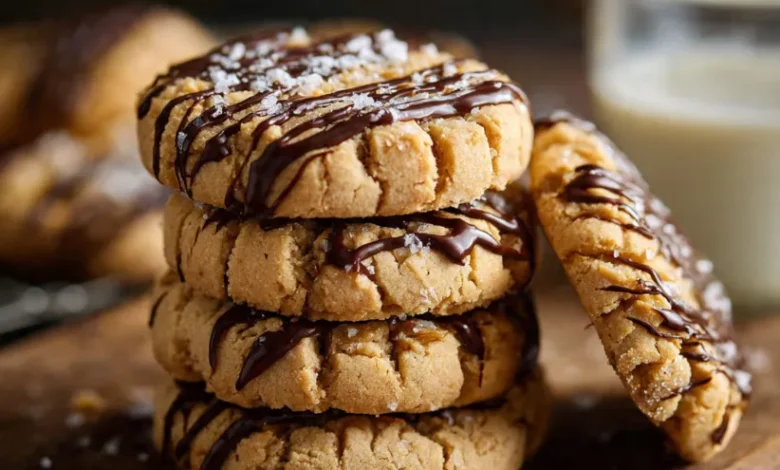
Have you ever walked into a bakery, taken one whiff of the sweet, nutty air, and immediately zeroed in on those perfectly puffy, impossibly soft peanut butter cookies in the display case? The ones that are almost too beautiful to eat until you take a bite and experience that divine, melt-in-your-mouth texture? That’s the experience we’re bringing straight to your kitchen today.
Forget flat, crumbly, or greasy peanut butter cookies. This recipe is engineered for maximum thickness, incredible softness, and a meltaway texture that will make these your definitive go-to. We’re combining simple pantry staples with a few professional baker’s secrets to create cookies that look and taste like they came from a high-end patisserie. Perfect for beginners and seasoned bakers alike, this guide will walk you through every step to ensure peanut butter cookie perfection. Get ready to fill your home with the most amazing aroma and impress everyone with your newfound baking skills!
Why You’ll Fall in Love With This Recipe
- Bakery-Style Thickness: Uses specific techniques to prevent spreading, guaranteeing a tall, proud cookie.
- Melt-in-Your-Mouth Texture: The combination of ingredients creates a tender, soft crumb that literally dissolves on your tongue.
- Rich, Balanced Flavor: Deep roasted peanut butter flavor, perfectly sweet, with a hint of salt to balance it all.
- Simple & Reliable: Clear, step-by-step instructions make it foolproof, even for your first time.
- Crowd-Pleasing Favorite: Universally loved, perfect for parties, gift-giving, or a well-deserved treat.
Kitchen Essentials & Ingredients
Before we begin, ensure you have these tools ready:
- Electric Mixer (Handheld or Stand): Crucial for creaming the butter and sugars to the right consistency.
- Mixing Bowls: One large, one medium.
- Measuring Cups and Spoons: For accuracy.
- Baking Sheets: Light-colored sheets are best for even browning.
- Parchment Paper or Silicone Baking Mats: To prevent sticking and ensure easy cleanup.
- Cookie Scoop (3-tablespoon size): This is key for uniform, thick cookies. A 1/4 cup measure also works.
- Wire Cooling Rack
Now, let’s gather the cast of characters that will create this magic.
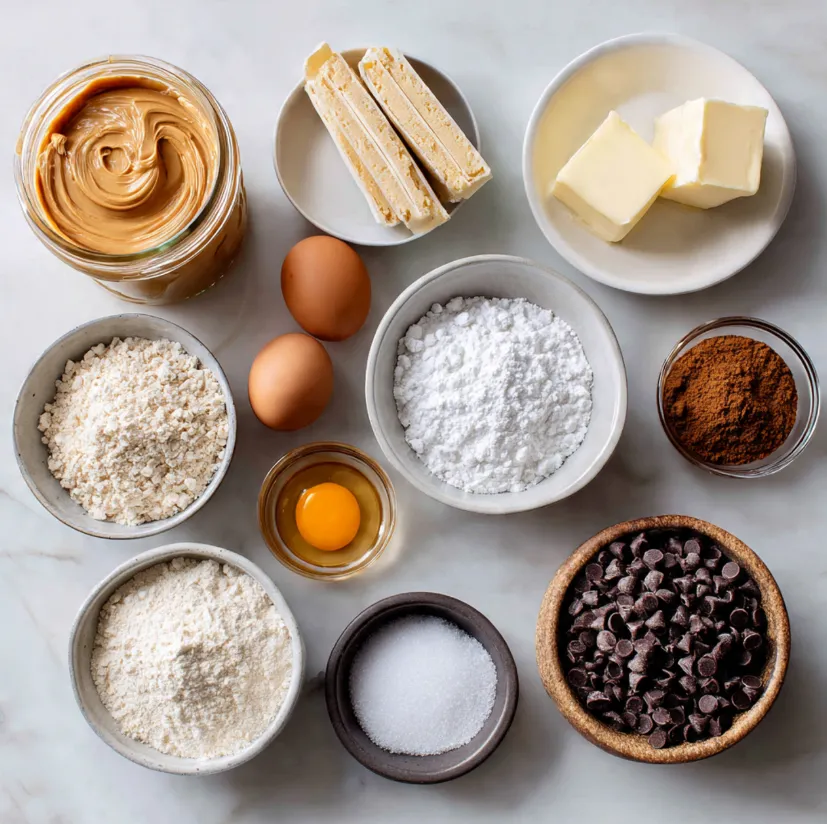
Ingredients List for Bakery-Style Thick Peanut Butter Cookies
For the Cookies:
- 1 cup (226g) unsalted butter, softened to room temperature
- 1 cup (270g) creamy peanut butter (use a standard, no-stir variety like Jif or Skippy for best texture)
- 1 cup (200g) packed light brown sugar
- 3/4 cup (150g) granulated white sugar
- 2 large eggs, at room temperature
- 2 teaspoons pure vanilla extract
- 3 cups (375g) all-purpose flour, spooned and leveled
- 2 teaspoons cornstarch
- 1 teaspoon baking soda
- 1/2 teaspoon baking powder
- 1 teaspoon fine sea salt
For the Optional Topping & Finish:
- 1 cup (170g) semi-sweet or milk chocolate chips or chunks
- Flaky sea salt (for sprinkling after baking)
Step-by-Step Baking Instructions
Follow these steps in order for the best results. Patience is key!
Step 1: Preheat and Prepare
Preheat your oven to 375°F (190°C). This ensures it’s perfectly hot when your cookies are ready to bake. Line your baking sheets with parchment paper or silicone mats. Do not grease the sheets, as this can cause excess spreading.
Step 2: Cream the Butter, Peanut Butter, and Sugars
In your large mixing bowl, combine the softened butter, peanut butter, brown sugar, and granulated sugar. Using your electric mixer on medium speed, beat for a full 2-3 minutes, until the mixture is very light in color, fluffy, and completely smooth. This step incorporates air, which is vital for texture.
Step 3: Incorporate Eggs and Vanilla
Add the eggs one at a time, beating well on medium speed after each addition until fully combined. Scrape down the sides of the bowl. Add the vanilla extract and mix until incorporated. Your mixture should now look creamy and cohesive.
Step 4: Combine Dry Ingredients
In your medium bowl, whisk together the flour, cornstarch, baking soda, baking powder, and sea salt. The cornstarch is our secret weapon it tenderizes the crumb and contributes to the soft, meltaway texture.
Step 5: Gradually Mix Dry into Wet
With your mixer on low speed, gradually add the dry ingredient mixture to the wet ingredients. Mix only until just combined and no dry streaks of flour remain. Overmixing at this stage will develop gluten and lead to tough cookies. The dough will be quite thick.
Step 6: Fold in Chocolate and Scoop
Using a spatula, gently fold in the chocolate chips. Now, using your 3-tablespoon cookie scoop (or a 1/4 cup measure), portion out the dough. Roll each portion into a tall, smooth ball between your palms. Place the dough balls at least 3 inches apart on your prepared baking sheets. This spacing is non-negotiable for thick cookies.
Step 7: The Chill Factor (Optional but Recommended)
For even thicker cookies with slightly more spread control, you can chill the shaped dough balls on the sheet for 15-20 minutes while the oven finishes preheating.
Step 8: Bake to Perfection
Bake one sheet at a time in the center rack of your preheated oven for 11-13 minutes. The cookies are done when the edges are very lightly golden and set, while the centers still look soft, puffy, and slightly underbaked. They will firm up as they cool. Do not overbake.
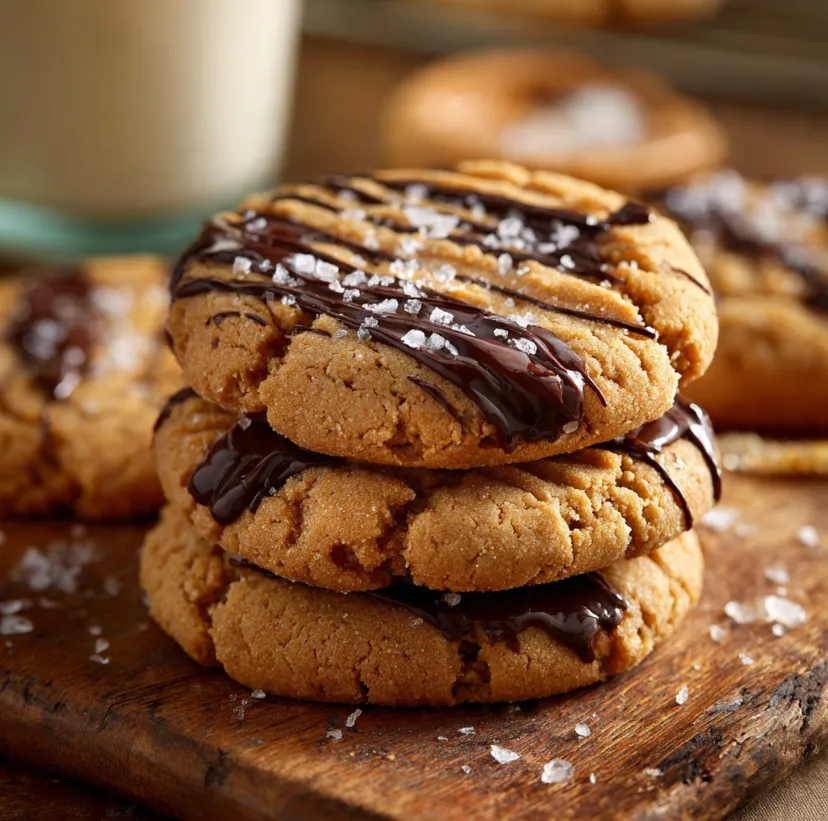
Step 9: The Finishing Touches
As soon as you remove the baking sheet from the oven, you can gently press a few extra chocolate chips onto the tops of the warm cookies for a professional look. Immediately sprinkle each cookie with a tiny pinch of flaky sea salt this elevates the flavor dramatically.
Step 10: Cool Completely
Let the cookies cool on the baking sheet for 5 minutes. Then, using a spatula, carefully transfer them to a wire rack to cool completely. This stops the cooking process and allows their texture to fully set into that dreamy, soft state.
Pro Tips for Guaranteed Success
- Ingredient Temperature is Crucial: Room temperature butter, eggs, and peanut butter emulsify properly, creating a uniform dough that bakes evenly. Cold ingredients can cause your dough to break and your cookies to spread unevenly.
- Measure Flour Correctly: The most common baking mistake is using too much flour. Always spoon flour into your measuring cup and level it off with a knife. Do not scoop directly from the bag.
- The Scoop Matters: Using a large cookie scoop ensures all cookies are the same size, which means they bake at the same rate. It also helps create that tall, bakery-style shape.
- Underbake Slightly: Remember, the cookies continue to cook on the hot baking sheet. Taking them out when the centers look soft ensures a melt-in-your-mouth texture, not a dry one.
- Peanut Butter Choice: For consistent results, use a processed, creamy peanut butter with stabilizers. Natural peanut butters (oil-on-top) have different fat and moisture content and will alter the texture and spread.
FAQs (Frequently Asked Questions)
Can I use crunchy peanut butter?
Yes, absolutely! Using crunchy peanut butter will give you the same great flavor and texture with added peanut bits for a little crunch.
How do I store these cookies?
Store completely cooled cookies in an airtight container at room temperature for up to 5 days. They will stay soft! You can also freeze the baked cookies for up to 3 months, or freeze the shaped dough balls and bake from frozen, adding 1-2 minutes to the bake time.
My cookies spread too much. What happened?
This usually points to butter that was too warm or melted, an oven that wasn’t hot enough, or the baking sheet being placed too close together. Ensuring your dough is cool and your oven is properly preheated solves 99% of spreading issues.
Can I omit the chocolate?
Of course! These are fantastic as classic peanut butter cookies. You can also roll the dough balls in granulated sugar before baking for a classic crackled look.
Ready to Taste the Magic?
There you have it the complete blueprint for creating the most sensational, bakery-worthy Thick Peanut Butter Meltaway Cookies right in your own home. This recipe isn’t just about following steps; it’s about understanding the why behind them, empowering you to bake with confidence.
The moment you pull those golden, puffy cookies from the oven and experience that first warm, soft, salty-sweet bite, you’ll know it was all worth it. So, preheat that oven, gather your ingredients, and get ready to create a batch of pure happiness. Don’t forget to pour that glass of milk you’re going to need it.
Now it’s your turn! We’d love to hear about your baking adventure. Share your cookie photos, ask questions, or tell us what you think in the comments below. Happy baking