Ultimate Banana Pudding Rice Krispie Treats: A Nostalgic Twist on a Classic
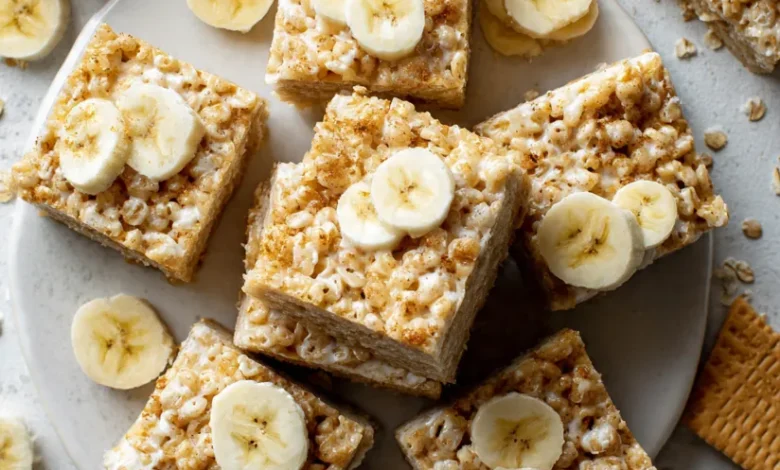
Remember the creamy, dreamy delight of banana pudding and the crackling, sugary joy of a Rice Krispie treat? What if you could combine them into one unforgettable dessert that’s easier than pie? That’s exactly what these Banana Pudding Rice Krispie Treats offer. They are the perfect marriage of two beloved classics, resulting in a no-bake dessert that’s irresistibly chewy, packed with banana flavor, and speckled with crunchy vanilla wafer cookies. Whether you’re a baking novice looking for a surefire hit or a seasoned pro in need of a quick crowd-pleaser, this recipe is your golden ticket. Get ready for a treat that will vanish from the plate faster than you can say “snap, crackle, pop!”

Why You’ll Fall in Love with This Recipe
This isn’t your average Rice Krispie treat. By infusing the classic with instant banana pudding mix and studding it with vanilla wafers, we create a dessert with layers of flavor and texture. It’s:
- Incredibly Easy: No oven, no mixer, just one pot and 15 minutes of active time.
- Family-Friendly: Kids love making them almost as much as they love eating them.
- Perfect for Any Occasion: Potlucks, parties, bake sales, or a simple weeknight treat.
- A Flavor Sensation: The nostalgic taste of banana pudding in a portable, handheld form.
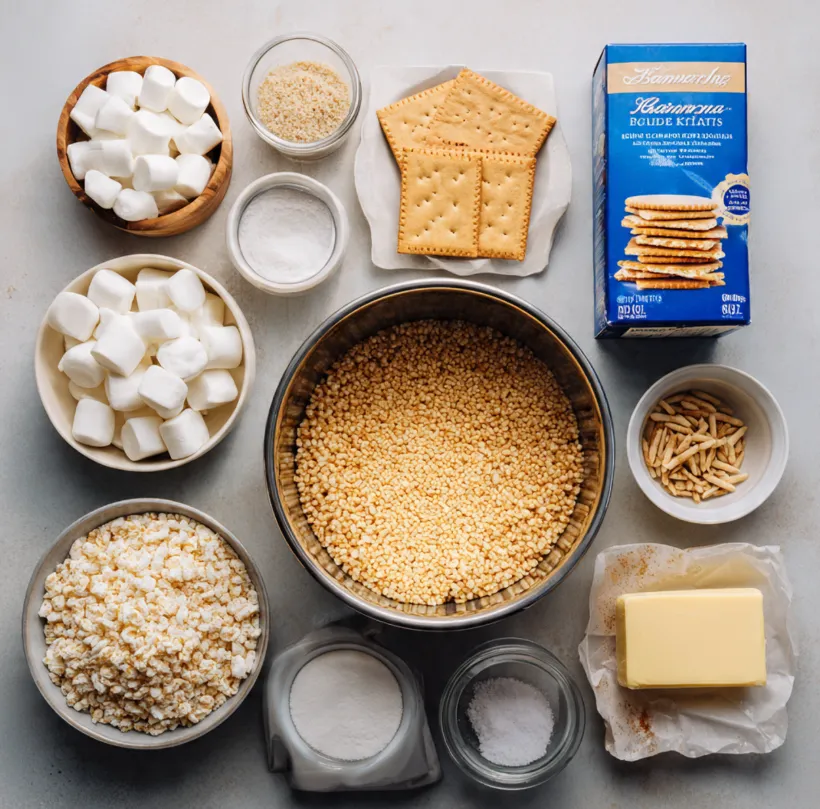
Banana Pudding Rice Krispie Treats: Your Shopping List
Gathering your ingredients is the first simple step. You’ll be amazed that such ordinary items can create something so extraordinary.
Essential Ingredients
- 6 cups Rice Krispies Cereal: The classic, crispy base. For best results, use a fresh box for maximum snap.
- 10 oz bag Mini Marshmallows: Using mini marshmallows ensures they melt quickly and evenly. You can also use about 4 cups of regular marshmallows.
- 4 tablespoons Unsalted Butter: This adds richness and helps create the perfect, non-sticky texture.
- 1 (3.4 oz) box Instant Banana Pudding Mix: This is the magic ingredient! It infuses every bite with authentic, creamy banana flavor. Do not cook the pudding; use the dry powder.
- 1 cup Vanilla Wafer Cookies, roughly chopped: They provide essential crunch and that iconic “pudding” element. Nilla Wafers are the classic choice.
- 1/4 teaspoon Fine Sea Salt: A pinch of salt balances the sweetness and enhances all the flavors.
Optional Add-Ins & Toppings
- 1/2 cup White Chocolate Chips: For a sweeter, creamier note.
- 1/4 cup Dried Banana Chips, crushed: For an extra burst of concentrated banana flavor and texture.
- For Serving: Sliced fresh bananas, a dollop of whipped cream, or an extra sprinkle of crushed wafers.
Step-by-Step Instructions for Perfect Treats
Follow these simple steps for flawless, chewy, and flavorful treats every single time.
Step 1: Prepare Your Pan
Lightly grease a 9×13 inch baking dish with butter or non-stick cooking spray. You can also line it with parchment paper, leaving an overhang on two sides for easy removal. This step is crucial for getting clean, perfect squares later. Set the pan aside.
Step 2: Melt Butter and Marshmallows
In a large pot or Dutch oven (you’ll need room to stir in the cereal later), melt the 4 tablespoons of butter over low heat. Once melted, add the entire 10 oz bag of mini marshmallows. Stir continuously with a sturdy wooden spoon or silicone spatula until the marshmallows are completely melted and the mixture is smooth. Keeping the heat low is key to prevent the sugar from burning.
Step 3: Add the Banana Flavor
Remove the pot from the heat. Immediately, sprinkle in the entire box of dry instant banana pudding mix and the 1/4 teaspoon of salt. Stir vigorously until the pudding powder is fully incorporated into the marshmallow mixture. It will become very fragrant and take on a pale yellow color.
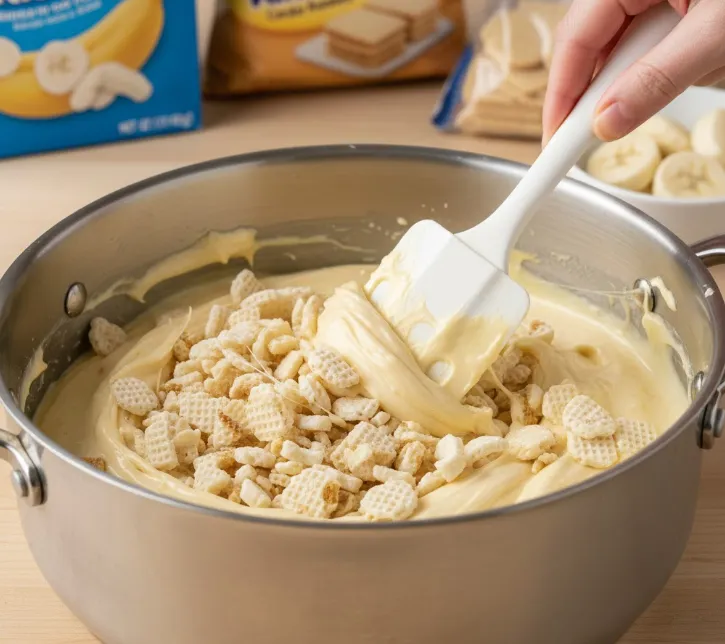
Step 4: Combine with Cereal and Wafers
Quickly add the 6 cups of Rice Krispies cereal and the 1 cup of roughly chopped vanilla wafers to the pot. Gently fold and stir until every piece of cereal and every cookie chunk is thoroughly coated in the flavored marshmallow mixture. Be careful not to crush the cereal.
Step 5: Press and Set
Transfer the mixture to your prepared baking dish. Using your hands (lightly greased with butter or cooking spray to prevent sticking) or the bottom of a greased measuring cup, press the mixture firmly and evenly into the pan. A good, firm press ensures the treats hold together when cut.
Allow the treats to cool and set at room temperature for at least 1-2 hours before cutting. Do not refrigerate to set, as this can make them overly hard.
Step 6: Slice and Serve
Once completely set, use a sharp knife to cut into squares. For clean cuts, wipe the knife with a damp cloth between slices.
Serve and enjoy the taste of pure nostalgia!
Pro Tips for Success
Even the easiest recipes benefit from a few expert tricks.
- Freshness Counts: Stale cereal or marshmallows won’t give you the best texture. Use fresh ingredients for the ideal “snap” and chew.
- Low and Slow: Never rush the melting of marshmallows. High heat causes them to seize up and become tough.
- The Power of Pressing: Don’t be shy! Pressing the mixture firmly into the pan is the secret to treats that don’t crumble.
- Customization is Key: Feel free to stir in 1/2 cup of white chocolate chips or peanut butter chips with the cereal for a fun twist.
- Storage: Store leftovers in an airtight container at room temperature for up to 3 days. Place parchment paper between layers to prevent sticking. They are best enjoyed fresh.
Frequently Asked Questions (FAQs)
Can I use homemade marshmallow fluff?
Yes, you can substitute the bag of mini marshmallows and butter with about 1 1/2 cups (one 7 oz jar) of marshmallow fluff. Warm it gently in the pot before adding the pudding mix.
My treats turned out very hard. What happened?
This usually means the marshmallow mixture was cooked over too high heat or for too long, causing the sugar to harden. Always use low heat and remove the pot from the burner as soon as the marshmallows are melted.
Can I make these ahead of time?
Absolutely! They are a great make-ahead dessert. Prepare and cut them the day before your event. Store them tightly covered at room temperature.
Is there a substitute for vanilla wafers?
If you can’t find vanilla wafers, you can use shortbread cookies, graham cracker pieces, or even omit them. The banana flavor will still be prominent from the pudding mix.
Conclusion: Your New Go-To Dessert Awaits
There you have it the simple, no-fail path to creating sensational Banana Pudding Rice Krispie Treats. This recipe proves that with a little creativity, you can transform a childhood favorite into something even more special and delicious. The familiar comfort of a Rice Krispie treat meets the creamy, nostalgic flavor of banana pudding in every perfectly chewy, crunchy bite.
So, what are you waiting for? Grab that box of Rice Krispies and banana pudding mix, and in less than 30 minutes, you’ll have a dessert that will have everyone asking for the recipe. Don’t forget to share your creations and tag your photos—we love seeing your kitchen triumphs! Happy cooking


