There’s a moment in every dessert lover’s life when they discover a recipe so easy, so decadent, and so crowd-pleasing that it instantly earns a permanent spot in their repertoire. Today, that moment is here. Forget preheating the oven, meticulous measuring, and the stress of a cake that might not rise. We’re making a Banana Split Ice Cream Poke Cake a spectacular, no-bake dessert that layers all the iconic flavors of a classic banana split into one irresistible, icebox cake.
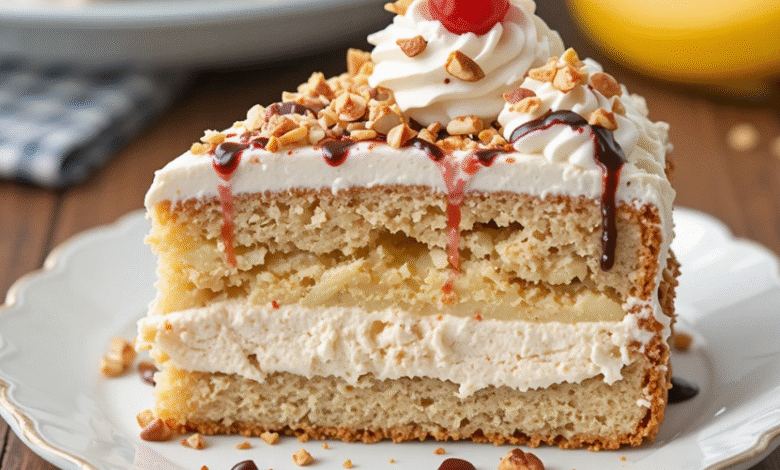
Imagine: a buttery graham cracker crust, a soft vanilla cake base pierced and soaked with sweet pineapple juice, a layer of fresh bananas and crushed pineapple, all enveloped in a blanket of rich vanilla ice cream. It’s crowned with swirls of whipped cream, a drizzle of chocolate and strawberry sauce, a sprinkle of nuts, and, of course, a cherry on top. Each slice is a perfect, make-ahead bite of pure nostalgia and joy. This isn’t just a dessert; it’s a celebration in a pan.

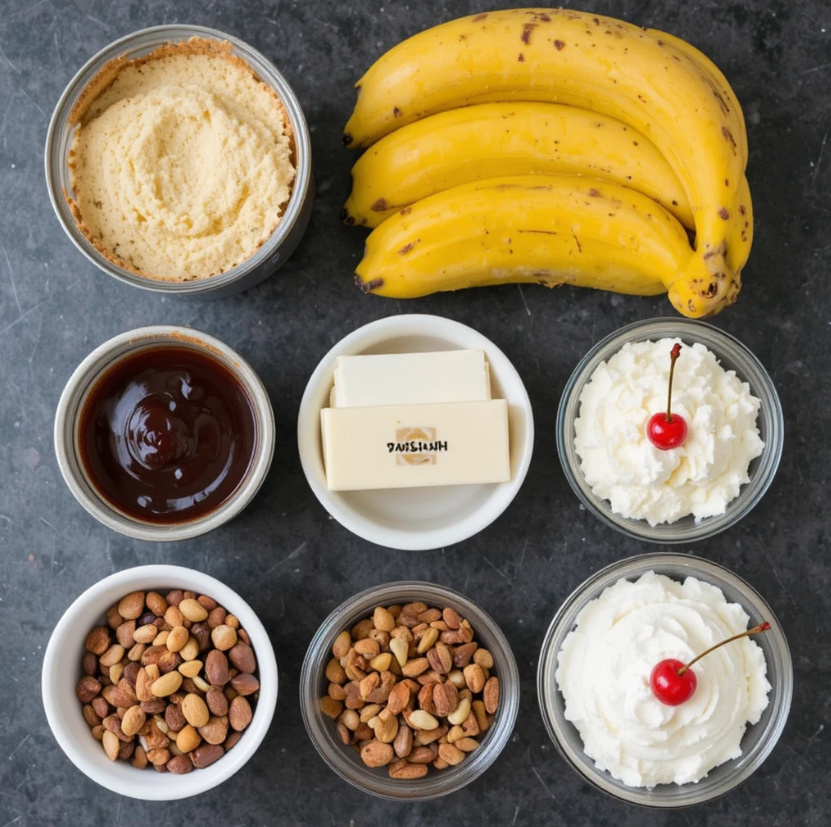
Ready to make the dessert that will have everyone asking for the recipe? Let’s gather our ingredients.
Everything You Need: The Banana Split Poke Cake Shopping List
The beauty of this recipe is its simplicity and use of clever shortcuts. We’re using a store-bought pound cake to form our perfect, no-bake base. Here’s your complete list:
For the Cake & Soak:
- 1 (10.75-12 oz) loaf of plain pound cake: You can use a store-bought one (like Sara Lee) or a homemade pound cake if you prefer. This is our foundation.
- 1 (20 oz) can of crushed pineapple in juice: Do not drain. We will use both the fruit and the juice.
For the Filling & Ice Cream Layer:
- 2-3 ripe (but firm) bananas: They should be yellow with maybe a few brown speckles, not mushy.
- 1/2 gallon (1.9 L) container of vanilla ice cream: Let it soften at room temperature for about 15-20 minutes until spreadable but not melted.
For the Graham Cracker Crust:
- 1 1/2 cups graham cracker crumbs (about 12 full sheets)
- 1/3 cup granulated sugar
- 6 tablespoons unsalted butter, melted
For the Epic Toppings:
- 1 cup heavy whipping cream, cold
- 2 tablespoons powdered sugar
- 1 teaspoon vanilla extract
- Chocolate syrup or hot fudge sauce
- Strawberry syrup or sauce
- 1/2 cup chopped walnuts or pecans (optional)
- Maraschino cherries, for serving
Step-by-Step: How to Assemble Your No-Bake Masterpiece
Follow these simple, numbered steps for a foolproof dessert. The key is in the assembly!
Step 1: Prepare the Pan and the Crust
- Take a 9×13 inch baking dish. For easy removal and clean slices, line it with parchment paper, letting the edges overhang slightly.
- In a medium bowl, combine the graham cracker crumbs and granulated sugar. Pour the melted butter over the mixture and stir until all the crumbs are evenly moistened and resemble wet sand.
- Press this mixture firmly and evenly into the bottom of your prepared baking dish. Use the bottom of a measuring cup to get a nice, compact layer. Place the dish in the freezer for 10-15 minutes to set while you work on the next step.
Step 2: Create the Cake Base
- Slice the pound cake horizontally into 1/2-inch thick slices. You can also cut it into cubes if that’s easier.
- Arrange the slices or cubes in a single layer over the chilled graham cracker crust. It’s okay if there are small gaps; they will get filled in.
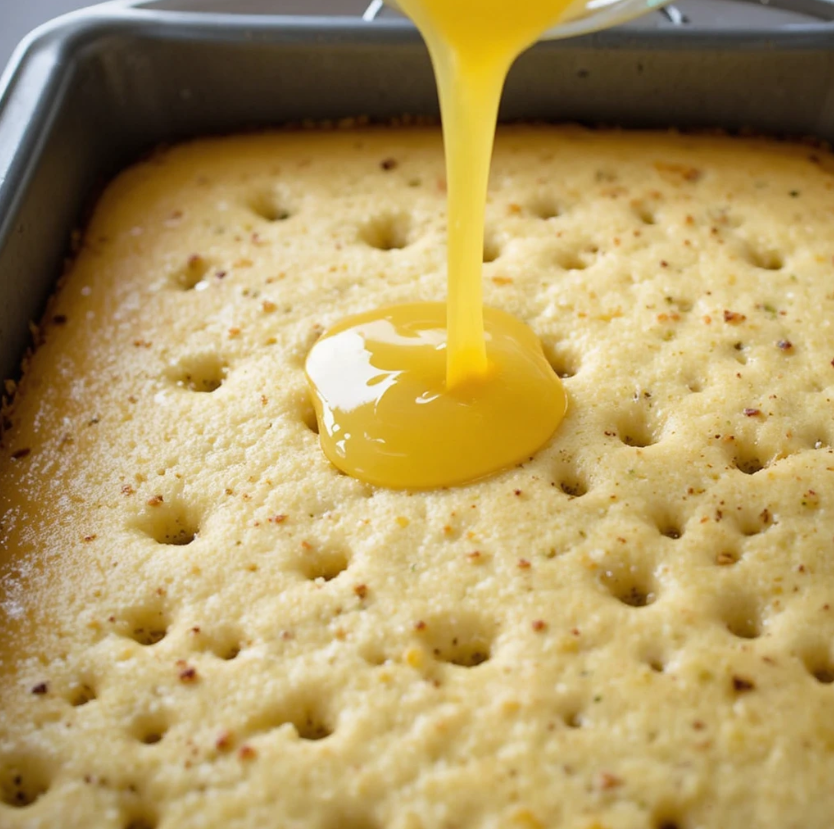
- Here’s the “poke” part: Using the handle of a wooden spoon or a chopstick, poke holes all over the pound cake layer. Don’t be shy poke deep, about 3/4 of the way down.
Step 3: The Flavor Soak and Fruit Layer
- Open the can of crushed pineapple. Reserve the fruit for the next step.
- Slowly and evenly pour the pineapple juice from the can all over the poked cake. Try to let it seep into the holes. This adds incredible moisture and a hint of tropical flavor that makes the cake irresistible.
- Now, sprinkle the reserved crushed pineapple evenly over the cake layer.
- Slice your bananas into 1/4-inch rounds and arrange them in a single layer over the pineapple.
Step 4: The Ice Cream Blanket
- Your ice cream should be soft enough to spread easily. If it’s still too hard, let it sit for another 5-10 minutes.
- Using a spatula or a large spoon, dollop the softened vanilla ice cream over the banana layer.
- Gently but quickly spread the ice cream into a smooth, even layer that reaches all the edges of the pan. Work efficiently to prevent the ice cream from melting too much.
- Immediately place the entire assembled cake in the freezer. Freeze for at least 6 hours, or preferably overnight, until it is completely firm.
Step 5: The Final Toppings (Add Before Serving!)
- About 15-30 minutes before you plan to serve, prepare the whipped cream. In a chilled bowl, beat the cold heavy cream, powdered sugar, and vanilla extract with a hand mixer or stand mixer until medium-stiff peaks form.
- Remove the cake from the freezer. Using the parchment paper overhang, carefully lift the cake out of the pan and place it on a serving board or platter (optional, but makes for a beautiful presentation).
- Spread or pipe the whipped cream over the top of the firm ice cream layer.
- Now, decorate like a classic banana split! Drizzle generous zig-zags of chocolate and strawberry sauce over the whipped cream. Sprinkle with chopped nuts if using.
- Slice and then top each individual slice with a maraschino cherry right before serving. This prevents the cherries from bleeding color onto the whipped cream.
Pro Tips for the Perfect Poke Cake Every Time
- Ice Cream Consistency is Key: The ideal softening point for the ice cream is when you can make a clear indent with a spoon and it’s pliable but not soupy. If it melts completely and refreezes, it can become icy.
- Banana Browning Hack: To prevent the banana layer from oxidizing (turning brown) too much, you can toss the banana slices in a tiny bit of lemon or pineapple juice before arranging them. The freezing process also slows browning significantly.
- Make it Ahead: This is the ultimate make-ahead dessert. It can be prepared and stored, covered tightly with plastic wrap or foil, in the freezer for up to 3-4 days. Just add the whipped cream and final toppings on the day you serve it.
- Customize Your Split: Feel free to get creative! Use chocolate pound cake, swap vanilla ice cream for strawberry or chocolate, or add a layer of sliced strawberries under the bananas. The formula is flexible.
- Clean Slices: For picture-perfect slices, dip a sharp knife in hot water and wipe it dry between each cut.
Slice, Serve, and Savor the Applause
And there you have it your new secret weapon for potlucks, birthdays, summer barbecues, or any occasion that calls for a show-stopping, no-fuss dessert. This Banana Split Ice Cream Poke Cake delivers on every promise: it’s visually stunning, deeply flavorful, wonderfully textured, and incredibly easy to make. It brings the playful, shareable joy of an ice cream parlor treat right to your kitchen, without any of the stress of traditional baking.
So, what are you waiting for? Gather those simple ingredients, clear some space in your freezer, and get ready to create a dessert that’s guaranteed to become your new favorite. Don’t forget to take a picture of your masterpiece before it disappears! Share it, tag it, and most importantly, enjoy every delicious, no-bake bite.


