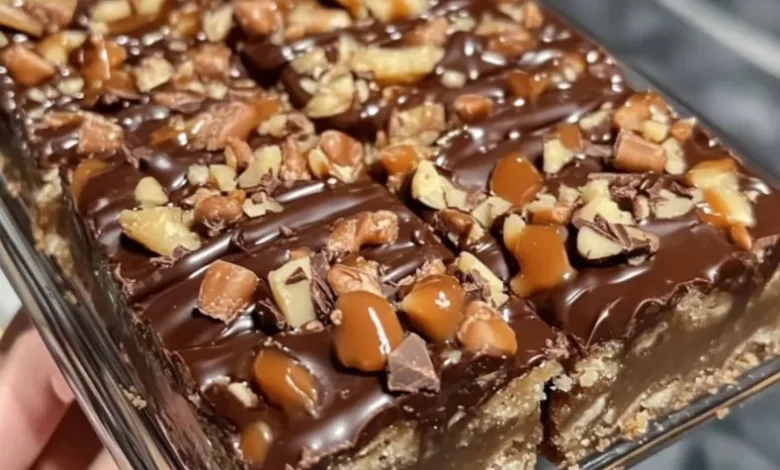
In the world of desserts, few things are as universally loved as the perfect combination of chocolate and caramel. It’s a match made in heaven, a symphony of sweet, rich, and buttery flavors that delights the senses. Now, imagine that divine duo resting on a crispy, crunchy base that requires absolutely no baking. That’s the magic of Caramel Chocolate Crunch Bars.
This recipe is more than just a treat; it’s a lifesaver for busy weeknights, a guaranteed hit at potlucks, and a simple project for budding young chefs. With a straightforward method and common ingredients, these bars deliver a gourmet taste and texture that belies their simplicity. They are the perfect harmony of crisp and creamy, sweet and salty, sophisticated and comforting. Let’s dive into creating this unforgettable dessert.
Why You’ll Love This Recipe
- No-Bake Wonder: Perfect for hot summer days or when you don’t want to turn on the oven.
- Incredibly Easy: With simple steps and no fancy techniques, it’s foolproof.
- Crowd-Pleasing: Loved by both kids and adults, making it ideal for any gathering.
- Customizable: Easily adaptable with different nuts, cereals, or types of chocolate.
- Make-Ahead Friendly: These bars need time to set, making them a fantastic do-ahead dessert.
The Key Ingredients: A Symphony of Texture and Flavor
The beauty of this recipe lies in the quality and combination of its core components. Each layer plays a crucial role in the final product.
For the Crunchy Base:
- 5 cups Rice Krispies cereal: This is the foundation, providing the iconic light and crispy texture. You can also use cornflakes for a slightly different crunch.
- 1 cup (2 sticks) unsalted butter: Using unsalted butter allows you to control the saltiness. It acts as the binding agent for the base.
- 1/2 cup granulated sugar: A touch of sugar caramelizes with the butter, adding depth to the base layer.
For the Luscious Caramel Layer:
- 1 (14 oz) bag of soft caramels, unwrapped: This is the cheat code for a smooth, gooey caramel without the fuss of making it from scratch. Look for high-quality brands for the best flavor.
- 1/4 cup heavy cream or whole milk: This is essential for thinning the caramels into a smooth, pourable sauce. Heavy cream will yield a richer, creamier result.
For the Rich Chocolate Topping:
- 2 cups semi-sweet chocolate chips: Semi-sweet chocolate provides the perfect balance to the sweet caramel. You can use milk chocolate for a sweeter bar or dark chocolate for a more intense flavor.
- 1/2 cup creamy peanut butter (optional but highly recommended): This is the secret weapon! It makes the chocolate topping silky, easy to spread, and adds a subtle nutty flavor that complements the caramel beautifully. If you have a nut allergy, you can substitute this with 1/4 cup of additional butter or coconut oil.
- Flaky sea salt (for garnish): A light sprinkle of flaky sea salt just before the chocolate sets elevates the bars to a professional level, cutting through the sweetness and enhancing all the other flavors.
Essential Equipment
- 9×13 inch baking pan
- Parchment paper
- Large saucepan
- Medium saucepan or microwave-safe bowl
- Spatula
- Measuring cups and spoons
Step-by-Step Cooking Instructions
Follow these steps for perfect, sliceable bars every single time.
Step 1: Prepare the Pan
Line your 9×13 inch baking pan with parchment paper, leaving some overhang on two opposite sides. This “sling” will make it incredibly easy to lift the entire block of bars out of the pan for clean cutting later. Lightly grease the parchment paper with butter or cooking spray.
Step 2: Create the Crunchy Base
In your large saucepan, melt the 1 cup of butter over medium heat. Add the 1/2 cup of granulated sugar and stir constantly for about 1-2 minutes until the mixture is bubbly and the sugar has dissolved. Remove the pan from the heat. Quickly add the 5 cups of Rice Krispies cereal and stir until every piece is thoroughly and evenly coated with the butter mixture. Transfer the mixture to your prepared pan. Using a spatula or the bottom of a greased measuring cup, press the cereal down firmly and evenly to create a compact base. This firm base is crucial for supporting the layers above.
Step 3: Craft the Gooey Caramel Layer
In your medium saucepan, combine the unwrapped caramels and the 1/4 cup of heavy cream. Cook over low heat, stirring constantly, until the caramels are completely melted and the mixture is smooth. This requires patience low heat prevents the caramel from burning. Once smooth, immediately pour the caramel sauce over the prepared crust. Use your spatula to spread it into an even layer, reaching all the corners. Allow this layer to cool and set for about 10-15 minutes.
Step 4: Prepare the Chocolate Topping
While the caramel is setting, it’s time to melt the chocolate. You can do this using a double boiler or the microwave.
- Microwave Method: In a microwave-safe bowl, combine the 2 cups of chocolate chips and 1/2 cup of peanut butter. Heat in 30-second intervals, stirring well after each, until the mixture is completely smooth.
- Double Boiler Method: Place a heatproof bowl over a pot of simmering water (ensure the bottom of the bowl doesn’t touch the water). Add the chocolate chips and peanut butter, stirring until melted and combined.
Step 5: Assemble the Final Layer
Pour the smooth chocolate and peanut butter mixture over the slightly set caramel layer. Tilt the pan gently to spread the chocolate evenly across the entire surface.
Step 6: The Finishing Touch
Immediately after spreading the chocolate, while it’s still wet, sprinkle the top generously with flaky sea salt. This not only adds flavor but also gives the bars a beautiful, professional finish.
Step 7: The Most Important Step – Chilling
Place the pan in the refrigerator for at least 3-4 hours, or until the chocolate topping is completely firm. For the best results, you can leave it overnight. This chilling time is non-negotiable; it ensures all the layers bind together and allows for clean, neat slices.
Step 8: Slicing and Serving
Once fully set, use the parchment paper sling to lift the entire block of bars out of the pan and onto a cutting board. Using a sharp knife, slice them into your desired size and shape. For super clean cuts, you can wipe the knife with a hot, damp cloth between slices.
Tips, Tricks, and Customizations
- Room Temperature is Key: For the cleanest slices, let the bars sit at room temperature for 5-10 minutes after removing them from the fridge before cutting.
- Get Creative with the Base: Add 1/2 cup of chopped peanuts, pecans, or pretzel pieces to the cereal mixture for extra crunch and flavor.
- Caramel Shortcut: If you’re in a real hurry, you can use a can of store-bought dulce de leche instead of melting the caramels.
- Storage: Keep these bars stored in an airtight container in the refrigerator for up to one week. They can also be frozen for up to 3 months. Simply thaw in the fridge before serving.
Conclusion
These Caramel Chocolate Crunch Bars are a testament to the fact that the most impressive desserts are often the simplest to make. They deliver a multi-layered experience of texture and flavor that will have everyone asking for the recipe. From the satisfying crunch of the base to the luxurious flow of caramel and the snap of the rich chocolate top, every bite is a little piece of perfection. So, gather your ingredients, clear some space in your fridge, and get ready to make your new signature dessert. Your taste buds will thank you.