Celebrate with Style: Mary Berry’s Condensed Milk Ice Cream for a Perfect Birthday
When it comes to birthdays, the cake often takes center stage. But what if you could offer something equally spectacular, wonderfully creamy, and surprisingly simple to make? Enter Mary Berry’s Condensed Milk Ice Cream. This legendary recipe from the doyenne of British baking is a game-changer for home cooks and a guaranteed showstopper for any birthday celebration.
This isn’t just any ice cream; it’s a luxuriously rich, no-churn ice cream that bypasses the need for any specialized equipment. Its magic lies in the combination of softly whipped cream and sweetened condensed milk, creating a base that is impossibly smooth and resistant to forming icy crystals. For a birthday, this means you can focus on the celebration, not on complicated kitchen gadgets. It’s a dessert that embodies Mary Berry’s own philosophy: elegant, reliable, and always crowd-pleasing.
In this article, we will guide you through creating this delightful frozen dessert, offering pro tips for the perfect texture and inspiring ideas to tailor it specifically for a birthday extravaganza.
Why This Mary Berry Ice Cream is the Ultimate Birthday Dessert
- Effortless Elegance: The “no-churn” method is foolproof. Whether you’re a baking novice or a seasoned pro, this recipe delivers a professional-quality result every time. It frees you from the stress of last-minute dessert prep on a busy birthday day.
- Incredibly Customizable: The basic recipe is a blank canvas for your birthday person’s favorite flavors. Are they a chocolate fanatic? A fruit fiend? We’ll explore mix-in ideas that make this dessert personally theirs.
- Make-Ahead Marvel: You can and should! make this ice cream days in advance. This allows the flavors to meld perfectly and gives you one less thing to worry about as the birthday party approaches.
- A Refreshing Alternative: After a heavy birthday meal, a scoop of this light-yet-indulgent ice cream is a refreshing and welcome change from traditional cake, or it can be the perfect companion to a slice of it.
Gathering Your Ingredients: The Simple List for Perfection
The beauty of this recipe is in its short, simple ingredient list. Using high-quality components will yield the best results.
Mary Berry’s Condensed Milk Ice Cream Base:
- 600 ml (or 2 ½ cups) Double Cream or Heavy Whipping Cream: Ensure it is very cold. This is the body of your ice cream, providing the fat content that whips up into soft, stable peaks.
- 397 g (or one 14 oz can) Sweetened Condensed Milk: This is the sweetener and the key to the no-churn magic. It gives the ice cream its signature creamy, soft-scoop texture.
- 2 teaspoons Vanilla Extract: Use a good quality pure vanilla extract for the best flavor. This is the classic base, but feel free to experiment with other extracts.
Essential Equipment:
- A large mixing bowl
- An electric hand whisk or a stand mixer with a whisk attachment
- A spatula
- A 2-litre (or 2-quart) freezer-safe container with a lid (a loaf tin works well)
The Foolproof Method: Crafting Your Ice Cream Masterpiece
Follow these steps for a perfectly creamy and dreamy ice cream.
Step 1: Prepare Your Container
Take your freezer-safe container and have it ready. There’s no need to line it with parchment paper, as the high fat content will prevent sticking.
Step 2: Whip the Cream to Perfect Peaks
Pour the very cold double cream into your large mixing bowl. Using an electric whisk, start on a low speed and gradually increase to medium-high. Whip the cream until it just forms soft peaks. This is the most critical step. You want the cream to be thick and billowy, but not grainy or buttery. When you lift the whisk, the peak should gently droop over.
Step 3: Incorporate the Condensed Milk and Flavor
Pour in the sweetened condensed milk and the vanilla extract. Now, switch to a spatula or continue whisking on the lowest speed. Gently fold the condensed milk into the whipped cream. Be careful not to over-mix and deflate the air you’ve just whipped into the cream. You are looking for a smooth, uniform, and voluminous mixture.
Step 4: Add Your Birthday Mix-Ins (Optional)
This is where you personalize the dessert! If you’re adding any mix-ins like crushed cookies, chocolate chips, or fruit puree, now is the time. Gently fold them in until just combined.
Classic Birthday Ideas:
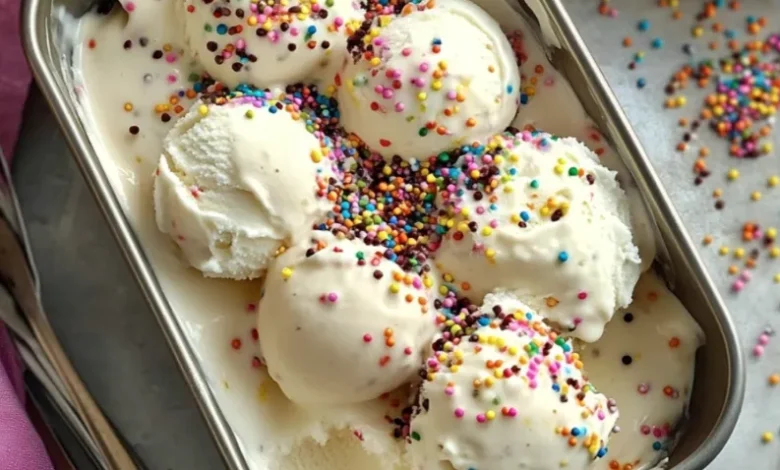
- Sprinkle Surprise: Fold in 100g of multi-colored sprinkles for a classic “confetti” ice cream.
- Chocolate Lover’s Dream: Add 150g of finely chopped chocolate or chocolate chips.
- Berry Blast: Gently swirl in 200g of a slightly sweetened, mashed raspberry or strawberry puree for a ripple effect.
Step 5: Freeze to Set
Pour the mixture into your prepared container. Smooth the top with your spatula. Press a piece of baking parchment directly onto the surface of the ice cream to prevent ice crystals from forming. Seal with the lid.
Place the container in the freezer for a minimum of 6 hours, but ideally overnight, until it is firm and scoopable.
Pro Tips from a Mary Berry Admirer
- Chill Your Bowl: For even better results, place your mixing bowl and whisk attachments in the freezer for 15-20 minutes before you start. A cold bowl helps the cream whip faster and more effectively.
- Don’t Over-whip: Soft peaks are your friend. Over-whipped cream will make folding difficult and result in a denser final product.
- Soften Before Serving: For the perfect scoop, take the ice cream out of the freezer and let it sit on the counter for 5-10 minutes before serving. This will allow it to soften to a creamy, dreamy consistency.
Serving Your Birthday Masterpiece
Presentation is key for a birthday! Here are some ideas to make your Mary Berry ice cream the star of the show:
- The Ultimate Ice Cream Sundae Bar: Scoop the ice cream into bowls and set up a topping bar with hot fudge, caramel sauce, fresh berries, chopped nuts, and extra sprinkles. Let guests build their own dessert.
- Elegant Parfaits: Layer scoops of ice cream with crumbled birthday cake or brownie bits in fancy glasses for a deconstructed cake-and-ice-cream experience.
- The Classic “Slice & Serve”: If you used a loaf tin, you can turn the ice cream out onto a plate and slice it into elegant portions. Drizzle with sauce and garnish with a fresh mint sprig.
Conclusion: A Birthday Tradition in the Making
Mary Berry’s Condensed Milk Ice Cream is more than just a recipe; it’s a testament to the power of simple, quality ingredients combined with a reliable technique. It empowers you to create a dessert that is both deeply impressive and wonderfully straightforward.
This birthday, skip the store-bought tubs and give the gift of homemade joy. With this no-churn wonder, you’re not just making ice cream you’re creating a sweet, creamy, and unforgettable centerpiece for a celebration. It’s a dessert that truly honors the Mary Berry mantra: it’s all about the simple things done well. Happy birthday, and happy scooping


