Why Mint Brownies are a Timeless Classic
There’s a special place in the dessert hall of fame for the humble brownie. It’s a classic, a comfort, a square of pure joy. But sometimes, even a classic needs a refreshing twist. Enter the Mint Brownie: a sophisticated, triple-layered confection that elevates the familiar chocolate treat into something extraordinary.
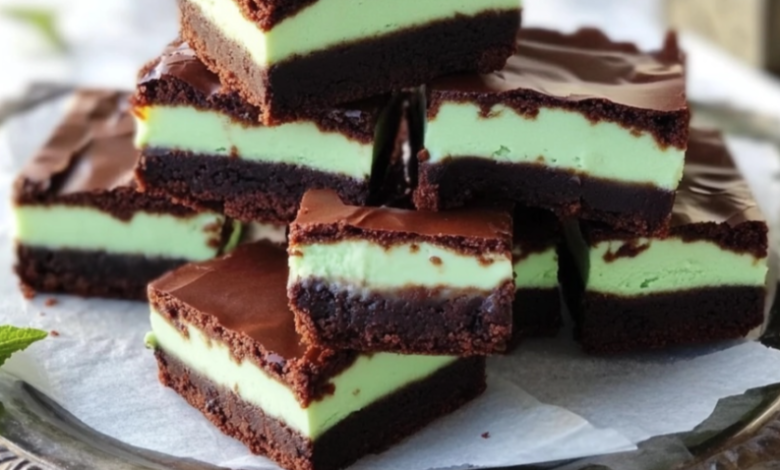
This isn’t just a brownie with a hint of mint extract. This is a carefully crafted experience. It begins with a dense, fudgy brownie base that is profoundly chocolatey. This foundation is then topped with a layer of cool, creamy mint buttercream, so smooth it melts in your mouth. The final curtain is a rich, glossy layer of dark chocolate ganache that provides a satisfying snap with every bite. The combination of rich chocolate and refreshing mint is a match made in heaven, creating a dessert that is both indulgent and surprisingly balanced.
In this article, we will guide you through creating these show-stopping mint brownies from scratch. We’ll cover the secrets to each layer, offer tips for perfect results, and explore why this combination is so universally loved. Get ready to bake a batch that will disappear faster than you can say “decadent.”
The Anatomy of the Perfect Mint Brownie: A Three-Act Play
The magic of a great mint brownie lies in its distinct layers. Each one has a specific role to play in the overall texture and flavor profile.
- Act I: The Fudgy Brownie Base. This is the foundation. It needs to be sturdy enough to support the upper layers but remain moist and intensely chocolatey. We achieve this by using a higher fat-to-flour ratio and melted dark chocolate.
- Act II: The Cool Mint Cream Layer. This is the refreshing heart of the dessert. We use a simple buttercream base, flavored with pure peppermint extract (not spearmint, which can taste like toothpaste). For a vibrant look and a subtle, natural flavor, we’ll also use a touch of green food coloring, though this is optional.
- Act III: The Silky Chocolate Ganache Top. This is the elegant finish. A simple mixture of high-quality chocolate and warm cream, it sets into a firm, shiny layer that contrasts beautifully with the soft cream and fudgy base beneath it.
Gathering Your Ingredients: A Checklist for Success
For the best results, use high-quality ingredients. The flavor of your chocolate and peppermint extract will truly shine through.
For the Fudgy Brownie Base:
- 1 cup (225g) unsalted butter
- 8 oz (225g) high-quality dark or semi-sweet chocolate, finely chopped
- 1 ½ cups (300g) granulated sugar
- 4 large eggs, at room temperature
- 1 teaspoon pure vanilla extract
- ¾ cup (95g) all-purpose flour
- ¼ cup (25g) unsweetened cocoa powder (Dutch-processed preferred)
- ½ teaspoon salt
For the Mint Cream Layer:
- ½ cup (115g) unsalted butter, softened to room temperature
- 2 cups (250g) powdered sugar, sifted
- 2 tablespoons heavy cream or whole milk
- 1 ½ teaspoons pure peppermint extract
- Optional: 2-3 drops of green food coloring
For the Chocolate Ganache Topping:
- 6 oz (170g) high-quality semi-sweet or dark chocolate, finely chopped
- ½ cup (120ml) heavy cream
- 1 tablespoon unsalted butter
The Method: Crafting Your Mint Brownie Masterpiece
Follow these steps carefully for flawless, layered mint brownies.
Part 1: The Fudgy Brownie Base
- Prep and Preheat: Preheat your oven to 350°F (175°C). Line a 9×9 inch baking pan with parchment paper, leaving an overhang on two sides for easy removal. This is crucial for clean cuts later.
- Melt Chocolate and Butter: In a heatproof bowl set over a saucepan of simmering water (a double boiler), melt the butter and chopped dark chocolate together. Stir continuously until smooth and glossy. Remove from heat and let it cool for 5 minutes.
- Combine Wet Ingredients: Whisk the granulated sugar into the warm chocolate mixture until combined. Add the eggs, one at a time, whisking well after each addition. Stir in the vanilla extract.
- Incorporate Dry Ingredients: In a separate bowl, sift together the flour, cocoa powder, and salt. Gently fold the dry ingredients into the wet chocolate mixture using a spatula. Mix only until the flour disappears; do not overmix.
- Bake: Pour the batter into your prepared pan and spread it evenly. Bake for 25-30 minutes, or until a toothpick inserted into the center comes out with a few moist crumbs attached (not wet batter).
- Cool Completely: Place the pan on a wire rack and allow the brownie base to cool completely. This is non-negotiable! If the base is warm, it will melt the mint layer.
Part 2: The Mint Cream Layer
- Cream the Butter: In a medium bowl, using an electric mixer, beat the softened butter on medium speed until it is light and fluffy (about 2 minutes).
- Add Remaining Ingredients: Gradually add the sifted powdered sugar, about ½ a cup at a time, beating on low speed until combined. Once all the sugar is incorporated, add the heavy cream, peppermint extract, and optional food coloring.
- Whip and Spread: Increase the mixer speed to medium-high and beat for 2-3 minutes until the mixture is very smooth and creamy. Spread this mint cream evenly over the completely cooled brownie base. For a perfectly even layer, an offset spatula is your best friend.
- Chill: Place the pan in the refrigerator for at least 30 minutes to allow the mint layer to firm up. This will prevent the hot ganache from mixing with it.
Part 3: The Chocolate Ganache Topping
- Prepare the Chocolate: Place the finely chopped chocolate in a heatproof bowl.
- Heat the Cream: In a small saucepan, heat the heavy cream over medium heat until it just begins to simmer. Do not let it boil vigorously.
- Create the Ganache: Immediately pour the hot cream over the chopped chocolate. Let it sit, untouched, for 2-3 minutes to melt the chocolate. Then, starting from the center, gently whisk until the mixture is completely smooth and glossy. Whisk in the tablespoon of butter until melted and incorporated.
- The Final Layer: Slowly and carefully pour the warm ganache over the chilled mint layer. Tilt the pan to help it spread into a smooth, even coating.
- Set and Slice: Return the pan to the refrigerator for at least 1-2 hours, or until the ganache is fully set.
Serving and Storing Your Creation
Once fully set, use the parchment paper overhang to lift the entire block of mint brownies out of the pan. Place it on a cutting board.
For Clean Cuts: Dip a sharp knife in hot water, wipe it dry, and then slice. Repeat this process for each cut. This will give you beautifully clean layers without smudging.
Storage: Store these mint brownies in an airtight container in the refrigerator for up to one week. They are best served slightly chilled, offering a wonderful contrast between the cool mint and the firm, fudgy layers.
Conclusion: More Than Just a Brownie
These layered mint brownies are more than just a simple dessert; they are a statement. They show care, attention to detail, and a love for balanced flavors. While they require a bit more patience than a standard brownie, the result is a professional-quality treat that is perfect for parties, holidays, or any time you want to impress.
The journey from the rich, dark base through the refreshing mint cream to the final, satisfying snap of dark chocolate ganache is an experience every chocolate and mint lover deserves. So, preheat your oven, gather your ingredients, and prepare to bake what might just become your new signature dessert. Happy baking


