The Ultimate Pickled Eggs with Sausage & Onions: A Tangy, Savory Delight
A Jar Full of Flavor
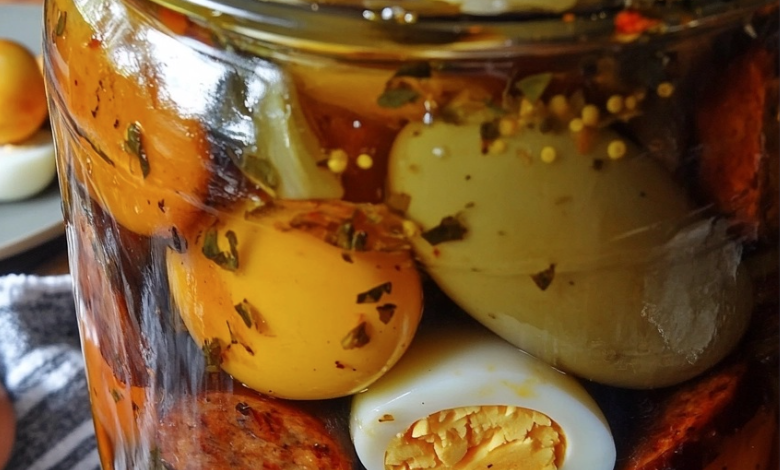
Imagine opening a jar to find not just ordinary pickled eggs, but a complete, protein-packed snack suspended in a beautifully spiced, tangy brine. Welcome to the world of Pickled Eggs with Sausage and Onions. This recipe elevates the classic pub snack into a hearty, flavorful delicacy that is perfect for picnics, quick lunches, or an impressive addition to your charcuterie board.
Forget the bland, one-note versions you might have tried before. By incorporating savory sausage and sweet, sharp onions, we create a symphony of textures and tastes in every bite. The eggs become creamy and infused with spice, the onions soften and sweeten, and the sausage adds a robust, meaty depth that makes these pickles incredibly satisfying.
This article is your complete guide, from selecting the best ingredients to mastering the pickling process. Let’s dive into this timeless yet innovative preservation method and create a jar of pure delight.
Why You’ll Love This Recipe
- Meal-Prep Hero: Make a batch on Sunday and have ready-to-eat, high-protein snacks for the entire week.
- Incredible Flavor: The combination of vinegar, spices, sausage, and onion creates a complex flavor profile that deepens over time.
- Versatile: Enjoy them solo, sliced on salads, paired with cheese, or as part of a hearty ploughman’s lunch.
- Economical: Using simple, staple ingredients, this recipe is a cost-effective way to create delicious food.
The Essential Ingredients
The magic of this recipe lies in the quality and balance of its components. Here’s what you’ll need for this culinary adventure.
For the Main Jar Contents:
- 12 large eggs: Fresh eggs are best for easier peeling. Older eggs tend to have more air in them, which can sometimes make peeling difficult.
- 1 pound (450g) fully cooked sausage: Kielbasa or smoked sausage is highly recommended for its robust flavor that stands up well to the brine. Ensure it is fully cooked and sliced into 1-inch rounds.
- 1 large red onion: Peeled and sliced into thin rings or half-moons. Red onion adds a beautiful color and a milder, sweeter flavor compared to yellow onions.
For the Pickling Brine:
- 2 cups apple cider vinegar: This provides the signature tangy base with a slightly fruity undertone.
- 1 cup water: To balance the acidity of the vinegar.
- 1 cup white granulated sugar: Adds a necessary sweetness to counter the vinegar. You can adjust this to your taste.
- 2 teaspoons kosher salt: Enhances all the flavors. If using table salt, reduce the quantity by half.
- The Spice Sachet (Tied in cheesecloth):
- 2 bay leaves
- 1 tablespoon black peppercorns
- 1 tablespoon mustard seeds
- 1 teaspoon coriander seeds
- 1 teaspoon red pepper flakes (adjust for heat)
- 4-5 whole cloves
- 3-4 whole allspice berries
(Optional for color): A few slices of beetroot will give the eggs a stunning pinkish-purple hue.
Equipment You Will Need
- Large pot for boiling eggs
- Medium saucepan for the brine
- Cheesecloth and kitchen twine for the spice sachet
- Two clean 1-quart (1-liter) mason jars with lids: Glass is best as it won’t react with the acidic brine.
- Tongs and a slotted spoon
- Bowl of ice water
Step-by-Step Cooking & Pickling Instructions
Follow these steps carefully for perfect, safe, and delicious pickled eggs every time.
Step 1: Prepare the Eggs Perfectly
The key to beautiful pickled eggs is easy peeling. Place the eggs in a single layer in a large pot and cover with cold water by about an inch. Bring the water to a rolling boil over high heat. Once boiling, immediately cover the pot and remove it from the heat. Let the eggs sit in the hot water for 10-12 minutes.
While the eggs are sitting, prepare an ice bath—a large bowl filled with ice and cold water. After the 10-12 minutes, use tongs to transfer the eggs directly into the ice bath. Let them cool completely for at least 15 minutes. This shock stops the cooking process and contracts the egg inside the shell, making them much easier to peel. Gently tap and roll each egg on the counter, then peel under cool running water.
Step 2: Cook and Slice the Sausage & Onion
While the eggs are cooling, slice the fully cooked sausage into 1-inch rounds. If you prefer, you can lightly pan-sear the sausage rounds to render a little fat and add a touch of caramelization, but this is optional. Peel the red onion and slice it thinly.
Step 3: Create the Flavor-Packed Brine
This is where the magic happens. In your medium saucepan, combine the apple cider vinegar, water, sugar, and salt. Place all the whole spices into the center of a small square of cheesecloth, gather the edges, and tie it securely with kitchen twine to create a sachet. Drop this sachet into the vinegar mixture.
Bring the mixture to a gentle simmer over medium heat, stirring occasionally to dissolve the sugar and salt. Once simmering, reduce the heat to low and let it infuse for 10-15 minutes. Do not let it boil vigorously. The aroma will be incredible! After infusing, remove the saucepan from the heat.
Step 4: Assemble the Jars
Now for the fun part: layering. Ensure your mason jars are impeccably clean and dry.
- Start by placing a few onion rings and sausage slices at the bottom of each jar.
- Carefully add the peeled, hard-boiled eggs. You can fit about 6 eggs per quart jar.
- Tuck the remaining sausage slices and onion rings around and between the eggs, filling in the gaps. This ensures the brine can circulate and flavor everything evenly.
- If you are using beetroot for color, add the slices between the layers now.
Step 5: The Pickling Process
Remove the spice sachet from the brine. Carefully pour the hot brine over the contents of the jars, ensuring the eggs, sausage, and onions are completely submerged. Leave about a ½-inch of headspace at the top of the jar.
Tap the jars gently on the counter to release any trapped air bubbles. Wipe the rims of the jars with a clean, damp cloth to ensure a good seal. Screw on the lids until they are fingertip-tight.
Step 6: Cooling and Curing for Maximum Flavor
Allow the jars to cool completely on the countertop. Once cool, place them in the refrigerator. This is a refrigerator pickle recipe and is not designed for shelf-stable canning.
This is the hardest part: the waiting. For the best flavor, let the jars cure in the refrigerator for at least 3-4 days, but ideally 1-2 weeks. This waiting period allows the flavors to meld and penetrate deep into the eggs and sausage. They will keep safely for up to 3-4 months in the refrigerator.
Serving Suggestions & Tips for Success
- How to Serve: Enjoy these pickled eggs and sausage straight from the jar as a snack. Slice them over a fresh green salad, serve them alongside sharp cheddar cheese and crusty bread for a ploughman’s lunch, or as a unique garnish for a Bloody Mary.
- Safety First: Always use clean utensils to remove the eggs and sausage from the jar to prevent contamination. Never store these at room temperature after sealing.
- Customize Your Flavor: Feel free to experiment with the spices! Add a cinnamon stick, a few slices of fresh ginger, or a sprig of fresh dill to the brine for a different twist.
- Peeling is Key: The ice bath method is non-negotiable for easy-peel eggs. Don’t skip it!
Conclusion: Your New Favorite Jarred Treasure
Making Pickled Eggs with Sausage and Onions is more than just following a recipe; it’s about creating a preserved food that is bursting with character and convenience. The transformation that occurs in the jar over a few days is a small miracle of flavor infusion.
So, gather your ingredients, be patient with the curing process, and get ready to enjoy one of the most satisfying and flavorful snacks you can make at home. This recipe is sure to become a cherished staple in your refrigerator. Happy pickling