Unlock the Food Court Secret: How to Make Mall-Style Teriyaki Chicken & Fried Rice at Home

Have you ever walked through a bustling shopping mall, hit by that unmistakable, irresistible aroma of sizzling teriyaki chicken and fried rice? That sweet, savory, slightly smoky scent pulls you in like a magnet, leading you straight to the food court counter. You watch, mesmerized, as the chef deftly tosses glistening chicken and vegetables on a giant, fiery grill. The final plate arrives—a perfect mound of steaming rice, juicy chicken coated in a glossy, sticky sauce, with just the right amount of char. It’s a flavor of pure nostalgia and satisfaction. But what if you could recreate that exact, iconic mall-style teriyaki chicken and fried rice experience in your own kitchen? No mysterious ingredients, no commercial-grade equipment needed. Today, we’re unlocking the food court secret, giving you a foolproof, step-by-step recipe to bring that beloved takeout classic home. Get ready to impress yourself and your family with a meal that’s even better, fresher, and more affordable than the mall version.

Why This Homemade Version Beats the Food Court Every Time
Before we dive into the ingredients, let’s talk about the benefits of making this dish yourself. First, you have complete control over quality. You choose tender, high-quality chicken breast and fresh, crisp vegetables. Second, you can adjust the flavors to your liking more garlic, less ginger, a touch more sweetness or a kick of heat. Third, it’s surprisingly quick and economical. This entire meal, which easily serves four, comes together in about 45 minutes for a fraction of the cost of eating out. Finally, the secret isn’t in fancy equipment; it’s in a few key techniques and a perfectly balanced, simple homemade teriyaki sauce. Let’s get started.
Your Shopping List: Ingredients for Authentic Teriyaki Chicken & Fried Rice
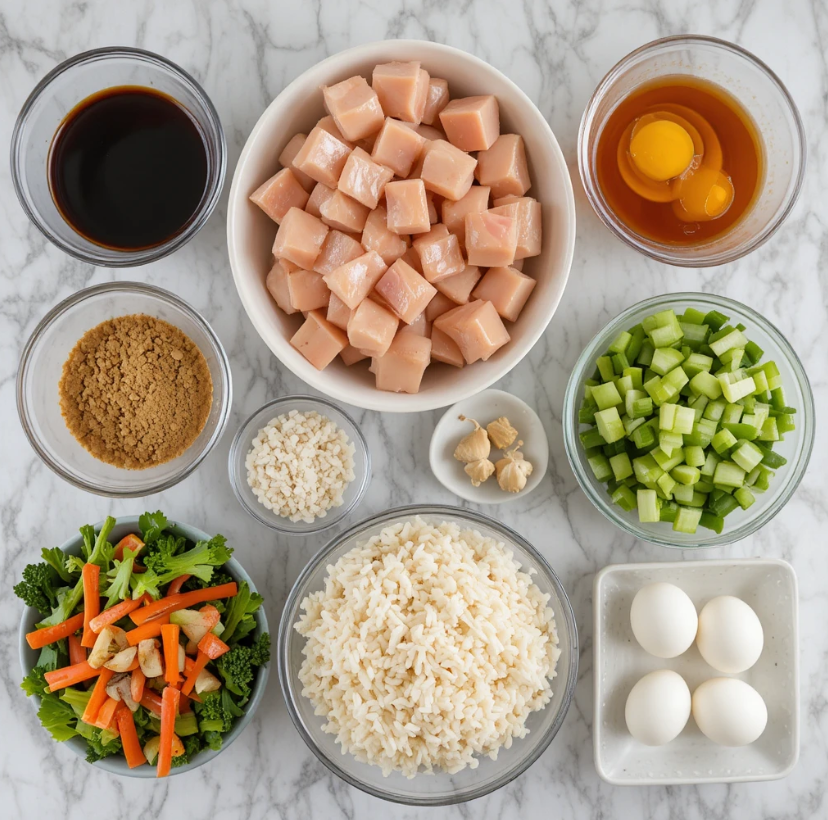
Gathering everything you need is the first step to success. Here’s your complete list, broken down by component. Most items are pantry staples or easily found at any grocery store.
For the Teriyaki Chicken:
- Boneless, Skinless Chicken Breasts: 1.5 lbs (about 680g), cut into 1-inch cubes. Thighs work too for a juicier, richer flavor.
- Vegetable Oil: 1 tablespoon, for stir-frying.
- Cornstarch: 1 tablespoon, for coating the chicken. This is the KEY to getting that slightly crispy exterior and helping the sauce thicken beautifully.
- Salt & Black Pepper: To season the chicken.
For the Homemade Teriyaki Sauce (No Bottled Stuff!):
- Soy Sauce: 1/2 cup (use low-sodium if preferred). This is the salty, umami base.
- Water: 1/4 cup.
- Brown Sugar: 1/4 cup, packed. This provides the deep sweetness and helps the sauce caramelize.
- Honey: 2 tablespoons. Adds a glossy finish and another layer of sweetness.
- Rice Vinegar: 2 tablespoons. The crucial acid that balances the sweetness and saltiness.
- Fresh Ginger: 1 tablespoon, finely grated (or 1 tsp ground ginger in a pinch).
- Fresh Garlic: 3 cloves, minced.
- Cornstarch Slurry: 1 tablespoon cornstarch mixed with 2 tablespoons COLD water. This is our thickening agent.
For the Mall-Style Fried Rice:
- Day-Old Cooked White Rice: 4 cups, cold and clumpy (like jasmine or medium-grain). This is non-negotiable for perfect texture. Fresh rice is too moist and steamy.
- Eggs: 2 large, lightly beaten.
- Frozen Peas & Carrots Mix: 1 cup, no need to thaw.
- Yellow Onion: 1/2 medium, finely diced.
- Green Onions: 3, sliced, with whites and greens separated.
- Sesame Oil: 1 teaspoon (for finishing flavor).
- Soy Sauce: 2-3 tablespoons, to taste.
- Vegetable Oil: 2 tablespoons, for cooking.
Step-by-Step Cooking Guide: Building Your Food Court Feast
Follow these steps in order for a seamless cooking process. We’ll make the sauce first, then the fried rice, and finish with the teriyaki chicken for the freshest possible meal.
Part 1: The Foundation – Make the Teriyaki Sauce
This sauce is so good, you’ll want to put it on everything.
- In a small saucepan over medium heat, combine the soy sauce, water, brown sugar, honey, rice vinegar, grated ginger, and minced garlic.
- Whisk continuously until the sugar dissolves completely, about 3-4 minutes.
- Bring the mixture to a gentle simmer. Give your cornstarch slurry a quick stir (it separates) and slowly drizzle it into the simmering sauce while whisking constantly.
- Continue to cook for 1-2 minutes until the sauce thickens enough to coat the back of a spoon. It should be glossy and rich. Remove from heat and set aside. (It will thicken more as it cools).
Part 2: The Perfect Base – Cook the Fried Rice
Fried rice is best made in a wok or large skillet over high heat. Have all your ingredients prepped and ready to go (mise en place!).
- Scramble the Eggs: Heat 1 tablespoon of vegetable oil in your wok/large skillet over medium-high heat. Pour in the beaten eggs and let them set for 30 seconds before scrambling with a spatula until just cooked. Break into small pieces and transfer to a plate.
- Sauté the Aromatics: Add the remaining 1 tablespoon of oil to the hot wok. Add the diced yellow onion and the white parts of the green onions. Stir-fry for 2-3 minutes until softened.
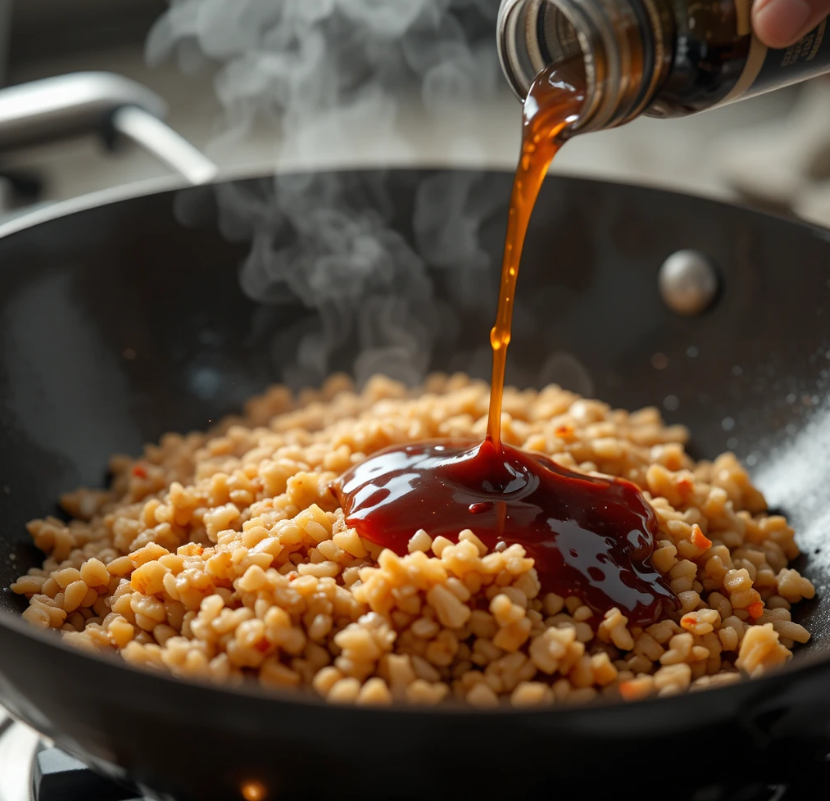
- Add Vegetables & Rice: Increase heat to high. Add the frozen peas and carrots and stir-fry for 1 minute. Add the cold rice, breaking up any large clumps with your fingers or a spatula. Toss and stir constantly for 3-4 minutes until the rice is heated through and starts to get a slight fry on some grains.
- Season & Finish: Push the rice to one side. Pour the soy sauce directly onto the hot surface of the wok it will sizzle and steam instantly, which is where the “wok hei” (breath of the wok) flavor comes from. Quickly toss everything together. Add back the scrambled eggs and the green onion tops. Drizzle with the sesame oil, give one final toss, and transfer the entire fried rice to a serving platter or keep warm in the oven.
Part 3: The Star – Cook the Teriyaki Chicken
Now, for the main event.
- Coat the Chicken: In a medium bowl, toss the cubed chicken with salt, pepper, and the 1 tablespoon of cornstarch until evenly coated.
- Sear the Chicken: In a clean large skillet or wok, heat 1 tablespoon of vegetable oil over medium-high heat. Add the chicken in a single layer (cook in batches if needed to avoid steaming). Let it sear undisturbed for 1-2 minutes until a golden crust forms, then flip and cook until browned on all sides and nearly cooked through, about 5-6 minutes total.
- Glaze with Sauce: Reduce the heat to medium-low. Give your prepared teriyaki sauce a stir and pour it over the chicken. Stir gently and simmer for 2-3 minutes, allowing the sauce to thicken further, cling to the chicken, and create a beautiful glossy glaze. The chicken should be fully cooked (internal temp of 165°F / 74°C).
Pro-Tips for That Unbeatable Food Court Magic
These small details make a huge difference in achieving authentic results.
- The Rice Rule: Always use cold, day-old rice. Fresh rice steams and becomes mushy. Spread freshly cooked rice on a baking sheet to cool quickly if you’re in a pinch.
- High Heat is Key: For fried rice, your wok or pan needs to be very hot to quickly evaporate moisture and create that slight “toasted” flavor without making the rice oily.
- Don’t Crowd the Pan: When searing the chicken, give it space. Overcrowding creates steam, which prevents browning and the development of flavor.
- Sauce Consistency: If your teriyaki sauce gets too thick after sitting, simply whisk in a tablespoon of warm water to loosen it up before adding it to the chicken.
- Customize It! Add broccoli florets (blanched first) to the chicken in the last minute of cooking. For a kick, add a teaspoon of sriracha or red pepper flakes to the teriyaki sauce. Swap chicken for beef strips or firm tofu.
Serving and Savoring Your Homemade Masterpiece
To serve, pile a generous portion of the hot fried rice onto a plate. Spoon the glazed teriyaki chicken and all that luscious sauce right over the top. A final sprinkle of sliced green onions or a dash of sesame seeds adds the perfect finish.
There you have it the food court secret is out! This isn’t just a recipe; it’s a ticket to recreating a beloved comfort food experience anytime the craving strikes. You’ll discover that the homemade version, with its fresher ingredients and customizable flavors, doesn’t just match the mall standard it surpasses it. The process is fun, the kitchen will smell incredible, and the result is a complete, satisfying meal that everyone will love.
So, skip the food court lines and the takeout containers tonight. Tie on your apron, fire up the stove, and get ready to serve up a plate of pure, delicious nostalgia. You’ve got this! Don’t forget to share your culinary triumph tag your photos #MallTeriyakiAtHome. Happy cooking