🌿 Fire-Roasted Green Salsa Verde Tatemada: A Smoky, Vibrant Masterpiece
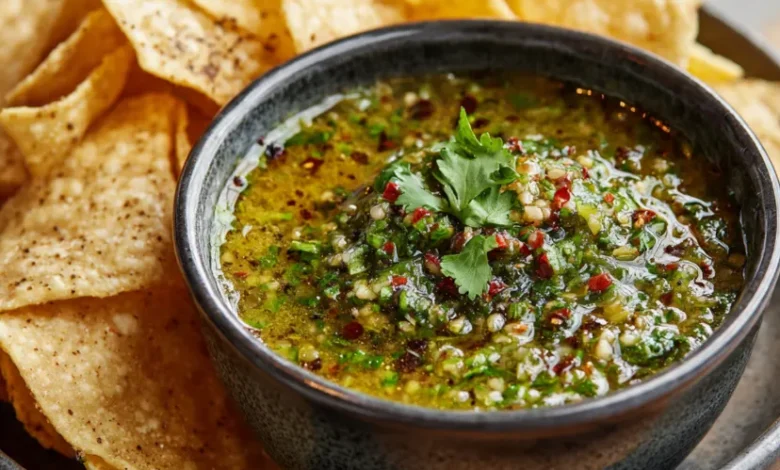
There’s salsa, and then there’s Fire-Roasted Green Salsa Verde Tatemada. This isn’t your average jarred condiment. This is a symphony of charred tomatillos, fiery peppers, and aromatic herbs, transformed over an open flame into a sauce that’s smoky, tangy, complex, and utterly addictive. The process of tatemar—blistering ingredients until they’re beautifully blackened is the soul of authentic Mexican salsas, unlocking depths of flavor you simply can’t achieve any other way.
Imagine dipping a crispy tortilla chip into a bowl of this emerald-green wonder: the first hit is the bright, citrusy tang of tomatillo, quickly followed by a wave of earthy, smoky char, and finishing with a clean, customizable heat that warms rather than burns. This easy salsa verde recipe is a game-changer for taco nights, a versatile marinade for grilled meats, or the secret sauce that elevates scrambled eggs from mundane to magnificent. Let’s fire it up!

Fire-Roasted Salsa Verde: Your Ingredient List
This recipe celebrates simplicity. Each component plays a crucial role in building the final flavor profile. For the best results, seek out fresh, high-quality produce.
Core Ingredients:
- 1.5 lbs (about 700g) fresh tomatillos: Husks removed and rinsed well. They should be firm and bright green.
- 3-5 serrano peppers (or 2-3 jalapeños for milder heat): Adjust based on your spice tolerance.
- 1 medium white onion: Cut into thick slices or quarters.
- 4-6 large garlic cloves: Leave them in their skins for roasting.
- 1 large bunch of fresh cilantro (about 1 cup packed leaves and tender stems): The fresh herbaceous backbone.
- Juice of 1 large lime: For essential brightness.
- 1.5 teaspoons sea salt (or to taste): Enhances all the flavors.
- ½ teaspoon granulated sugar (optional): A tiny pinch can balance acidity if your tomatillos are very tart.
Equipment:
- A comal (griddle), cast-iron skillet, or grill.
- Blender or food processor.
- Tongs and a bowl for cooling.

Step-by-Step Guide to Perfect Salsa Verde Tatemada
Follow these numbered steps carefully to achieve the perfect balance of smoke, acidity, and heat.
H2: Step 1: The Art of Tatemar (Fire-Roasting)
This is the most important step. Don’t be afraid of the black spots that’s where the magic happens.
- Prepare Your Heat Source: Heat a dry comal, cast-iron skillet, or grill over medium-high heat. You want a steady, robust heat.
- Roast the Vegetables: Place the rinsed tomatillos, whole peppers, onion slices, and unpeeled garlic cloves on the hot surface. Do not overcrowd.
- Char to Perfection: Let the vegetables roast undisturbed for 4-5 minutes until the bottoms are deeply charred and blackened. Use tongs to turn them. Repeat until all sides are nicely blistered and the tomatillos are soft and leaking juice. The garlic skin will blacken; this protects the clove inside from burning. This process should take about 10-15 minutes total.
- Steam the Peppers (Optional for Milder Heat): For a milder salsa, place the charred hot peppers in a small bowl and cover it with plastic wrap for 5 minutes. This steams them, making the skins easier to peel and slightly reducing the sharpness of the heat.
H2: Step 2: Blending & Balancing Flavors
- Prep for the Blender: Once the roasted vegetables are cool enough to handle, peel the garlic cloves (discard the skins). If you prefer, you can peel the skins off the peppers, but leaving them on adds great texture and flavor. For less heat, you can also scrape out some of the seeds and veins from the peppers.
- Initial Pulse: Add the charred tomatillos, peppers, onion, and peeled garlic to your blender or food processor. Add the lime juice and about half of the cilantro. Pulse 5-7 times until the ingredients are coarsely chopped and combined but not completely smooth. A little texture is desirable in an authentic salsa tatemada.
- Season and Finalize: Add the sea salt. Blend again until you reach your preferred consistency—some like it chunkier, some smoother. Taste! This is critical. Adjust the seasoning: need more salt? A bit more lime? For more herbal freshness, blend in the remaining cilantro.

H2: Step 3: The Crucial Rest
Transfer your freshly blended salsa to a serving bowl. This next step is non-negotiable: let it rest at room temperature for at least 20-30 minutes before serving. This allows the smoky, charred flavors to meld and deepen, and the salt to fully integrate. The flavor transformation is remarkable.
Useful Tips for Salsa Success : Pro Chef Secrets)
- Control the Heat: Start with fewer peppers. You can always add more heat after blending by finely mincing a fresh raw serrano and stirring it in.
- Texture is Key: Avoid over-blending. A salsa that’s too puréed can feel like a sauce. Short pulses help maintain a rustic, authentic texture.
- No Grill/Comal? Use your oven’s broiler! Place the vegetables on a baking sheet lined with foil and broil 4-6 inches from the element, turning occasionally, until charred.
- Storage: Store in an airtight container in the refrigerator for up to 5 days. The flavor often improves on the second day. It can also be frozen for up to 3 months.
- Variations: For a creamy twist, add ½ an avocado while blending. For a nuttier dimension, toast a tablespoon of pumpkin seeds (pepitas) and blend them in.
Conclusion: Your New Go-To Condiment Awaits
Congratulations! You’ve just moved beyond basic salsa and mastered the art of Salsa Verde Tatemada. This smoky, vibrant concoction is more than a recipe it’s a flavor experience that connects you to a traditional cooking method with stunningly delicious results.
Don’t limit it to chips. Use it as a zingy topping for grilled chicken or fish, a simmering sauce for enchiladas, a hearty spoonful over huevos rancheros, or even as a bold salad dressing when thinned with a little olive oil. Its versatility is its superpower.
So, the next time you see fresh tomatillos at the market, grab them confidently. You now possess the knowledge to turn them into a smoky, tangy, unforgettable masterpiece. Light the fire, embrace the char, and get ready to impress your taste buds and everyone at your table. ¡Buen provecho!